FordParts
My Garage
My Account
Cart
OEM 2005 Lincoln Town Car Alternator
Generator- Select Vehicle by Model
- Select Vehicle by VIN
Select Vehicle by Model
orMake
Model
Year
Select Vehicle by VIN
For the most accurate results, select vehicle by your VIN (Vehicle Identification Number).
1 Alternator found

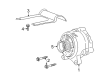
2005 Lincoln Town Car Alternator Part Number: 4U2Z-10V346-ERRM
$230.85 MSRP: $367.27You Save: $136.42 (38%)Product Specifications- Other Name: Re-Manufactured Alternator Assembly
- Replaces: 3W1Z-10346-AARM2, 4U2Z-10V346-ABRM, 3W1Z-10V346-ABRM, GLV-8731-RM, GLV-8774-RM, GL-943-RM, GL-526, GLV-8526-RM, 3W1Z-10346-AA, 3W1Z-10V346-AARM
- Condition: New
- Fitment Type: Direct Replacement
- SKU: 4U2Z-10V346-ERRM
- Warranty: This genuine part is guaranteed by Ford's factory warranty.
2005 Lincoln Town Car Alternator
If you're seeking quality and affordability, look no further than our extensive inventory of genuine 2005 Lincoln Town Car Alternator available at FordPartsDeal.com. You can confidently purchase our OEM 2005 Lincoln Town Car Alternator as they are supported by the manufacturer's warranty and our hassle-free return policy, alongside the benefit of our fast delivery service.
2005 Lincoln Town Car Alternator Parts Q&A
- Q: How to properly maintain and fix an alternator and What steps are involved on 2005 Lincoln Town Car?A: To service alternator, disconnect battery, loosen screws of engine cover and loosen intake resonator. Unattach the accessory drive-belt, disconnect the B+ cable nut to the generator, and disconnect electrical connectors. Disassemble the generator bracket bolts, and then repeat the actions in order to install the new generator.
Related 2005 Lincoln Town Car Parts
 2005 Lincoln Town Car Starter
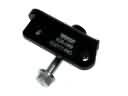 2005 Lincoln Town Car Alternator Bracket
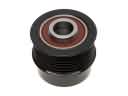 2005 Lincoln Town Car Alternator Pulley
 2005 Lincoln Town Car Battery Cable
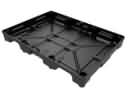 2005 Lincoln Town Car Battery Tray
 2005 Lincoln Town Car Car Batteries