My Garage
Cart

OEM 2000 Ford Contour Exhaust Manifold

Engine Exhaust Manifold
  • Select Vehicle by Model
  • Select Vehicle by VIN
Select Vehicle by Model
Make
Model
Year
or
Select Vehicle by VIN
For the most accurate results, select vehicle by your VIN (Vehicle Identification Number).

1 Exhaust Manifold found

  • 2000 Ford Contour Exhaust Manifold - F7RZ-9430-AA
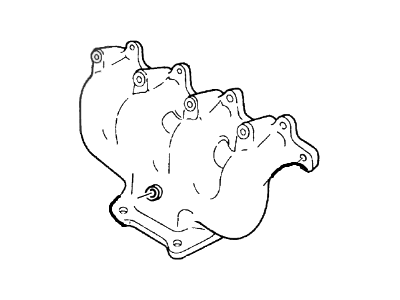
    2000 Ford Contour Exhaust Manifold Diagram - F7RZ-9430-AA
    View related parts
    Product Specifications
    • Other Name: Manifold Assembly - Exhaust
    • Base No.: 9430
    • Item Weight: 11.30 Pounds
    • Item Dimensions: 20.7 x 10.1 x 6.3 inches
    • Condition: New
    • Fitment Type: Direct Replacement
    • SKU: F7RZ-9430-AA
    • Warranty: This genuine part is guaranteed by Ford's factory warranty.
    More Info
    Fits the following 2000 Ford Contour Submodels:
    • Base, GL, GL Sport, LX, LX Sport, SE, Sport | 4 Cyl 2.0 L BI-FUEL, 4 Cyl 2.0 L GAS

2000 Ford Contour Exhaust Manifold

If you're seeking quality and affordability, look no further than our extensive inventory of genuine 2000 Ford Contour Exhaust Manifold available at FordPartsDeal.com. You can confidently purchase our OEM 2000 Ford Contour Exhaust Manifold as they are supported by the manufacturer's warranty and our hassle-free return policy, alongside the benefit of our fast delivery service.

2000 Ford Contour Exhaust Manifold Parts Q&A

  • Q: How to service and repair the exhaust manifold on 2000 Ford Contour?
    A: The first step to address exhaust manifold service and repair requires heat shield removal together with upper bolt removal. The first step involves removing both the coolant hose bracket aside with the engine lifting eye before pulling out the engine oil level indicator tube. Sequence the service by first unclamping the coolant hose before unbolting both lower exhaust bolts. Interfering with the Heated Oxygen Sensor (HO2S) at the wiring harness during the repair is essential to avoid harm. You must disconnect the Three Way Catalytic Converter (TWC) from the exhaust manifold after taking off the HO2S wiring electrical connector. To perform this operation raise and support the vehicle before loosening the TWC bracket bolt so you can lower the TWC until its studs are beyond the exhaust manifold. Lower the vehicle before starting exhaust manifold removal. Check that the engine temperature has reached room level and then remove the four nuts from the exhaust manifold while discarding the old gasket. The gasket removal should be done with plastic manual scrapers instead of using grinding discs because they prevent damage to the aluminum sealing surfaces. Put the exhaust manifold in place while using a new gasket before you join the TWC to the exhaust manifold and then connect the HO2S electrical connector. During the process reposition the vehicle up and down while tightening the TWC bracket bolt before completing vehicle descent. The heat shield installation process should be followed by inserting the oil level indicator tube into the cylinder block then placing coolant hose bracket and engine lifting eye before tightening the upper and lower bolts with the coolant hose bracket.