FordParts
My Garage
My Account
Cart
OEM 2000 Ford F-150 Intercooler
Front Intercooler- Select Vehicle by Model
- Select Vehicle by VIN
Select Vehicle by Model
orMake
Model
Year
Select Vehicle by VIN
For the most accurate results, select vehicle by your VIN (Vehicle Identification Number).
1 Intercooler found

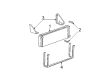
2000 Ford F-150 Intercooler Part Number: XL3Z-8K226-AA
Product Specifications- Base No.: 8K226
- Item Weight: 6.00 Pounds
- Condition: New
- Fitment Type: Direct Replacement
- SKU: XL3Z-8K226-AA
- Warranty: This genuine part is guaranteed by Ford's factory warranty.
2000 Ford F-150 Intercooler
If you're seeking quality and affordability, look no further than our extensive inventory of genuine 2000 Ford F-150 Intercooler available at FordPartsDeal.com. You can confidently purchase our OEM 2000 Ford F-150 Intercooler as they are supported by the manufacturer's warranty and our hassle-free return policy, alongside the benefit of our fast delivery service.
2000 Ford F-150 Intercooler Parts Q&A
- Q: How to service the Intercooler on 2000 Ford F-150?A: Service of the Intercooler begins with disconnecting the battery ground cable. Before beginning service on the supercharger assembly, clean the surrounding areas while using protective engine and supercharger coverage to prevent foreign material damage. Detach the air cleaner outlet tube before removing the Throttle Position (TP) sensor and idle air control electrical connectors and their vacuum lines and vent hose. Begin by disconnecting all throttle control linkages, especially the speed control actuator cable and accelerator cable, then remove the throttle return spring while making a note of its original orientation. Start by disconnecting the Exhaust Gas Recirculation (EGR) valve and its vacuum line and tube fitting after removing the three nuts. The accelerator cable bracket needs to be placed aside during this process. Since the brake booster vacuum line needs removal, disconnect it through the process that starts with bolt removal from the bracket followed by removal of the vacuum line itself. After discarding the gasket, take out the throttle body spacer followed by removing the accessory drive belt. The technician should drain the Intercooler system while loosening the Intercooler hose clamps before taking out the hoses. The Intercooler water supply and return tubes need their nuts removed before setting them aside while the EGR vacuum regulator bracket must be taken away together with its nuts. Begin by removing two upper vacuum hoses from the supercharger bypass valve actuator and afterward removing the supercharger along with plenum assembly while discarding the gasket. Disassemble the upper intake manifold which requires removal of vacuum hose and Intercooler hoses together with bolts before discarding the gasket. Perform Intercooler removal by discarding bolts together with the gasket. Mass production begins with installation of the Intercooler using a fresh gasket alongside fresh bolts because new bolts are mandatory. Secure the Intercooler hoses through the new gasket followed by the vacuum hose while installing the upper intake manifold with four loosely-bolted rear bolts. Application of new gaskets should be followed by supercharger plenum assembly installation while performing bolt tightening with the first stage at 2 Nm (18 lb-in) then stage two at 45 Nm (33 lb-ft). Reinstall the two upper vacuum hoses to the supercharger bypass valve actuator before adding EGR vacuum regulator bracket nuts and positioning Intercooler water supply and return tubes with its corresponding nuts. Before closure, install new accessory drive belt together with Intercooler hoses and clamps while filling the Intercooler cooling system. Apply a new gasket to the throttle body spacer while tightening the bolts according to two stages beginning at 10 Nm (89 lb-in) then continuing with an additional 90 degrees. Clean all soft metal sealing surfaces during this operation. Examine the gasket on the throttle body spacer and perform a replacement when needed. Reinstall the vacuum components including brake booster vacuum line as well as accelerator cable bracket using dedicated bolts. Also, reconnect the EGR valve and its vacuum line and tube fitting. Reconnect every cable piece from the throttle control linkages while making sure the throttle return spring sits properly before connecting vacuum lines and the vent hose. To complete the installation, reconnect the electrical connectors of idle air control and Throttle Position (TP) sensor and install the air cleaner outlet tube and then reconnect the battery ground cable.
Related 2000 Ford F-150 Parts
 2000 Ford F-150 Water Pump
 2000 Ford F-150 Coolant Reservoir
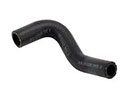 2000 Ford F-150 Cooling Hose
 2000 Ford F-150 Oil Cooler
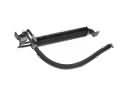 2000 Ford F-150 Power Steering Cooler
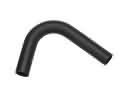 2000 Ford F-150 Radiator Hose
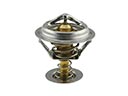 2000 Ford F-150 Thermostat
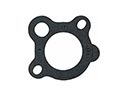 2000 Ford F-150 Thermostat Gasket
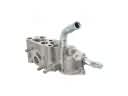 2000 Ford F-150 Thermostat Housing
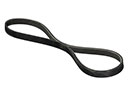 2000 Ford F-150 V-Belt
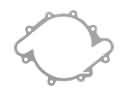 2000 Ford F-150 Water Pump Gasket
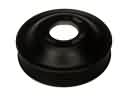 2000 Ford F-150 Water Pump Pulley