
Popular OEM Ford F-150 Parts
- Body & Hardware Parts View More >
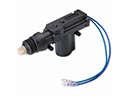
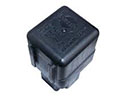
- Electrical Parts View More >
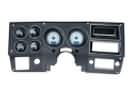
- Interior & Exterior Trim Parts View More >
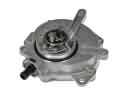
- Air & Fuel Delivery Parts View More >
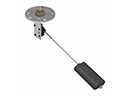
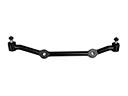
- Steering Parts View More >
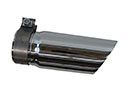
- Emission Control & Exhaust Parts View More >
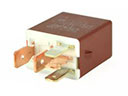
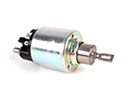
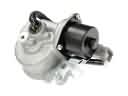
- Charging & Starting Parts View More >
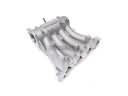
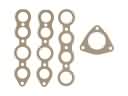
- Engine Parts View More >
- Belts & Cooling Parts View More >
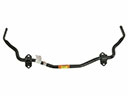
- Suspension Parts View More >
- Brakes Parts View More >
- A/C & Heating Parts View More >


Why Buy Genuine Ford F-150 Parts From FordPartsDeal.com
FordPartsDeal.com offers a smart and convenient way to buy genuine parts online. We sell new OEM Ford F-150 parts, including Headlights & Lighting. Authorized dealers directly provide all the Ford F-150 parts and assemblies to ensure the optimal quality and fit. We also provide all properly fitting Ford F-150 parts, such as Transmission, Driveline & Axles specific to your model. When you shop here, you get real Ford value at highly competitive prices. All our products come with the same Ford warranty available at other dealerships. Our easy-to-use catalog helps you quickly identify the right part for your car. You'll receive fast shipping from our warehouse network, keeping your Ford F-150 running smoothly. Our staff consists of Ford professionals who are ready to assist you. We aim to treat each customer as if they were stepping out of a Ford showroom. VIN verification and our live support ensure that the part you order is the right Ford F-150 part for your vehicle.
Ford introduced the F-150 model in 1975 as a medium-sized truck between F-100 and F-250 models to provide both power and capability features. In 1986 Ford revolutionized its F-150 model lineup by equipping it with a fuel-injected engine through the standard availability of the 5.0L V8. The F-150 added various engines to its line which included the 4.9-liter inline-six and the performance-focused SVT Lightning vehicle powered by a 240 horsepower V8 engine. Automatic transmission systems have combined better driving comfort with increased fuel efficiency levels in their development journey. The F-150's seventh generation became available in 1980 along with a completely new chassis frame and improved aerodynamics which improved fuel efficiency. The manufacturer's commitment to safety and durability came through their addition of front disc brakes along with galvanized steel components during their development of newer model F-150 vehicles. The structural defense of a Ford F-150 depends on selecting original parts that follow strict Ford quality guidelines which enables easy installation with the restoration of genuine automotive characteristics. The manufacturer warranty of genuine Ford parts verifies their reliability while confirming their suitability for the F-150 according to its engineering requirements.
Ford F-150 presents three groups by system and function. The HVAC system affects cabin heat, located behind the dash and underhood. Loss of heat from vents on the Ford F-150 often traces to a failed blend door actuator. Verify coolant level, thermostat operation, and heater core flow before replacement. Repair includes actuator replacement, coolant service, and air purge after refilling. The engine management group involves idle quality on the Ford F-150. A sticking EGR sensor keeps the EGR valve slightly open, causing rough idle. Replace the sensor and valve together, then clear codes and confirm stable idle. The ignition and cylinder head group concerns spark plug retention on the Ford F-150. Some V8 heads use short, soft threads, letting combustion pressure eject spark plugs. Symptoms include tapping noises, steady misfire, and an illuminated check engine light. Repair uses threaded inserts to restore the port, or replacement of the affected head and gasket. Updated spark plugs reduce recurrence, as outlined for the F-150 in service guidance. After repair, confirm torque and proper ignition timing on the F-150. Finish with a road test and scan for pending codes.
Ford F-150 Parts and Q&A
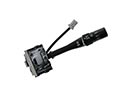
- Q: How to service the steering wheel on Ford F-150?A:In service of the steering wheel, the driver air bag module must be removed and the steering wheel bolt must be discarded after placing the steering wheel in the straight-ahead position. A new bolt with a tightness of 40 Nm (30 lb-ft) should be used. Disassemble the switches, pull out the wheel, wire routing, tape the Clock Spring and reassemble in reverse.
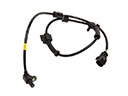
- Q: How to service and repair the alternator on a 4.6L (3V) engine on Ford F-150?A:In order to service the alternator in a 4.6L engine, one must disconnect the battery, remove the Air Cleaner outlet pipe, and rotate the FEAD belt tensioner. Unscrew the generator bracket bolts and unwind the generator bolts in order to find electrical connections. Turn off the generator and disassemble the B+ nut and terminal and reverse the process.
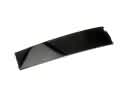
- Q: How to service and repair the front bumper cover on Ford F-150?A:In order to remove the front bumper cover in Mark LT and F150 cars, you must take away the headlamps, bumper cover bolts, hood bumper, and braces. Unbolst fenders and wheelhouses. Last, remove bumper cover bolts where headlamps open, and remove the cover. Install the cover by reversing the procedures.


