FordParts
My Garage
My Account
Cart
OEM 2001 Mercury Cougar Windshield
Glass Windshield- Select Vehicle by Model
- Select Vehicle by VIN
Select Vehicle by Model
orMake
Model
Year
Select Vehicle by VIN
For the most accurate results, select vehicle by your VIN (Vehicle Identification Number).
1 Windshield found

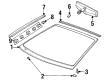
2001 Mercury Cougar Windshield Part Number: F8RZ-6303100-AD
Product Specifications- Other Name: Glass - Windscreen
- Base No.: 03100
- Item Weight: 37.40 Pounds
- Condition: New
- Fitment Type: Direct Replacement
- SKU: F8RZ-6303100-AD
- Warranty: This genuine part is guaranteed by Ford's factory warranty.
2001 Mercury Cougar Windshield
If you're seeking quality and affordability, look no further than our extensive inventory of genuine 2001 Mercury Cougar Windshield available at FordPartsDeal.com. You can confidently purchase our OEM 2001 Mercury Cougar Windshield as they are supported by the manufacturer's warranty and our hassle-free return policy, alongside the benefit of our fast delivery service.
2001 Mercury Cougar Windshield Parts Q&A
- Q: How to Ensure Proper Windshield Maintenance and Repair on 2001 Mercury Cougar?A: The windshield servicing process requires initial disconnect of the battery ground cable. You should heat Polyurethane (PU) adhesive when ambient temperatures fall below 10°C by placing cartridges beside a heating radiator or directing a hot air gun toward the cartridges for about 15 minutes while setting it at 25°C. You must first remove these parts starting with the cowl panel weather strip followed by the windshield wipers then the cowl grille panel and finishing with the windshield side and top weather strips and A-pillar trim and sun visor screws and clip. Then separate the front part of the headliner using a small block of suitable material as spacer. After removing the rear view mirror proceed to cut the windshield perimeter with a pneumatic knife using a 28 mm hooked blade and continue cutting the bottom edge with a 60 mm hook blade. The interior auto glass cut-out knife equipped with a four-inch cutter blade will cut the PU adhesive while using EC7784 lubricant or water and soap solution at a 10:1 ratio to ease the cutting process along the top and sides of the windshield. During original heated windshield installation always maintain the cutter blade close to the heated connectors. The removal of the windshield requires an eight-inch cutter blade to cut its lower edge and two technicians with suction pads to complete the process. Inspect behind the pinch weld area to ensure both its surface and any foreign materials are good before installing by removing extra PU adhesive to just 1 mm bodywork contact. A hot air gun should heat both windshield opening and glass bond line to 25°C to remove moisture until all bonding surfaces become dry. Use the adhesive kit instructions to prepare glass and windshield opening and trimmed PU adhesive before applying the PU adhesive between 8-10 mm heights to the windshield flange. The initial 100 mm portion of PU adhesive should be discarded to maintain operational time whereas all bead interruptions must receive a 20 mm gap coverage to stop leakage from occurring. Wear suction pads while windshield installation proceeds with other person assistance until the temperature reaches 10°C and above when applying warm air for 15 minutes. First reinstall the rear view mirror and then install the headliner by removing the spacer followed by setting the sun visor clip using the pin and inserting it before using new screws to attach the A-pillar trim panels. The installation process continues with application of windshield top and side weather strips and cowl grille panel followed by windshield wipers and cowl grille panel weather strip together with the battery ground cable reconnection.
Related 2001 Mercury Cougar Parts
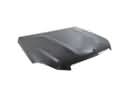 2001 Mercury Cougar Hood
 2001 Mercury Cougar Car Mirror
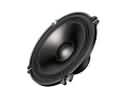 2001 Mercury Cougar Car Speakers
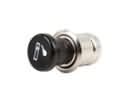 2001 Mercury Cougar Cigarette Lighter
 2001 Mercury Cougar Door Hinge
 2001 Mercury Cougar Floor Pan
 2001 Mercury Cougar Seat Cushion
 2001 Mercury Cougar Tailgate Lift Support
 2001 Mercury Cougar Washer Reservoir
 2001 Mercury Cougar Weather Strip
 2001 Mercury Cougar Windshield Wiper
 2001 Mercury Cougar Wiper Arm