Popular OEM Mercury Cougar Parts
- Body & Hardware Parts View More >
- Electrical Parts View More >
- Interior & Exterior Trim Parts View More >
- Air & Fuel Delivery Parts View More >
- Steering Parts View More >
- Emission Control & Exhaust Parts View More >
- Charging & Starting Parts View More >
- Engine Parts View More >
- Belts & Cooling Parts View More >
- Suspension Parts View More >
- Brakes Parts View More >
- A/C & Heating Parts View More >
Why Buy Genuine Mercury Cougar Parts From FordPartsDeal.com
FordPartsDeal.com offers a smart and convenient way to buy genuine parts online. We sell new OEM Mercury Cougar parts. Authorized dealers directly provide all the Mercury Cougar parts and assemblies to ensure the optimal quality and fit. We also provide all properly fitting Mercury Cougar parts specific to your model. When you shop here, you get real Mercury value at highly competitive prices. All our products come with the same Mercury warranty available at other dealerships. Our easy-to-use catalog helps you quickly identify the right part for your car. You'll receive fast shipping from our warehouse network, keeping your Mercury Cougar running smoothly. Our staff consists of Mercury professionals who are ready to assist you. We aim to treat each customer as if they were stepping out of a Mercury showroom. VIN verification and our live support ensure that the part you order is the right Mercury Cougar part for your vehicle.
From 1967 through 1997 and continuing from 1999 to 2002 the Mercury Cougar functioned as an exclusive Mercury division vehicle despite major engineering and design transformations across its release periods. During its inception the first-generation Mercury Cougar built on the Mustang platform yet received independent styling treatment with extended dimensions to establish its own distinct model identity. In 1969 the Cougar Eliminator received prominence because it included the 351 Windsor V8 engine that provided 290 hp. The Boss 302 V8 functioned exclusively in Mustangs apart from its absence in Cougars and similarly the Boss 429 engine appeared only in restricted ways throughout Ford models. A reengineered chassis in the second-generation Mercury Cougar introduced a new wheelbase of 112.1 inches to deliver enhanced driving qualities when it entered the market in 1971. The vehicle transformed into a sport luxury car while getting power brakes added to its standard equipment together with front disc and rear drum brakes in the 1973 production run. All Mercury Cougar engines reached peak performance levels and developed friendly driver operations because of swapping 3-speed manual transmission for the 3-speed automatic transmission setup. During every year of the Mercury Cougar production cycle Mercury guaranteed consumer satisfaction through authentic component production to provide durable and trustworthy items. The brand's OEM components allow Mercury Cougar owners to maintain their cars to reach the company's goal for outstanding products that fulfill customers.
Mercury Cougar issues group into cooling and sealing, oil leak control, and ignition safety. In engine cooling, the Cougar with plastic intake manifold can crack. Coolant seeps from the front passage, then overheating appears at idle. Watch for low coolant warnings and sweet exhaust odor from steam. Confirm with a pressure test and visual dye, then replace the intake manifold. Upgraded designs add a metal front passage to prevent repeat failures. For lubrication control, the Mercury Cougar may leak at the valve cover gasket. Oil collects on the heads and smells on the hot manifold. Clean mating surfaces, verify crankcase ventilation, and install a new valve cover gasket. Retorque fasteners in sequence, then recheck for residue after heat soak. In electrical safety, some Mercury Cougar models need the updated ignition switch. Old switches overheat, risk melting, and cause intermittent stalls or equipment loss. Inspect connectors for discoloration and verify good grounds before replacement. Install the revised ignition switch and confirm starting and charging stability. Finish with a road test so the Mercury Cougar runs cool and leak free. The Cougar should idle smoothly, show steady temperatures, and keep warnings off.
Mercury Cougar Parts and Q&A
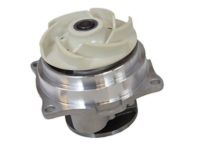
- Q: How to service and repair the water pump on Mercury Cougar?A:To service the water pump, drain the cooling system, loosen the pulley bolts, and remove the accessory drive belt. Then, remove the water pump bolts and raise the vehicle. Installation is the reverse of removal, followed by refilling the cooling system.
- Q: How to service the cabin air filter on Mercury Cougar?A:In order to service the cabin air filter, the battery ground cable should be disconnected and the wiper motor parked. Disassemble the wiper arms, the cowl grille and the pollen filter. Installation The process is reversed. The vehicle might exhibit abnormal drive symptoms on reconnecting the battery, which could deposit a requirement of relearning the vehicle with a drive of 16 km (10 miles).
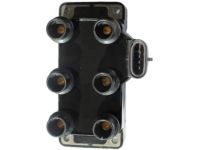
- Q: How to service and repair the ignition coil on Mercury Cougar?A:The ignition coil has electrical connector and spark plug wires that need to be pulled out to service and repair the ignition coil. Next, take the bolts holding the ignition coil. All that is required is a reversal of these steps to install.


