My Garage
Cart

OEM 2003 Ford Crown Victoria Axle Shaft

Car Axle Shaft
  • Select Vehicle by Model
  • Select Vehicle by VIN
Select Vehicle by Model
Make
Model
Year
or
Select Vehicle by VIN
For the most accurate results, select vehicle by your VIN (Vehicle Identification Number).

1 Axle Shaft found

  • 2003 Ford Crown Victoria Axle Shaft - 3W1Z-4234-A
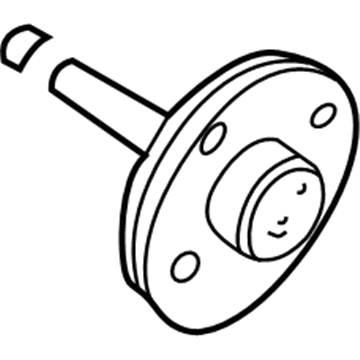
    2003 Ford Crown Victoria Axle Shaft Diagram - 3W1Z-4234-A
    View related parts

    2003 Ford Crown Victoria Axle Shaft, Rear Part Number: 3W1Z-4234-A

    $204.88 MSRP: $278.81
    You Save: $73.93 (27%)
    ADD TO CART
    Product Specifications
    • Other Name: Shaft Assembly - Rear Axle; Drive Axle Shaft, Rear; Axle Shafts
    • Manufacturer Note: 28 Spline
    • Position: Rear
    • Replaces: 3W1Z-4234-KA
    • Base No.: 4234
    • Item Weight: 23.70 Pounds
    • Item Dimensions: 40.4 x 8.7 x 8.4 inches
    • Condition: New
    • Fitment Type: Direct Replacement
    • Require Quantity: 2
    • SKU: 3W1Z-4234-A
    • Warranty: This genuine part is guaranteed by Ford's factory warranty.
    More Info
    Fits the following 2003 Ford Crown Victoria Submodels:
    • Base, Fleet, LWB, LX, LX Sport, Police Interceptor, S, Special Edition | 8 Cyl 4.6 L CNG, 8 Cyl 4.6 L FLEX, 8 Cyl 4.6 L GAS

2003 Ford Crown Victoria Axle Shaft

If you're seeking quality and affordability, look no further than our extensive inventory of genuine 2003 Ford Crown Victoria Axle Shaft available at FordPartsDeal.com. You can confidently purchase our OEM 2003 Ford Crown Victoria Axle Shaft as they are supported by the manufacturer's warranty and our hassle-free return policy, alongside the benefit of our fast delivery service.

2003 Ford Crown Victoria Axle Shaft Parts Q&A

  • Q: How to service and repair the axle shaft on 2003 Ford Crown Victoria?
    A: Regardless of axle shaft servicing or repair the first step includes using a hoist to position the vehicle although application of heat to loosen tight wheel nuts should be avoided since it generates damage to wheels and their associated rear wheel bearings. First you need to remove the wheel center cap along with the wheel nuts to proceed. Proceed in relaxing the wheel nuts while the vehicle remains weight-bearing. Turn off the rear air suspension switch that lies in the left side of the luggage compartment before hoisting, jacking or towing to avoid sudden inflation or deflation. You need to remove the rear wheel and tire assembly after uninstalling the wheel nuts from the rear wheel before taking the assembly off. To proceed with the task start by unscrewing the 10 bolts which secure the differential housing cover before draining all lubricant from the rear axle housing. First detach the rear brake anti-lock sensor then remove the rear brake caliper and brake disc while supporting the caliper with mechanics wire. When removing a U-washer through U-washer groove pushing axle shaft inboard users should avoid injuring the rubber O-ring. Begin installation of the differential pinion shaft by pushing the axle shaft toward the outside while securing the pinion shaft lock bolt without excessive tightness. Handle the axle shaft gently before using the thin-blade cold chisel on the rear brake anti-lock sensor indicator. First position the rear brake anti-lock sensor indicator onto the bearing plate then pass the axle shaft through before pressing it to reach axle flange bottoming out. The lip of the wheel bearing oil seal requires Premium Long-Life Grease XG-1-C or equivalent grease matching Ford specification ESA-M1C75-B prior to reinstalling the differential pinion shaft to prevent wheel bearing oil seal damage. Seat the U-washer in the side gear by pulling the shaft outward at its button end. Place the differential pinion shaft while setting its hole over the lock bolt hole before locking it down with the bolt. Fasten the brake disc along with brake caliper then reinstall the rear brake anti-lock sensor. The housing cover needs installation and lubricant filling while you must clean all surfaces to eliminate corrosion and foreign material for wheel nut safety. Install the wheel along with tire and center caps and turn on the air suspension if your vehicle has it before doing a vehicle descent with air activated.