FordParts
My Garage
My Account
Cart
OEM 2003 Ford Explorer Shift Interlock Solenoid
Shift Lock Actuator- Select Vehicle by Model
- Select Vehicle by VIN
Select Vehicle by Model
orMake
Model
Year
Select Vehicle by VIN
For the most accurate results, select vehicle by your VIN (Vehicle Identification Number).
1 Shift Interlock Solenoid found

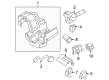
2003 Ford Explorer Actuator Part Number: 5L2Z-3Z719-A
Product Specifications- Other Name: Solenoid Assembly; Ignition Switch Actuator; Shift Interlock Solenoid
- Replaces: 1L2Z-3Z719-DA
- Base No.: 3Z719
- Item Weight: 0.30 Pounds
- Item Dimensions: 3.2 x 2.6 x 1.7 inches
- Condition: New
- Fitment Type: Direct Replacement
- SKU: 5L2Z-3Z719-A
- Warranty: This genuine part is guaranteed by Ford's factory warranty.
2003 Ford Explorer Shift Interlock Solenoid
If you're seeking quality and affordability, look no further than our extensive inventory of genuine 2003 Ford Explorer Shift Interlock Solenoid available at FordPartsDeal.com. You can confidently purchase our OEM 2003 Ford Explorer Shift Interlock Solenoid as they are supported by the manufacturer's warranty and our hassle-free return policy, alongside the benefit of our fast delivery service.
2003 Ford Explorer Shift Interlock Solenoid Parts Q&A
- Q: How to service and repair the shift interlock solenoid on 2003 Ford Explorer?A: You should first position the 2002-2005 Explorer 4 Dr/Mountaineer vehicle on a hoist in neutral mode before starting shift interlock solenoid service and repair operations. The instrument panel knee bolster needs its two fasteners removed to disclose the steering column section while taking off the cover. The process begins by taking off the steering column lower shroud through detachment of its three fasteners. Undertake the removal of three fasteners securing the wiring bundle carrier from beneath the steering column so that you can work while uninstalling the brake shift interlock switch while also disconnecting any multifunction switch connectors when needed. Located at the bottom of the column there are two bolts that must be removed along with the tab of the brake shift interlock which enables its separation from the column housing. Push the locking tab of the white connector toward the wiring while breaking off side tabs on the brake shift interlock near that connector which can be assisted by a small flat screwdriver. Secure the wires to the new brake shift interlock by following the specific clip alignment which ensures proper wiring connection at each point. Put the brake shift interlock into position on the steering column before placing the fasteners back. Press the brake pedal when the key rests in the accessory or run position; this should activate the brake shift interlock pin which needs one second to return automatically after releasing the brake pedal. Repeat this process several times. Fasten the wiring bundle carrier to the steering column after reinstalling its mounting points. Ensure every connection of the multifunction switch unit remains properly fastened. Reinstall the steering column by doing the opposite steps while ensuring the rubber gap hider sits correctly on the shroud. Check the shift effort by operating the shift lever between park and drive and back to park multiple times until the enhanced function is verified.
Related 2003 Ford Explorer Parts
 2003 Ford Explorer Steering Wheel
 2003 Ford Explorer Rack And Pinion
 2003 Ford Explorer Ignition Switch
 2003 Ford Explorer Power Steering Pump
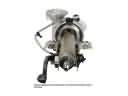 2003 Ford Explorer Steering Column
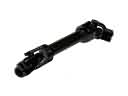 2003 Ford Explorer Steering Shaft
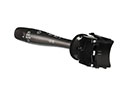 2003 Ford Explorer Turn Signal Switch
 2003 Ford Explorer Ignition Lock Cylinder
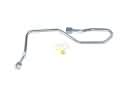 2003 Ford Explorer Power Steering Hose
 2003 Ford Explorer Rack & Pinion Bushing
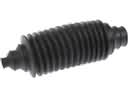 2003 Ford Explorer Rack and Pinion Boot
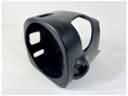 2003 Ford Explorer Steering Column Cover