FordParts
My Garage
My Account
Cart
OEM 2003 Ford F-250 Super Duty Battery Cable
Car Battery Cable- Select Vehicle by Model
- Select Vehicle by VIN
Select Vehicle by Model
orMake
Model
Year
Select Vehicle by VIN
For the most accurate results, select vehicle by your VIN (Vehicle Identification Number).
14 Battery Cables found


2003 Ford F-250 Super Duty Positive Cable Part Number: 3C3Z-14300-CA
$554.07 MSRP: $920.00You Save: $365.93 (40%)Ships in 1 Business DayProduct Specifications- Other Name: Cable Assembly - Battery To Battery; Battery Cables
- Base No.: 14300
- Item Weight: 3.20 Pounds
- Item Dimensions: 19.1 x 12.1 x 5.2 inches
- Condition: New
- Fitment Type: Direct Replacement
- SKU: 3C3Z-14300-CA
- Warranty: This genuine part is guaranteed by Ford's factory warranty.


2003 Ford F-250 Super Duty Negative Cable, Driver Side Part Number: 2C3Z-14301-AA
$303.58 MSRP: $416.52You Save: $112.94 (28%)Product Specifications- Other Name: Cable Assembly; Battery Cables; Ground Strap
- Manufacturer Note: LH standard duty, diesel, w/o dual alternators
- Position: Driver Side
- Base No.: 14301
- Item Weight: 3.10 Pounds
- Item Dimensions: 9.2 x 4.4 x 14.3 inches
- Condition: New
- Fitment Type: Direct Replacement
- SKU: 2C3Z-14301-AA
- Warranty: This genuine part is guaranteed by Ford's factory warranty.

2003 Ford F-250 Super Duty Positive Cable Part Number: 2C3Z-14300-CA
$487.82 MSRP: $810.00You Save: $322.18 (40%)Ships in 1 Business DayProduct Specifications- Other Name: Cable Assembly - Battery To Battery; Battery Cables
- Manufacturer Note: diesel, w/o dual alternators, w/automatic transmission
- Base No.: 14300
- Item Weight: 3.10 Pounds
- Item Dimensions: 17.0 x 16.6 x 8.1 inches
- Condition: New
- Fitment Type: Direct Replacement
- SKU: 2C3Z-14300-CA
- Warranty: This genuine part is guaranteed by Ford's factory warranty.

2003 Ford F-250 Super Duty Negative Cable Part Number: 3C3Z-14301-BA
$809.53 MSRP: $1170.00You Save: $360.47 (31%)Ships in 1-2 Business DaysProduct Specifications- Other Name: Cable Assembly; Battery Cables; Ground Strap
- Base No.: 14301
- Item Weight: 2.10 Pounds
- Item Dimensions: 9.3 x 3.1 x 16.5 inches
- Condition: New
- Fitment Type: Direct Replacement
- SKU: 3C3Z-14301-BA
- Warranty: This genuine part is guaranteed by Ford's factory warranty.
2003 Ford F-250 Super Duty Positive Cable Part Number: 3C3Z-14300-CAA
$27.34 MSRP: $37.21You Save: $9.87 (27%)Product Specifications- Other Name: Cable - Battery To Starter Motor; Battery Cables
- Manufacturer Note: From fuse panel B+ post to J block stud. (NOTE: cable from J block stud to positive battery post cable terminal is PIA to 14300 battery cable asy. on gas engines. On diesel, this cable connects to battery B+ terminal)
- Base No.: 14300
- Item Weight: 1.40 Pounds
- Item Dimensions: 12.4 x 3.1 x 9.0 inches
- Condition: New
- Fitment Type: Direct Replacement
- SKU: 3C3Z-14300-CAA
- Warranty: This genuine part is guaranteed by Ford's factory warranty.

 Product Specifications
- Other Name: Cable Assembly; Battery Cables; Ground Strap
- Manufacturer Note: RH battery, battery negative to engine, frame, and body ground, diesel, w/single alternator
- Position: Passenger Side
- Base No.: 14301
- Item Weight: 3.10 Pounds
- Item Dimensions: 10.5 x 3.5 x 9.6 inches
- Condition: New
- Fitment Type: Direct Replacement
- SKU: F81Z-14301-CA
- Warranty: This genuine part is guaranteed by Ford's factory warranty.
 Product Specifications
- Other Name: Cable Assembly; Battery Cables; Ground Strap
- Position: Driver Side
- Base No.: 14301
- Item Weight: 1.60 Pounds
- Item Dimensions: 9.1 x 3.0 x 14.3 inches
- Condition: New
- Fitment Type: Direct Replacement
- SKU: 3C3Z-14301-AA
- Warranty: This genuine part is guaranteed by Ford's factory warranty.

 Product Specifications
- Other Name: Cable Assembly; Battery Cables; Ground Strap
- Manufacturer Note: RH standard duty, diesel, w/o dual alternators
- Position: Passenger Side
- Base No.: 14301
- Item Weight: 1.80 Pounds
- Item Dimensions: 9.3 x 8.1 x 3.0 inches
- Condition: New
- Fitment Type: Direct Replacement
- SKU: 2C3Z-14301-BA
- Warranty: This genuine part is guaranteed by Ford's factory warranty.

2003 Ford F-250 Super Duty Positive Cable Part Number: 2C3Z-14300-BA
Product Specifications- Other Name: Cable Assembly - Battery To Battery; Battery Cables
- Manufacturer Note: Positive and Negative cables
- Base No.: 14300
- Item Weight: 6.30 Pounds
- Item Dimensions: 15.6 x 5.5 x 13.1 inches
- Condition: New
- Fitment Type: Direct Replacement
- SKU: 2C3Z-14300-BA
- Warranty: This genuine part is guaranteed by Ford's factory warranty.

2003 Ford F-250 Super Duty Positive Cable Part Number: 2C3Z-14300-AA
Product Specifications- Other Name: Cable Assembly - Battery To Battery; Battery Cables
- Manufacturer Note: Positive and Negative cables
- Base No.: 14300
- Item Weight: 6.00 Pounds
- Item Dimensions: 4.4 x 17.8 x 17.3 inches
- Condition: New
- Fitment Type: Direct Replacement
- SKU: 2C3Z-14300-AA
- Warranty: This genuine part is guaranteed by Ford's factory warranty.
2003 Ford F-250 Super Duty Negative Cable Part Number: 2C3Z-14301-CA
Product Specifications- Other Name: Cable Assembly; Battery Cables; Ground Strap
- Manufacturer Note: diesel, w/dual alternators
- Base No.: 14301
- Item Weight: 1.80 Pounds
- Item Dimensions: 3.2 x 7.9 x 12.9 inches
- Condition: New
- Fitment Type: Direct Replacement
- SKU: 2C3Z-14301-CA
- Warranty: This genuine part is guaranteed by Ford's factory warranty.
2003 Ford F-250 Super Duty Positive Cable Part Number: 2C3Z-14300-GA
Product Specifications- Other Name: Cable Assembly - Battery; Battery Cables; Cable Assembly - Battery To Battery
- Manufacturer Note: Diesel, w/dual alternators, w/manual transmission
- Base No.: 14300
- Item Weight: 6.10 Pounds
- Item Dimensions: 14.9 x 5.1 x 13.0 inches
- Condition: New
- Fitment Type: Direct Replacement
- SKU: 2C3Z-14300-GA
- Warranty: This genuine part is guaranteed by Ford's factory warranty.
2003 Ford F-250 Super Duty Positive Cable Part Number: 2C3Z-14300-FA
Product Specifications- Other Name: Cable Assembly - Battery; Battery Cables; Cable Assembly - Battery To Battery
- Manufacturer Note: Diesel, w/o dual alternators, w/manual transmission
- Base No.: 14300
- Item Weight: 6.10 Pounds
- Item Dimensions: 4.1 x 12.6 x 12.1 inches
- Condition: New
- Fitment Type: Direct Replacement
- SKU: 2C3Z-14300-FA
- Warranty: This genuine part is guaranteed by Ford's factory warranty.
2003 Ford F-250 Super Duty Positive Cable Part Number: 2C3Z-14300-DA
Product Specifications- Other Name: Cable Assembly - Battery; Battery Cables; Cable Assembly - Battery To Battery
- Manufacturer Note: diesel, w/dual alternators, w/automatic transmission
- Base No.: 14300
- Item Weight: 5.80 Pounds
- Item Dimensions: 3.2 x 12.2 x 12.7 inches
- Condition: New
- Fitment Type: Direct Replacement
- SKU: 2C3Z-14300-DA
- Warranty: This genuine part is guaranteed by Ford's factory warranty.
2003 Ford F-250 Super Duty Battery Cable
If you're seeking quality and affordability, look no further than our extensive inventory of genuine 2003 Ford F-250 Super Duty Battery Cable available at FordPartsDeal.com. You can confidently purchase our OEM 2003 Ford F-250 Super Duty Battery Cable as they are supported by the manufacturer's warranty and our hassle-free return policy, alongside the benefit of our fast delivery service.
2003 Ford F-250 Super Duty Battery Cable Parts Q&A
- Q: How to service and repair the battery cable on 2003 Ford F-250 Super Duty?A: The battery cables need disconnecting before any work begins on the battery cable repair or servicing. First disconnect the battery ground cable screw and remove the cable. The service starts with removing the screw found at the frame rail top and then unfastening the engine front cover's bottom engine-side nut. Next step takes the engine block nut which resides above the oil pan rail while you pull out the transmission line bracket from the stud. Start by removing the stud and battery ground cable eyelet before disconnecting the starter motor through the separation of its solenoid cable followed by the starter motor positive cable. Finally, remove the cables. Installation should be done by following the exact opposite steps of removal.
Related 2003 Ford F-250 Super Duty Parts
 2003 Ford F-250 Super Duty Alternator
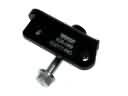 2003 Ford F-250 Super Duty Alternator Bracket
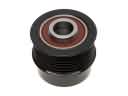 2003 Ford F-250 Super Duty Alternator Pulley
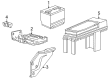
 2003 Ford F-250 Super Duty Battery Tray
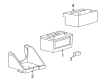
 2003 Ford F-250 Super Duty Car Batteries
 2003 Ford F-250 Super Duty Starter
 2003 Ford F-250 Super Duty Voltage Regulator