FordParts
My Garage
My Account
Cart
OEM 2003 Lincoln Town Car Control Arm
Suspension Arm- Select Vehicle by Model
- Select Vehicle by VIN
Select Vehicle by Model
orMake
Model
Year
Select Vehicle by VIN
For the most accurate results, select vehicle by your VIN (Vehicle Identification Number).
8 Control Arms found
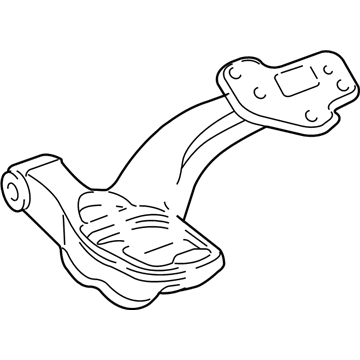
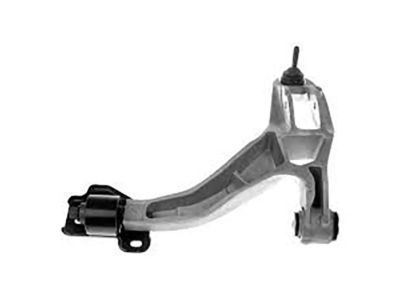
2003 Lincoln Town Car Lower Control Arm, Front Driver Side Part Number: 9W1Z-3079-B
$379.11 MSRP: $524.45You Save: $145.34 (28%)Ships in 1-2 Business DaysProduct Specifications- Other Name: Arm Assembly - Front Suspension; Suspension Control Arm and Ball Joint Assembly; Control Arm Assembly; Control Arm
- Position: Front Driver Side
- Replaces: 4W1Z-3079-BA, 6W1Z-3079-BA, MCSOE-147
- Base No.: 3078
- Item Weight: 25.30 Pounds
- Item Dimensions: 5.2 x 18.7 x 22.3 inches
- Condition: New
- Fitment Type: Direct Replacement
- SKU: 9W1Z-3079-B
- Warranty: This genuine part is guaranteed by Ford's factory warranty.
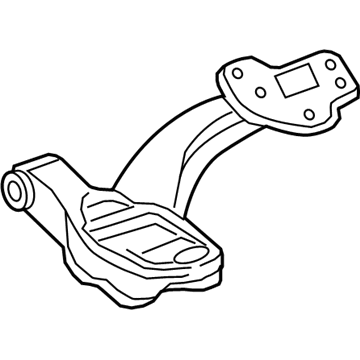
2003 Lincoln Town Car Lower Control Arm, Front Passenger Side Part Number: 9W1Z-3078-B
$379.11 MSRP: $524.45You Save: $145.34 (28%)Ships in 1-2 Business DaysProduct Specifications- Other Name: Arm Assembly - Front Suspension; Suspension Control Arm and Ball Joint Assembly; Control Arm Assembly; Control Arm
- Position: Front Passenger Side
- Replaces: 4W1Z-3078-BA, 6W1Z-3078-BA, MCSOE-113
- Base No.: 3078
- Item Weight: 23.40 Pounds
- Item Dimensions: 4.9 x 18.7 x 21.9 inches
- Condition: New
- Fitment Type: Direct Replacement
- SKU: 9W1Z-3078-B
- Warranty: This genuine part is guaranteed by Ford's factory warranty.
2003 Lincoln Town Car Lower Control Arm, Front Driver Side Part Number: 6W1Z-3079-AA
$379.11 MSRP: $524.45You Save: $145.34 (28%)Ships in 1-2 Business DaysProduct Specifications- Other Name: Arm Assembly - Front Suspension; Front Left Lower Control Arm and Ball Joint Assembly.; Control Arm
- Manufacturer Note: L.H., standard suspension, without special packages, FROM 08/03/05 TO 12/05/05
- Position: Front Lower Driver Side
- Replaces: 5W1Z-3079-AA
- Base No.: 3078
- Item Weight: 21.80 Pounds
- Item Dimensions: 5.1 x 18.9 x 22.1 inches
- Condition: New
- Fitment Type: Direct Replacement
- SKU: 6W1Z-3079-AA
- Warranty: This genuine part is guaranteed by Ford's factory warranty.
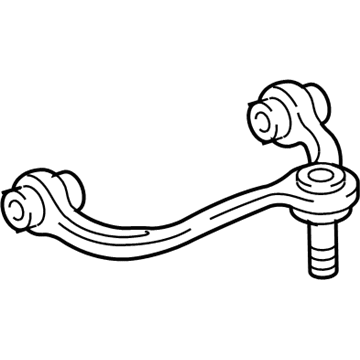
2003 Lincoln Town Car Upper Control Arm, Front Passenger Side Part Number: 6W1Z-3084-U
$97.79 MSRP: $160.91You Save: $63.12 (40%)Ships in 1-3 Business DaysProduct Specifications- Other Name: Arm Assembly - Front Suspension; Suspension Control Arm, Front Right Upper; Control Arm
- Position: Front Upper Passenger Side
- Replaces: 6W1Z-3084-R, 6W1Z-3084-T, 6W1Z-3084-S, MCSOE-35, 4W1Z-3084-RH, 5W1Z-3084-AA
- Item Weight: 8.20 Pounds
- Item Dimensions: 5.2 x 15.7 x 13.7 inches
- Condition: New
- Fitment Type: Direct Replacement
- SKU: 6W1Z-3084-U
- Warranty: This genuine part is guaranteed by Ford's factory warranty.
2003 Lincoln Town Car Upper Control Arm, Front Driver Side Part Number: 6W1Z-3085-N
$100.11 MSRP: $164.73You Save: $64.62 (40%)Ships in 1-3 Business DaysProduct Specifications- Other Name: Arm Assembly - Front Suspension; Suspension Control Arm, Front Left Upper; Control Arm
- Position: Front Upper Driver Side
- Replaces: 6W1Z-3085-L, 6W1Z-3085-M
- Item Weight: 8.60 Pounds
- Item Dimensions: 5.4 x 13.5 x 12.9 inches
- Condition: New
- Fitment Type: Direct Replacement
- SKU: 6W1Z-3085-N
- Warranty: This genuine part is guaranteed by Ford's factory warranty.
2003 Lincoln Town Car Lower Control Arm, Front Passenger Side Part Number: 6W1Z-3078-D
$210.15 MSRP: $341.82You Save: $131.67 (39%)Ships in 1-2 Business DaysProduct Specifications- Other Name: Arm Assembly - Front Suspension; Front Right Lower Control Arm and Ball Joint Assembly; Control Arm
- Manufacturer Note: R.H., standard suspension, without special packages, FROM 12/05/05
- Position: Front Lower Passenger Side
- Base No.: 3078
- Item Weight: 27.60 Pounds
- Item Dimensions: 5.2 x 15.6 x 26.3 inches
- Condition: New
- Fitment Type: Direct Replacement
- SKU: 6W1Z-3078-D
- Warranty: This genuine part is guaranteed by Ford's factory warranty.
 Product Specifications
- Other Name: Arm Assembly - Front Suspension; Front Right Lower Control Arm and Ball Joint Assembly; Control Arm
- Manufacturer Note: R.H., standard suspension, without special packages, FROM 08/03/05 TO 12/05/05
- Position: Front Lower Passenger Side
- Replaces: 5W1Z-3078-AA
- Base No.: 3078
- Item Weight: 23.90 Pounds
- Item Dimensions: 5.0 x 18.9 x 22.3 inches
- Condition: New
- Fitment Type: Direct Replacement
- SKU: 6W1Z-3078-AA
- Warranty: This genuine part is guaranteed by Ford's factory warranty.
- Product Specifications
- Other Name: Arm Assembly - Front Suspension; Front Left Lower Control Arm and Ball Joint Assembly.; Control Arm
- Manufacturer Note: L.H., standard suspension, without special packages, FROM 12/05/05
- Position: Front Lower Driver Side
- Base No.: 3078
- Item Weight: 26.30 Pounds
- Item Dimensions: 6.1 x 15.6 x 25.8 inches
- Condition: New
- Fitment Type: Direct Replacement
- SKU: 6W1Z-3079-D
- Warranty: This genuine part is guaranteed by Ford's factory warranty.
2003 Lincoln Town Car Control Arm
If you're seeking quality and affordability, look no further than our extensive inventory of genuine 2003 Lincoln Town Car Control Arm available at FordPartsDeal.com. You can confidently purchase our OEM 2003 Lincoln Town Car Control Arm as they are supported by the manufacturer's warranty and our hassle-free return policy, alongside the benefit of our fast delivery service.
2003 Lincoln Town Car Control Arm Parts Q&A
- Q: What are the crucial steps to follow when servicing the lower control arm and ensuring proper installation of suspension fasteners on 2003 Lincoln Town Car?A: The repair of the lower control arm depends on understanding that essential suspension fasteners directly influence system performance and their failure produces expensive repair bills. New fasteners need installation with parts identical to the original or acceptable alternatives that prevent using substandard designs. Proper retention requires following specified torque values during reassembly and the original fastener orientation must be maintained on all rear suspension arms. It is mandatory to turn off the air suspension service switch before vehicle hoisting, jacking or towing operations so you prevent unexpected air spring inflation and deflation that could cause abnormal vehicle movement. The installation reference point consists of measuring the wheel hub center to fender lip distance when the vehicle stands on level ground. A hoisted vehicle requires the removal of its threaded hardware components along with the nut which needs disposal. After removing these three components, discard the flag nut. You can interchange the rear suspension lower arms between the sides but they should be installed with the marked "OUTBOARD" facing outward. The suspension needs to be raised by a suitable jack or jack stands before tightening the fasteners until the measurement taken during removal matches the distance between the fender lip and wheel hub center. When finished with the installation reverse all steps from removal.


