FordParts
My Garage
My Account
Cart
OEM 2003 Mercury Marauder Mirror Actuator
Mirror Motor Actuator- Select Vehicle by Model
- Select Vehicle by VIN
Select Vehicle by Model
orMake
Model
Year
Select Vehicle by VIN
For the most accurate results, select vehicle by your VIN (Vehicle Identification Number).
1 Mirror Actuator found


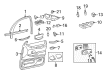
2003 Mercury Marauder Mirror Motor, Front Part Number: 5L2Z-17D696-A
$62.92 MSRP: $91.58You Save: $28.66 (32%)Ships in 1-3 Business DaysProduct Specifications- Other Name: Motor Assembly; Door Mirror Drive Motor, Front; Adjust Motor; Motor
- Manufacturer Note: RH/LH
- Position: Front
- Replaces: 3L2Z-17D696-AA
- Base No.: 17D696
- Item Weight: 1.20 Pounds
- Item Dimensions: 5.2 x 4.6 x 2.2 inches
- Condition: New
- Fitment Type: Direct Replacement
- SKU: 5L2Z-17D696-A
- Warranty: This genuine part is guaranteed by Ford's factory warranty.
2003 Mercury Marauder Mirror Actuator
If you're seeking quality and affordability, look no further than our extensive inventory of genuine 2003 Mercury Marauder Mirror Actuator available at FordPartsDeal.com. You can confidently purchase our OEM 2003 Mercury Marauder Mirror Actuator as they are supported by the manufacturer's warranty and our hassle-free return policy, alongside the benefit of our fast delivery service.
2003 Mercury Marauder Mirror Actuator Parts Q&A
- Q: How to service and repair the Mirror Actuator on 2003 Mercury Marauder?A: To replace the power mirror motor, loosen the outer rear view mirror pushing its top edge of the glass and pulling it out. Unscrew the electrical connector, loosen the screws used to secure it and remove the motor. Record colors and location of note connectors to be reinstalled and do the same in reverse.
Related 2003 Mercury Marauder Parts
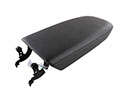 2003 Mercury Marauder Armrest
 2003 Mercury Marauder Car Mirror
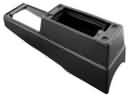 2003 Mercury Marauder Center Console Base
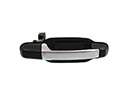 2003 Mercury Marauder Door Handle
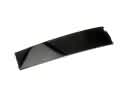 2003 Mercury Marauder Door Moldings
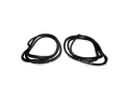 2003 Mercury Marauder Door Seal
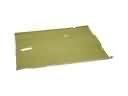 2003 Mercury Marauder Floor Pan
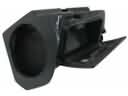 2003 Mercury Marauder Glove Box
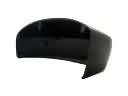 2003 Mercury Marauder Mirror Cover
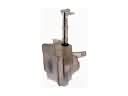 2003 Mercury Marauder Washer Reservoir
 2003 Mercury Marauder Weather Strip
 2003 Mercury Marauder Windshield Wiper