
Popular OEM Mercury Marauder Parts
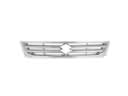
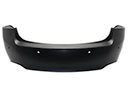
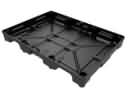
- Body & Hardware Parts View More >
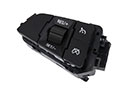
- Electrical Parts View More >
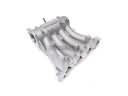
- Air & Fuel Delivery Parts View More >
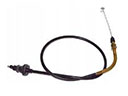
- Steering Parts View More >
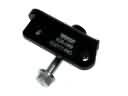
- Emission Control & Exhaust Parts View More >
- Charging & Starting Parts View More >
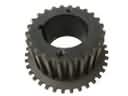
- Engine Parts View More >
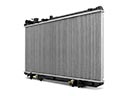
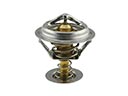
- Belts & Cooling Parts View More >
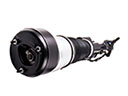
- Suspension Parts View More >
- Brakes Parts View More >
- A/C & Heating Parts View More >
- Headlights & Lighting Parts View More >


Why Buy Genuine Mercury Marauder Parts From FordPartsDeal.com
FordPartsDeal.com offers a smart and convenient way to buy genuine parts online. We sell new OEM Mercury Marauder parts, including Transmission. Authorized dealers directly provide all the Mercury Marauder parts and assemblies to ensure the optimal quality and fit. We also provide all properly fitting Mercury Marauder parts, such as Driveline & Axles specific to your model. When you shop here, you get real Mercury value at highly competitive prices. All our products come with the same Mercury warranty available at other dealerships. Our easy-to-use catalog helps you quickly identify the right part for your car. You'll receive fast shipping from our warehouse network, keeping your Mercury Marauder running smoothly. Our staff consists of Mercury professionals who are ready to assist you. We aim to treat each customer as if they were stepping out of a Mercury showroom. VIN verification and our live support ensure that the part you order is the right Mercury Marauder part for your vehicle.
The Mercury Marauder, developed by the Mercury division, was introduced in 1963 as a full-size automobile. When Mercury started offering the Marauder as a standard upgrade for coupe models they later developed their own independent vehicle with the powerful V8 engine that stood as the strongest option available in its line. The initial generation of Mercury Marauder existed from 1963 to 1965 with a 2-door hardtop body and gained a 4-door hardtop version in 1964 using a full-size Ford platform. The Mercury Marauder offered a 3-speed manual transmission or a 2- or 3-speed 'Merc-O-Matic' automatic transmission for smooth operation. During manufacturing from 1969 to 1970 the second-generation Mercury Marauder appeared as a personal luxury car that used a manual 3-speed transmission to power its 390 cu in (6.4 L) FE engine. Motorists who selected the Marauder X-100 variant received twin lounge seats together with sophisticated interior details. The Mercury Marauder experienced a return in 2003 utilizing the Panther platform while including contemporary chassis and suspension systems and powertrain elements. People who want their Marauder to perform well should use genuine Mercury parts because these parts uphold factory criteria to deliver accurate operation while fitting together perfectly.
The Mercury Marauder suffers from clusters of problems centered around engine compression, cooling system plumbing and the fastening integrity of cylinder heads. During engine compression a Marauder may misfire and trip out the warning light at idle or load. On Mercury models, exhaust valve leakage causes a drop in cylinder pressure and results in misfire codes. Repair is done by compression test, leakdown confirmation, and as required, exhaust valve service or head rebuild. A Marauder can have cooling and heater plumbing leaking under the intake with a sweet smell detected when hot. A leaking heater pipe permits the coolant to leak which causes overheating when stuck in traffic or idling. Intake removal and replacement of heater tube services using the Mercury o-ring specifications and torque. The integrity of the cylinder heads influences ignition sealing under high-combustion pressure on a Marauder. The threads of spark plugs may also become stripped which results in emission of plugs with an audible pop and instant misfire. Threaded inserts or cylinder head replacement and proper torque and heat cycle inspection are repair measures. Correct coils and grounds are healthy using electrical checks to resolve Marauder drivability using only mechanical fixes. By doing these steps, they are in line with the Mercury instructions to achieve complete organization of any Marauder that undergoes repair and check.
Mercury Marauder Parts and Q&A
- Q: How to service the ignition coil-on-plug on Mercury Marauder?A:In order to remove the ignition coil-on-plug, disconnection of battery ground and air cleaner outlet tube removal are to be considered. Remove the right ignition coil cover, unscrew connectors and remove coil. Repeat for the left side. To install, make sure that coil spring is placed accordingly and use silicone grease and dielectric compound.
- Q: How to service the rear brake pads on Mercury Marauder?A:In order to replace rear brake pads, take out the tire and wheel and then unscrew the caliper without straining the brake hose. Take the pads off pushing and rotating. Withdraw the piston and protect it then replace it with new pads in the same order and make sure the brake is clean and operating effectively.
- Q: How to service and repair a water pump on Mercury Marauder?A:In order to service the water pump, drain the coolant, loosen the bolts, and remove the belt and pulley. Removal of the water pump, cleaning the mounting surface, and not rotating the housing when installing it are all necessary to avoid leaks. To do this, install another lubricated O-ring seal and reverse the steps that were made to remove it.


