FordParts
My Garage
My Account
Cart
OEM 2004 Ford Explorer Sport Trac Alternator
Generator- Select Vehicle by Model
- Select Vehicle by VIN
Select Vehicle by Model
orMake
Model
Year
Select Vehicle by VIN
For the most accurate results, select vehicle by your VIN (Vehicle Identification Number).
1 Alternator found

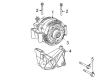
2004 Ford Explorer Sport Trac Alternator Part Number: 4U2Z-10V346-ELRM
$205.01 MSRP: $330.91You Save: $125.90 (39%)Ships in 1-3 Business DaysProduct Specifications- Other Name: Re-Manufactured Alternator Assembly
- Replaces: 1L2Z-10V346-ADRM, 1L2Z-10V346-ABRM, 1L2Z-10346-AB, GLV-8685-RM, GL-613, GLV-8613-RM, GLV-8931-RM, 4U2Z-10V346-CXRM
- Condition: New
- Fitment Type: Direct Replacement
- SKU: 4U2Z-10V346-ELRM
- Warranty: This genuine part is guaranteed by Ford's factory warranty.
2004 Ford Explorer Sport Trac Alternator
If you're seeking quality and affordability, look no further than our extensive inventory of genuine 2004 Ford Explorer Sport Trac Alternator available at FordPartsDeal.com. You can confidently purchase our OEM 2004 Ford Explorer Sport Trac Alternator as they are supported by the manufacturer's warranty and our hassle-free return policy, alongside the benefit of our fast delivery service.
2004 Ford Explorer Sport Trac Alternator Parts Q&A
- Q: How to service and repair the alternator on 2004 Ford Explorer Sport Trac?A: Service procedures for the alternator should start with battery cable removal. You must first take off both the air cleaner outlet tube and the drive belt. First dismantle the wiring harness from the voltage regulator electrical connector and afterward remove the B+ terminal cover and B+ terminal electrical connector through B+ terminal nut disassembly. Laboratories should first disconnect the wiring harness-to-generator pin-type retainer followed by disconnection of the B+ terminal electrical connector. Start by taking away the generator from its place by first unbolting the stud and nut components. Do this step with care to prevent damage. The reversal of previous removal steps will carry out installation procedures.
Related 2004 Ford Explorer Sport Trac Parts
 2004 Ford Explorer Sport Trac Starter
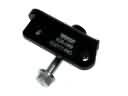 2004 Ford Explorer Sport Trac Alternator Bracket
 2004 Ford Explorer Sport Trac Battery Cable
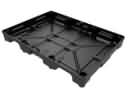 2004 Ford Explorer Sport Trac Battery Tray
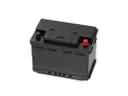 2004 Ford Explorer Sport Trac Car Batteries