FordParts
My Garage
My Account
Cart
OEM 2004 Ford Mustang Vapor Canister
Fuel Vapor Canister- Select Vehicle by Model
- Select Vehicle by VIN
Select Vehicle by Model
orMake
Model
Year
Select Vehicle by VIN
For the most accurate results, select vehicle by your VIN (Vehicle Identification Number).
1 Vapor Canister found


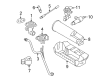
2004 Ford Mustang Vapor Canister Part Number: F87Z-9D653-CA
Product Specifications- Other Name: Reservoir Assembly; Vapor Canister Purge Solenoid
- Base No.: 9D653
- Item Weight: 3.10 Pounds
- Item Dimensions: 6.7 x 5.5 x 12.7 inches
- Condition: New
- Fitment Type: Direct Replacement
- SKU: F87Z-9D653-CA
- Warranty: This genuine part is guaranteed by Ford's factory warranty.
2004 Ford Mustang Vapor Canister
If you're seeking quality and affordability, look no further than our extensive inventory of genuine 2004 Ford Mustang Vapor Canister available at FordPartsDeal.com. You can confidently purchase our OEM 2004 Ford Mustang Vapor Canister as they are supported by the manufacturer's warranty and our hassle-free return policy, alongside the benefit of our fast delivery service.
2004 Ford Mustang Vapor Canister Parts Q&A
- Q: How to service the Vapor Canister on 2004 Ford Mustang?A: Service of the evaporative emission control canister must start by disconnecting the battery ground cable to avoid fire or explosion caused by fuel vapor. Raising the vehicle and supporting it is the first step before wheel removal. Move forward to the left rear position to remove the wheel. The service starts by removing the canister vent solenoid hose assembly with its connector and also the evaporative emission (EVAP) canister purge outlet tube. The EVAP canister assembly should be removed from the vehicle while disassembling the bolts and unfastening the bracket. Wash out the canister vent solenoid and its hose assembly while simultaneously taking out the EVAP canister purge outlet tube elbow. The final step involves breaking free the EVAP canister from its canister bracket. Installation requires performing the opposite steps of removal and conducting both a leak test and the evaporative emission repair verification drive cycle.
Related 2004 Ford Mustang Parts
 2004 Ford Mustang Catalytic Converter
 2004 Ford Mustang EGR Valve
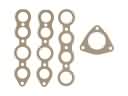 2004 Ford Mustang Exhaust Manifold
 2004 Ford Mustang Muffler
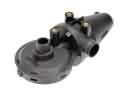 2004 Ford Mustang PCV Valve
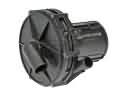 2004 Ford Mustang Air Injection Pump
 2004 Ford Mustang Canister Purge Valve
 2004 Ford Mustang EGR Valve Gasket
 2004 Ford Mustang EGR Valve Position Sensor
 2004 Ford Mustang Exhaust Manifold Gasket