
Popular OEM Ford Mustang Parts
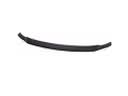
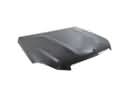
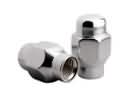
- Body & Hardware Parts View More >
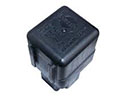
- Electrical Parts View More >
- Interior & Exterior Trim Parts View More >
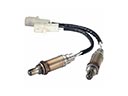
- Air & Fuel Delivery Parts View More >
- Steering Parts View More >
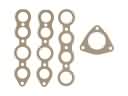
- Emission Control & Exhaust Parts View More >
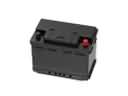
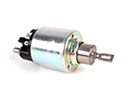
- Charging & Starting Parts View More >
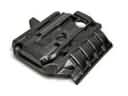
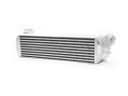
- Engine Parts View More >
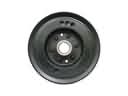
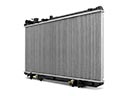
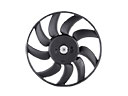
- Belts & Cooling Parts View More >
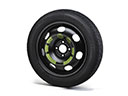
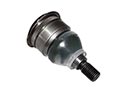
- Suspension Parts View More >
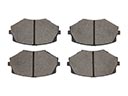
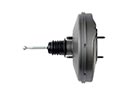
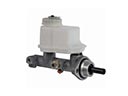
- Brakes Parts View More >
- A/C & Heating Parts View More >


Why Buy Genuine Ford Mustang Parts From FordPartsDeal.com
FordPartsDeal.com offers a smart and convenient way to buy genuine parts online. We sell new OEM Ford Mustang parts, including Headlights & Lighting. Authorized dealers directly provide all the Ford Mustang parts and assemblies to ensure the optimal quality and fit. We also provide all properly fitting Ford Mustang parts, such as Transmission, Driveline & Axles specific to your model. When you shop here, you get real Ford value at highly competitive prices. All our products come with the same Ford warranty available at other dealerships. Our easy-to-use catalog helps you quickly identify the right part for your car. You'll receive fast shipping from our warehouse network, keeping your Ford Mustang running smoothly. Our staff consists of Ford professionals who are ready to assist you. We aim to treat each customer as if they were stepping out of a Ford showroom. VIN verification and our live support ensure that the part you order is the right Ford Mustang part for your vehicle.
The Mustang automotive product saw its initial launch from Ford on April 17, 1964 before the company developed successive model versions that featured advancing engine power and transmission capabilities. The first Mustang revealing in 1964 had its foundation within the Ford Falcon while providing a 260 cubic inch V8 engine to generate 164 horsepower. A subsequent V8 engine addition named 289 V8 elevated the HP rating to 271 horsepower. When the Ford Mustang reached the market in the 1980s the manufacturer offered better performance and efficiency through the addition of the 5.0-liter V8 engine. When the 1994 Mustang debuted within the fourth-gen product line it came stock with either the 5.0L V8 or the 3.8L V6. Ford unveiled the new 4.6L V8 powertrain in 1996 when they also added the choice of five-speed manual and four-speed automatic transmission systems. The 2005 Mustang fifth generation incorporated the D2C platform and the Mustang GT received its 4.6L V8 engine which produced 300 horsepower and utilized six-speed manual transmissions for better handling performance. As the sixth generation Mustang arrived in 2013 it introduced two new engines that brought combined performance and efficiency through its EcoBoost 2.3-liter turbocharged engine and the powerful V8 5.0-liter engine with its upgraded output capabilities. Since their first production the Ford Mustang continues to uphold quality standards through parts made by Ford that satisfy precise performance requirements for reliable and secure driving experiences.
Ford Mustang issues group into HVAC controls, fuel delivery, and intake sealing. In HVAC, a failed blower motor resistor leaves only high speed and weak defrost. The Mustang often loses lower fan settings after heat and moisture cycles. Inspect the resistor connector behind the glove box, then replace the blower motor resistor. In fuel delivery, a noisy fuel pump check valve causes a droning sound from the tank. The Mustang may hum at idle and on decel, yet run normally. Confirm with chassis ears, check pressure, and install the revised fuel pump assembly per Ford guidance. For engine performance, intake manifold O-ring gaskets can leak and admit unmetered air. The Ford Mustang may idle rough, stumble, and store lean codes. Smoke test the intake, inspect PCV hoses, and replace intake manifold O-Ring gaskets. Clear codes and relearn idle after repairs. Finish with a road test so the Mustang accelerates cleanly and the blower steps through speeds. Follow Ford service procedures and torque values to prevent repeat concerns on the Mustang.
Ford Mustang Parts and Q&A
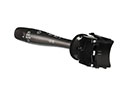
- Q: How to service and repair the steering wheel on Ford Mustang?A:In order to service the steering wheel, position the steering wheel in a straight direction and switch-off the ignition. Take off driver air bag system and eliminate steering wheel bolt. Next, pull off the steering wheel, and pull through the Clock Spring connectors. Lastly, undo the process of removal to install.
- Q: How to service and repair the alternator on Ford Mustang?A:Service of the alternator, remove the battery, counterclockwise rotation of the FEAD belt tensioner, and place the belt aside. Unscrew the connector of the generator, unscrew the B+ terminal nut, the generator stud nut. Take off the generator bolts then replace all the parts, tighten to a certain torque level. Start the unwinding back again.
- Q: How to service and repair the front bumper cover for the base, GT, and Shelby GT 500 on Ford Mustang?A:In order to mend the front bumper cover of the base vehicle, GT and Shelby GT 500, extract the relevant retainers, bolts and screws. Unhook side marker connectors and fog lamp connectors. Install new bumper cover by reversing the steps that were used to remove the cover and tightening the nuts to 5 Nm (44 lb-in).


