FordParts
My Garage
My Account
Cart
OEM 2004 Lincoln Aviator Oil Pan
Oil Drain Pan- Select Vehicle by Model
- Select Vehicle by VIN
Select Vehicle by Model
orMake
Model
Year
Select Vehicle by VIN
For the most accurate results, select vehicle by your VIN (Vehicle Identification Number).
1 Oil Pan found


2004 Lincoln Aviator Oil Pan Part Number: 1L2Z-6675-BA
Product Specifications- Other Name: Pan Assembly - Engine Oil; Engine Oil Pan
- Base No.: 6675
- Item Weight: 11.30 Pounds
- Item Dimensions: 17.6 x 12.1 x 12.7 inches
- Condition: New
- Fitment Type: Direct Replacement
- SKU: 1L2Z-6675-BA
- Warranty: This genuine part is guaranteed by Ford's factory warranty.
2004 Lincoln Aviator Oil Pan
If you're seeking quality and affordability, look no further than our extensive inventory of genuine 2004 Lincoln Aviator Oil Pan available at FordPartsDeal.com. You can confidently purchase our OEM 2004 Lincoln Aviator Oil Pan as they are supported by the manufacturer's warranty and our hassle-free return policy, alongside the benefit of our fast delivery service.
2004 Lincoln Aviator Oil Pan Parts Q&A
- Q: How to service and repair the oil pan, oil pump, oil pump screen, and pickup tube on 2004 Lincoln Aviator?A: The service and repair of the oil pan and oil pump and oil pump screen and pickup tube requires starting with a vehicle in neutral position on a hoist before draining the engine oil. Start the procedure by removing the front stabilizer bar while removing the engine front cover only when replacing the oil pump. Every step of removal and installation should follow the sequences depicted in the provided illustration and table. Before lowering the front axle with its support system keep the inner halfshaft boots at least 150 mm (6 inches) above the lower control arms to protect them from damage. During oil pan servicing prevent the use of metal scrapers and wire brushes which may create leaks through surface scratching by using a plastic scraper combined with a metal surface cleaner. Therefore, secure the oil pump against the block until you can tighten the bolts while adjusting the inner rotor for alignment with crankshaft flats before rotating the components into position. Apply new O-ring with clean engine oil before placing the O-ring on the oil pump screen and pickup tube. Apply silicone gasket and sealant to the oil pan gasket at two locations but maintain the oil pan and gasket connection within four minutes because extended application time will require cleaning the surfaces. Install the oil pan while applying torque to the bolts sequentially starting at 2 Nm (18 inch lbs.) then 20 Nm (15 ft. lbs.) and finally add a final torque of 60 degrees.
Related 2004 Lincoln Aviator Parts
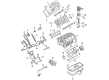
 2004 Lincoln Aviator Crankshaft
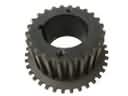 2004 Lincoln Aviator Crankshaft Gear
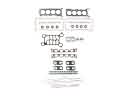 2004 Lincoln Aviator Cylinder Head Gasket
 2004 Lincoln Aviator Dipstick
 2004 Lincoln Aviator Engine Mount
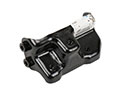 2004 Lincoln Aviator Engine Mount Bracket
 2004 Lincoln Aviator Oil Pump
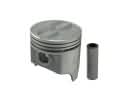 2004 Lincoln Aviator Piston
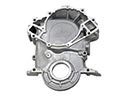 2004 Lincoln Aviator Timing Cover
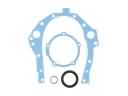 2004 Lincoln Aviator Timing Cover Gasket
 2004 Lincoln Aviator Valve Cover Gasket
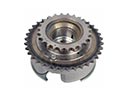 2004 Lincoln Aviator Variable Timing Sprocket