My Garage
Cart

OEM 2004 Mercury Marauder Timing Cover

Engine Timing Cover
  • Select Vehicle by Model
  • Select Vehicle by VIN
Select Vehicle by Model
Make
Model
Year
or
Select Vehicle by VIN
For the most accurate results, select vehicle by your VIN (Vehicle Identification Number).

1 Timing Cover found

  • 2004 Mercury Marauder Timing Cover - 3R3Z-6019-AA
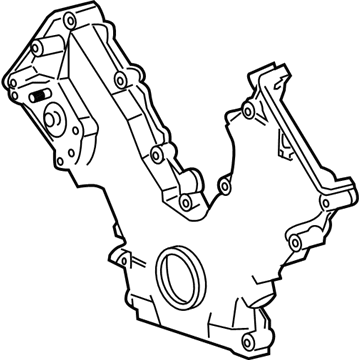
    2004 Mercury Marauder Timing Cover Diagram - 3R3Z-6019-AA
    View related parts
    Product Specifications
    • Other Name: Cover - Cylinder Front; Engine Timing Cover; Front Cover
    • Position: Front
    • Base No.: 6019
    • Item Weight: 11.20 Pounds
    • Item Dimensions: 20.3 x 18.8 x 6.6 inches
    • Condition: New
    • Fitment Type: Direct Replacement
    • SKU: 3R3Z-6019-AA
    • Warranty: This genuine part is guaranteed by Ford's factory warranty.
    More Info
    Fits the following 2004 Mercury Marauder Submodels:
    • Base | 8 Cyl 4.6 L GAS

2004 Mercury Marauder Timing Cover

If you're seeking quality and affordability, look no further than our extensive inventory of genuine 2004 Mercury Marauder Timing Cover available at FordPartsDeal.com. You can confidently purchase our OEM 2004 Mercury Marauder Timing Cover as they are supported by the manufacturer's warranty and our hassle-free return policy, alongside the benefit of our fast delivery service.

2004 Mercury Marauder Timing Cover Parts Q&A

  • Q: How to service and repair the engine front timing cover on 2004 Mercury Marauder?
    A: The first step of front cover engine repair work includes removing cooling fan components with the bolts and right and left valve covers together with crankshaft front seal and coolant pump pulley bolts. The service begins with removing power steering pump bolts then setting it aside before disconnecting the CKP sensor electrical cables plus taking off its nut and bracket. Engine oil draining starts by unscrewing the drain plug followed by removing the four engine front bolts to drop the vehicle downward. Start by setting the coolant line to the side then you can remove the engine front cover by taking out its bolts and studs after removing the belt idler pulleys and retainer. Cleaning operations on the sealing surfaces require attention because metal scrapers or abrasive tools must not be used; so use a plastic scraping tool to prepare the area. After gasket removal and inspection the sealing surfaces should be prepared as the next step. Put away the valve cover within four minutes or else the sealant must be eliminated and the sealing area must be cleaned with metal surface cleaner until complete dryness occurs. The installation process requires applying specified sealant and silicone gasket before installing the engine front cover and following the proper fastener sequence for tightening. Put back the belt idler pulleys before installing the coolant line and its retainer. Use these sequential torque steps for bolt tightening on the raised vehicle: begin at 2 Nm (18 inch lbs.), then move to 20 Nm (15 ft. lbs.) and end with an extra 60 degrees range. First replace the drain plug then insert the bracket and tightening the nut before reattaching the CKP sensor electrical connector and setting the power steering pump correctly before bolt installation. Next install the coolant pump pulley and crankshaft front seal followed by left and right valve covers and cooling fan and complete the procedure by filling the crankcase with clean engine oil.