FordParts
My Garage
My Account
Cart
OEM 2006 Ford Taurus Wheelhouse
Outer Wheelhouse- Select Vehicle by Model
- Select Vehicle by VIN
Select Vehicle by Model
orMake
Model
Year
Select Vehicle by VIN
For the most accurate results, select vehicle by your VIN (Vehicle Identification Number).
4 Wheelhouses found


2006 Ford Taurus Liner Extension, Front Driver Side Part Number: YF1Z-16103-AA
$16.17 MSRP: $22.00You Save: $5.83 (27%)Product Specifications- Other Name: Shield - Splash Wheel; Fender Liner Extension, Front Left; Shield - Splash - Wheelhouse
- Position: Front Driver Side
- Base No.: 16103
- Item Weight: 1.60 Pounds
- Condition: New
- Fitment Type: Direct Replacement
- SKU: YF1Z-16103-AA
- Warranty: This genuine part is guaranteed by Ford's factory warranty.
 Product Specifications
- Other Name: Shield; Fender Splash Shield, Front Left; Fender Splash Shield
- Manufacturer Note: L.H., Rear half portion
- Position: Front Driver Side
- Base No.: 16103
- Item Weight: 1.50 Pounds
- Condition: New
- Fitment Type: Direct Replacement
- SKU: YF1Z-16103-CA
- Warranty: This genuine part is guaranteed by Ford's factory warranty.
- Product Specifications
- Other Name: Shield; Fender Splash Shield, Front Right; Fender Splash Shield
- Manufacturer Note: R.H., Rear half portion
- Position: Front Passenger Side
- Base No.: 16102
- Item Weight: 1.80 Pounds
- Condition: New
- Fitment Type: Direct Replacement
- SKU: YF1Z-16102-CA
- Warranty: This genuine part is guaranteed by Ford's factory warranty.
- Product Specifications
- Other Name: Shield - Splash - Wheel; Fender Liner Extension, Front Right; Shield - Splash - Wheelhouse
- Manufacturer Note: R.H., Front half portion, 3.0 12V eng.
- Position: Front Passenger Side
- Base No.: 16102
- Item Weight: 1.60 Pounds
- Condition: New
- Fitment Type: Direct Replacement
- SKU: YF1Z-16102-AA
- Warranty: This genuine part is guaranteed by Ford's factory warranty.
2006 Ford Taurus Wheelhouse
If you're seeking quality and affordability, look no further than our extensive inventory of genuine 2006 Ford Taurus Wheelhouse available at FordPartsDeal.com. You can confidently purchase our OEM 2006 Ford Taurus Wheelhouse as they are supported by the manufacturer's warranty and our hassle-free return policy, alongside the benefit of our fast delivery service.
2006 Ford Taurus Wheelhouse Parts Q&A
- Q: How to service and repair the front Wheelhouse liner on 2006 Ford Taurus?A: Complete servicing or repair of the front fender liner requires first locating a vehicle in neutral gear on a hoist. Start the procedure by unscrewing 4 bolts and removing the pin-type retainer and front splash shield. Proceed to eliminate the front rocker panel pin-type retainers when needed before setting the rocker panel moulding off to the side. You should first remove the rear fender splash shield by extracting both screws and three pin-type retainers. The installation process ends by following exactly the same steps previously executed during the removal phase.
Related 2006 Ford Taurus Parts
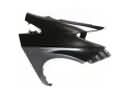 2006 Ford Taurus Fender
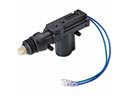 2006 Ford Taurus Door Lock Actuators
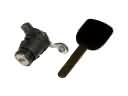 2006 Ford Taurus Door Lock Cylinder
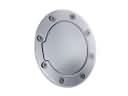 2006 Ford Taurus Fuel Door
 2006 Ford Taurus Fuel Filler Housing
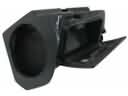 2006 Ford Taurus Glove Box
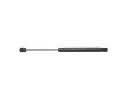 2006 Ford Taurus Lift Support
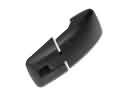 2006 Ford Taurus Liftgate Hinge
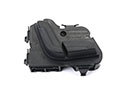 2006 Ford Taurus Seat Switch
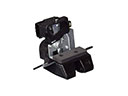 2006 Ford Taurus Tailgate Latch
 2006 Ford Taurus Wiper Arm
 2006 Ford Taurus Wiper Motor