
Popular OEM Ford Taurus Parts
- Body & Hardware Parts View More >
- Electrical Parts View More >
- Interior & Exterior Trim Parts View More >
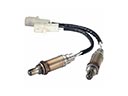
- Air & Fuel Delivery Parts View More >
- Steering Parts View More >
- Emission Control & Exhaust Parts View More >
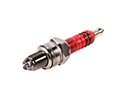
- Charging & Starting Parts View More >
- Engine Parts View More >
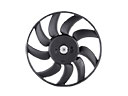
- Belts & Cooling Parts View More >
- Suspension Parts View More >
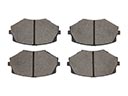
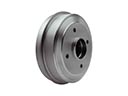
- Brakes Parts View More >
- A/C & Heating Parts View More >


Why Buy Genuine Ford Taurus Parts From FordPartsDeal.com
FordPartsDeal.com offers a smart and convenient way to buy genuine parts online. We sell new OEM Ford Taurus parts, including Headlights & Lighting. Authorized dealers directly provide all the Ford Taurus parts and assemblies to ensure the optimal quality and fit. We also provide all properly fitting Ford Taurus parts, such as Transmission, Driveline & Axles specific to your model. When you shop here, you get real Ford value at highly competitive prices. All our products come with the same Ford warranty available at other dealerships. Our easy-to-use catalog helps you quickly identify the right part for your car. You'll receive fast shipping from our warehouse network, keeping your Ford Taurus running smoothly. Our staff consists of Ford professionals who are ready to assist you. We aim to treat each customer as if they were stepping out of a Ford showroom. VIN verification and our live support ensure that the part you order is the right Ford Taurus part for your vehicle.
The Ford Taurus existed in two primary production periods starting in 1986 ending in 2007 followed by a reintroduction from 2010 until 2019 while advancing through different generations to meet evolving market needs. The initial Ford Taurus model featured a 160 hp Duratec I4 engine that customers could choose between manual or automatic transmission gearboxes. The second-generation Taurus integrated a 220hp Duratec V6 motor that received its 4-speed automatic transmission from Mazda. After its product development Ford Taurus improved its driving capabilities and reached superior efficiency levels through performance-based engineering. Ford Taurus introduced its hybrid variant in the fifth generation and integrated EcoBoost engines during the sixth generation as a response to their goal of product innovation. A new version of the Ford Taurus hybrid model which included the plug-in hybrid variant entered the American market during 2012 to expand the line-up and reach additional customers. For the 2013 version of the Ford Taurus included both a 2.0-liter EcoBoost engine and a 3.5-liter EcoBoost V6 motor to offer enhanced fuel efficiency and driving performance particularly prominently in premium trim levels. Ford Taurus gains popularity from customers because it delivers dependable handling along with superior performance standards in its market segment of midsize sedans. The use of authentic Ford accessories combined with factory standards gives Ford Taurus owners the optimal opportunity to achieve long-lasting reliability. The meticulous quality assessment procedure of these components supplies customers with confidence about their cars' structural safety.
Ford Taurus exhibits a cluster of issues related to engine sealing, lubrication leaks and the integrity of sensor wiring. When the head gasket goes the Taurus is able to overheat and blow white exhaust. Coolant can rapidly diminish and rough running occurs under hot idle or acceleration conditions. Watch out for coolant loss that is not caused by external leakage and sweet smelling exhaust. Check cooling pressure, a block test, inspect plugs for any wash. Check if misfire monitors and coolant sensors are plausible under warmup. It can be repaired by replacing the head gasket and checking the Taurus cylinder head against cracks. In the case of the Ford Taurus, the oil pan gasket will leak oil onto the exhaust and subframe. Checking underneath you can notice signs that the Taurus leaves spot shadows under the engine, as well as smells of burning oil. Clean pan rail, check crankcase ventilation and reseal and torque evenly. Apply thread locker where noted and check after heat soak to dry drips. The improperly mounted motor mounts may rub the engine coolant temperature sensor wiring in Ford Taurus. This fault contributes to rich mixtures, engine stalling, and the warning light comes on. Verify mounts, fix the harness and replace the engine coolant temperature sensor in case of damage. Wrap up with a road check where the road check the Ford Taurus to idle, and stay within the temperature.
Ford Taurus Parts and Q&A
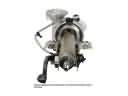
- Q: How to Service and Repair the Water Pump on Ford Taurus?A:In order to fix the coolant pump, empty the cooling system, get out the accessory drive belt, degas bottle and the generator. Remover bolts and the pump of the coolant. Clean and dry, Add new pump and screw bolts. Install reconnect hoses, reassemble parts and fill the cooling system.
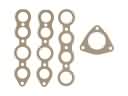
- Q: How to service the right-hand catalytic converter on Ford Taurus?A:Service instructions to replace the right-hand catalytic converter include new fasteners and gaskets, and clean flange faces. Immediately place the vehicle in neutral position in a hoist, take off the exhaust Y-pipe, the catalyst monitor sensor. Bolts and nuts shall be tightened to torque requirements when replaced and a new gasket must be installed.
- Q: How to service the alternator on Ford Taurus?A:To maintain alternator, disconnect battery, get rid of the generator B+ nut and terminal and lose the electrical connector. Dislodge upper radiator hose, loosen retainers, and swivel the tensioner of the belt. Disassemble the generator, loosen the nuts and bolts to certain torque when replacing it. To reinstall follow the procedure in reverse.


