My Garage
Cart

OEM 2006 Lincoln Zephyr Windshield

Glass Windshield
  • Select Vehicle by Model
  • Select Vehicle by VIN
Select Vehicle by Model
Make
Model
Year
or
Select Vehicle by VIN
For the most accurate results, select vehicle by your VIN (Vehicle Identification Number).

1 Windshield found

  • 2006 Lincoln Zephyr Windshield - 7H6Z-5403100-A
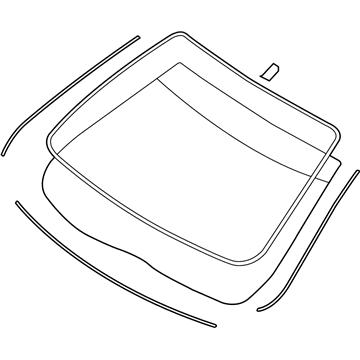
    2006 Lincoln Zephyr Windshield Diagram - 7H6Z-5403100-A
    View related parts

    2006 Lincoln Zephyr Windshield Part Number: 7H6Z-5403100-A

    $224.91 MSRP: $330.27
    You Save: $105.36 (32%)
    Ships in 1-3 Business Days
    ADD TO CART
    Product Specifications
    • Other Name: Glass - Windscreen
    • Replaces: 6H6Z-5403100-B
    • Base No.: <03100
    • Item Weight: 36.70 Pounds
    • Condition: New
    • Fitment Type: Direct Replacement
    • SKU: 7H6Z-5403100-A
    • Warranty: This genuine part is guaranteed by Ford's factory warranty.
    More Info
    Fits the following 2006 Lincoln Zephyr Submodels:
    • Base | 6 Cyl 3.0 L GAS

2006 Lincoln Zephyr Windshield

If you're seeking quality and affordability, look no further than our extensive inventory of genuine 2006 Lincoln Zephyr Windshield available at FordPartsDeal.com. You can confidently purchase our OEM 2006 Lincoln Zephyr Windshield as they are supported by the manufacturer's warranty and our hassle-free return policy, alongside the benefit of our fast delivery service.

2006 Lincoln Zephyr Windshield Parts Q&A

  • Q: How to reseal the windshield on 2006 Lincoln Zephyr?
    A: Begin the windshield resealing process by stripping away the cowl panel grille followed by putting aside both left-hand (LH) and right-hand (RH) weather strips. Afterward remove the three screws that secure the sun visors ahead of disconnecting their electrical connections before taking out both visors and their clips. Start by taking out the overhead console when needed before you can open screw covers on assist handles and unscrew their two mounting screws to disconnect the handles. Drop the front part of the headliner and stabilize it with appropriate materials for support. Wash both sides of the windshield glass by applying an alcohol-free cleaning solution to its inside and outside surfaces. Today mechanics need to use 6 mm (0.23 in) trimmed urethane adhesive applicator tip with a high-ratio electric or battery-powered caulk gun for applying urethane adhesive to existing urethane until gaps become continuous bead. Urethane adhesive application starts on the windshield top and sides from the inside of the vehicle while the bottom receives urethane from outside. The urethane adhesive needs at least one hour to cure before performing leak checks with a maximum allowed urethane usage. Install the front segment of the headliner and put back the two screws securing the assist handles before placing the assist handle screws back. Following the overhead console operation reinstall the sun visors by properly putting in the clips and reconnecting electrical connections before fastening with three screws. Finish the repair process by placing back the LH and RH A-pillar trim panels and both weather strips while installing the cowl panel grille and using alcohol-free cleaner to clean again the windshield glass surfaces.