FordParts
My Garage
My Account
Cart
OEM 2007 Mercury Grand Marquis Light Control Module
- Select Vehicle by Model
- Select Vehicle by VIN
Select Vehicle by Model
orMake
Model
Year
Select Vehicle by VIN
For the most accurate results, select vehicle by your VIN (Vehicle Identification Number).
1 Light Control Module found

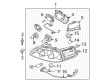
2007 Mercury Grand Marquis Lighting Control Module Part Number: FW1Z-13C788-ARM
$110.86 MSRP: $174.36You Save: $63.50 (37%)Product Specifications- Other Name: Remanufactured Processor - Lighting Control
- Replaces: 6W1Z-13C788-BA, 7W1Z-13C788-A, LCM-3
- Item Weight: 2.70 Pounds
- Item Dimensions: 8.5 x 4.5 x 6.1 inches
- Condition: New
- Fitment Type: Direct Replacement
- SKU: FW1Z-13C788-ARM
- Warranty: This genuine part is guaranteed by Ford's factory warranty.
2007 Mercury Grand Marquis Light Control Module
If you're seeking quality and affordability, look no further than our extensive inventory of genuine 2007 Mercury Grand Marquis Light Control Module available at FordPartsDeal.com. You can confidently purchase our OEM 2007 Mercury Grand Marquis Light Control Module as they are supported by the manufacturer's warranty and our hassle-free return policy, alongside the benefit of our fast delivery service.
2007 Mercury Grand Marquis Light Control Module Parts Q&A
- Q: How to properly handle the Light Control Module on 2007 Mercury Grand Marquis?A: When servicing the Lighting Control Module (LCM), configure it to a scan tool prior to installing it. New LCM with DTC B2477 will clear by default after programming and will be in manufacturing mode (when cleared). Take out the required components, unconnect the connectors and attach the new module, then undo the steps that one undertook to remove the components.
Related 2007 Mercury Grand Marquis Parts
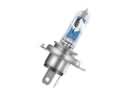 2007 Mercury Grand Marquis Headlight Bulb
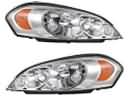 2007 Mercury Grand Marquis Headlight
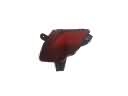 2007 Mercury Grand Marquis Bumper Reflector
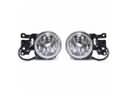 2007 Mercury Grand Marquis Fog Light
 2007 Mercury Grand Marquis Fog Light Bulb
 2007 Mercury Grand Marquis Instrument Panel Light Bulb
 2007 Mercury Grand Marquis Interior Light Bulb
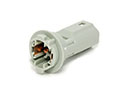 2007 Mercury Grand Marquis Light Socket