
Popular OEM Mercury Grand Marquis Parts
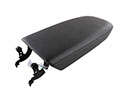
- Body & Hardware Parts View More >
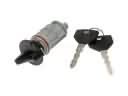
- Electrical Parts View More >
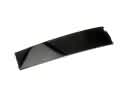
- Interior & Exterior Trim Parts View More >
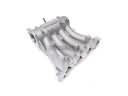
- Air & Fuel Delivery Parts View More >
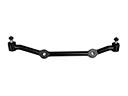
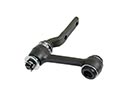
- Steering Parts View More >
- Emission Control & Exhaust Parts View More >
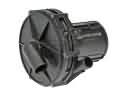
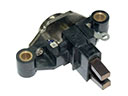
- Charging & Starting Parts View More >
- Engine Parts View More >
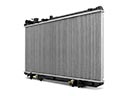
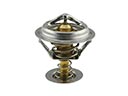
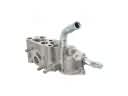
- Belts & Cooling Parts View More >
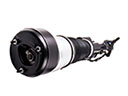
- Suspension Parts View More >
- Brakes Parts View More >
- A/C & Heating Parts View More >


Why Buy Genuine Mercury Grand Marquis Parts From FordPartsDeal.com
FordPartsDeal.com offers a smart and convenient way to buy genuine parts online. We sell new OEM Mercury Grand Marquis parts, including Headlights & Lighting. Authorized dealers directly provide all the Mercury Grand Marquis parts and assemblies to ensure the optimal quality and fit. We also provide all properly fitting Mercury Grand Marquis parts, such as Transmission, Driveline & Axles specific to your model. When you shop here, you get real Mercury value at highly competitive prices. All our products come with the same Mercury warranty available at other dealerships. Our easy-to-use catalog helps you quickly identify the right part for your car. You'll receive fast shipping from our warehouse network, keeping your Mercury Grand Marquis running smoothly. Our staff consists of Mercury professionals who are ready to assist you. We aim to treat each customer as if they were stepping out of a Mercury showroom. VIN verification and our live support ensure that the part you order is the right Mercury Grand Marquis part for your vehicle.
Over a period of thirty-six years from 1975 until 2011 Mercury produced four generations of the full-size luxury sedan Grand Marquis through its division Mercury which operated under Ford Motor Company. The Mercury Grand Marquis entered the Mercury Marquis family as a highly premium model during 1983 while using a front-engine rear-wheel-drive configuration that enabled smooth, stable handling. The Panther platform served as the base structure for Grand Marquis while the car featured V8 engine choices between the 4.6L V8 and previous model 4.9L V8. The available engine line for these vehicles delivered from 220 horsepower up to 239 horsepower depending on production specifications. A user-friendly automatic transmission controls power delivery through electronic control of its four-speed gear ratio and provides responsive operation. When different design versions were introduced to the Grand Marquis engineers worked on improving control systems and implementing a new flat-steering wheel design. The fourth-generation received a design transformation featuring new contemporary emblems and a contemporary modern large grille. All owners of Mercury Grand Marquis vehicles are obligated to install original vehicle components which fulfill both automotive performance requirements and operational reliability demands. The manufacturing standards used to design OEM Mercury Grand Marquis parts ensure high durability alongside maintenance compatibility thus saving owners money on future maintenance expenses.
Mercury Grand Marquis issues group into engine cooling, safety restraint electronics, and transmission hydraulics. On the engine side, the Grand Marquis often overheats and loses coolant. A cracked intake manifold leaks at the front passage, causing steam and warning lights. Replace the intake manifold, bleed air, and pressure test the cooling system. Inspect hoses, thermostat housing, and cap for damage on the Grand Marquis. Within safety systems, a failed seat belt buckle spring illuminates the airbag light. On many Mercury Grand Marquis models, buckle contacts wear and intermittently open the circuit. Replace the seat belt buckle, clear codes, and confirm lamp self test. In the transmission, the Grand Marquis can lose drive or slip at stops. A failing front pump loses hydraulic pressure, often with a rising whine. Verify line pressure, inspect fluid for debris, and replace the front pump. Flush the cooler and update service records on the Mercury sedan. After repairs, road test the Grand Marquis, check temperatures, and confirm steady pressures. Finish with battery health checks, ground cleaning, and visual wire inspection on every Mercury Grand Marquis.
Mercury Grand Marquis Parts and Q&A
- Q: What steps should be taken before servicing the catalytic converter to ensure safety and proper installation on Mercury Grand Marquis?A:The power of the air suspension system should be switched off prior to working on the catalytic converter to prevent unpredictable changes. Place the car on a hoist on neutral, unplug sensors, and take off catalytic converter. Wipe down surfaces, install new fasteners and evenly tighten parts. Undo the process of removal in order to install it.
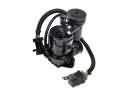
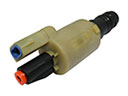
- Q: How to service and repair the power steering pump on Mercury Grand Marquis?A:In order to service the power steering pump, take off the drive belt, lift up the vehicle and remove the routing bracket. EVO systems Unplug the auxiliary actuator, remove the pump bolts, the pump hoses, and the pulley. To install, follow the same procedure in reverse, fit new seal rings, fill the system and verify leakages.
- Q: How to Service the Air Filter Element on Mercury Grand Marquis?A:In order to service the air cleaner element, one has to release the metal clips and the engine air cleaner cover to remove it. In reassembly, make sure that a cover and tray are engaged to all of the hinge features. The installation of a new air cleaner element is as easy as turning the removal processes in reverse.


