FordParts
My Garage
My Account
Cart
OEM 2009 Ford Crown Victoria Windshield
Glass Windshield- Select Vehicle by Model
- Select Vehicle by VIN
Select Vehicle by Model
orMake
Model
Year
Select Vehicle by VIN
For the most accurate results, select vehicle by your VIN (Vehicle Identification Number).
1 Windshield found

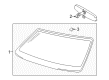
2009 Ford Crown Victoria Windshield, Front Part Number: 3W7Z-5403100-AB
$214.63 MSRP: $315.17You Save: $100.54 (32%)Product Specifications- Other Name: Glass - Windscreen; Windshield, Front
- Position: Front
- Base No.: 03100
- Item Weight: 35.40 Pounds
- Condition: New
- Fitment Type: Direct Replacement
- SKU: 3W7Z-5403100-AB
- Warranty: This genuine part is guaranteed by Ford's factory warranty.
2009 Ford Crown Victoria Windshield
If you're seeking quality and affordability, look no further than our extensive inventory of genuine 2009 Ford Crown Victoria Windshield available at FordPartsDeal.com. You can confidently purchase our OEM 2009 Ford Crown Victoria Windshield as they are supported by the manufacturer's warranty and our hassle-free return policy, alongside the benefit of our fast delivery service.
2009 Ford Crown Victoria Windshield Parts Q&A
- Q: How to reseal a windshield on 2009 Ford Crown Victoria?A: The windshield resealing process starts with removing the cowl panel grille before taking out screws and left-hand (LH) and right-hand (RH) sun visors and their clips. Take out LH and RH front door weather strips while setting them aside before removing LH and RH A-pillar trim panels. The installer must remove both the overhead console and the roof opening panel headliner retainer when present on the vehicle. Support the first half section of the front headliner by placing it on appropriate material as it lowers partially. Use glass cleaner to clean the glass edge region from the inside top and sides and outside bottom that already contains urethane adhesive. Cricke the urethane adhesive applicator tip to specification before using a high ratio electric or battery-operated caulk gun to reduce effort and create a continuous bead which joins all gaps together. The technician should mount the urethane adhesive over the existing urethane adhesive on both windshield interior areas that include the top and sides toward the top and to the exterior along the windshield base. Audiometric and water leak tests must occur one hour after adhesive application so additional adhesive can be applied when needed. Begin by reinstalling the front section of the headliner followed by installation of roof opening panel headliner retainer and overhead console when present on the vehicle. The next installation steps involve putting in the LH and RH A-pillar trim panels along with the LH and RH front door weather strips then the LH and RH sun visors with clips and concluding with the cowl panel grille. Completely clean the glass surface of the windshield from outside and inside with glass cleaner.
Related 2009 Ford Crown Victoria Parts
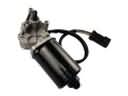 2009 Ford Crown Victoria Wiper Motor
 2009 Ford Crown Victoria Axle Beam
 2009 Ford Crown Victoria Car Mirror
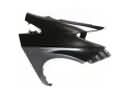 2009 Ford Crown Victoria Fender
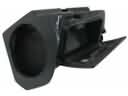 2009 Ford Crown Victoria Glove Box
 2009 Ford Crown Victoria Hood Cable
 2009 Ford Crown Victoria Hood Latch
 2009 Ford Crown Victoria Lift Support
 2009 Ford Crown Victoria Liftgate Hinge
 2009 Ford Crown Victoria Washer Reservoir
 2009 Ford Crown Victoria Weather Strip
 2009 Ford Crown Victoria Wiper Pivot