My Garage
Cart
Make sure this part fits

Ford 3W7Z-5403100-AB
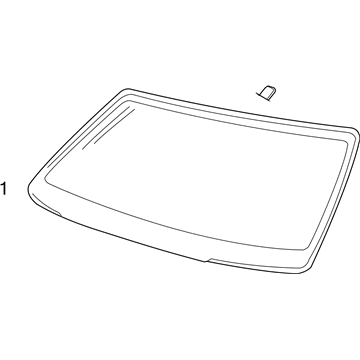
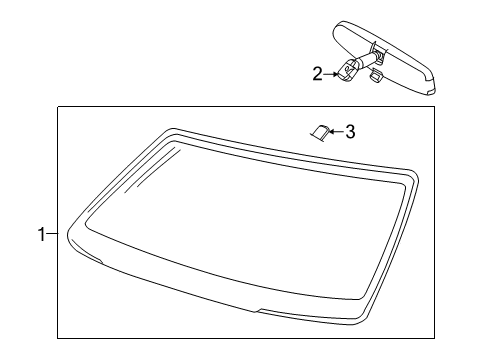
Windshield, Front

2004-2011 Ford 3W7Z5403100AB

Customer Questions & Expert Answers (4)
Ford 3W7Z-5403100-AB Windshield, Front
  • Part Description
    Glass - Windscreen; Windshield, Front
  • Base No.
    03100
  • Position
    Front
  • Manufacturer
    Ford
Make sure this part fits
$206.38 MSRP: $303.05
You Save: $96.67 (32%)
Currently Unavailable

Due to manufacturer supply shortage, this item isn't currently available for ordering.

  • Related Parts
  • Product Specifications
  • Vehicle Fitment
  • Customer Questions & Expert Answers
  • Product Specifications

    BrandGenuine Ford
    Base No.03100
    Manufacturer Part Number3W7Z-5403100-AB
    Part DescriptionGlass - Windscreen; Windshield, Front
    Item Weight35.40 Pounds
    PositionFront
    ConditionNew
    Fitment TypeDirect Replacement
    ManufacturerFord
    SKU3W7Z-5403100-AB
    WarrantyThis genuine Ford part is guaranteed by Ford's factory warranty.
    Shipping & ReturnShipping Policy Return Policy
    Warning: California's Proposition 65
  • Vehicle Fitment

    Year Make Model Trim Engine
    2004-2011 Ford Crown VictoriaBase, LWB, LX, LX Sport, Police Interceptor, S, Special Edition8 Cyl 4.6 L CNG, 8 Cyl 4.6 L FLEX, 8 Cyl 4.6 L GAS
    2004-2011 Mercury Grand MarquisGS, GSL, Limited Edition, LS, Ultimate Edition8 Cyl 4.6 L FLEX, 8 Cyl 4.6 L GAS
    2004 Mercury MarauderBase8 Cyl 4.6 L GAS
  • Customer Questions & Expert Answers

    Q:
    Will this 3W7Z-5403100-AB work in my car? Posted by FordPartsDeal Specialist
    A:
    Select Your Vehicle model to verify if part number 3W7Z-5403100-AB fits your car.
    Posted by FordPartsDeal Specialist
    Q:
    How to reseal a windshield on Ford Crown Victoria? Posted by Customer
    A:
    The windshield resealing process starts with removing the cowl panel grille before taking out screws and left-hand (LH) and right-hand (RH) sun visors and their clips. Take out LH and RH front door weather strips while setting them aside before removing LH and RH A-pillar trim panels. The installer must remove both the overhead console and the roof opening panel headliner retainer when present on the vehicle. Support the first half section of the front headliner by placing it on appropriate material as it lowers partially. Use glass cleaner to clean the glass edge region from the inside top and sides and outside bottom that already contains urethane adhesive. Cricke the urethane adhesive applicator tip to specification before using a high ratio electric or battery-operated caulk gun to reduce effort and create a continuous bead which joins all gaps together. The technician should mount the urethane adhesive over the existing urethane adhesive on both windshield interior areas that include the top and sides toward the top and to the exterior along the windshield base. Audiometric and water leak tests must occur one hour after adhesive application so additional adhesive can be applied when needed. Begin by reinstalling the front section of the headliner followed by installation of roof opening panel headliner retainer and overhead console when present on the vehicle. The next installation steps involve putting in the LH and RH A-pillar trim panels along with the LH and RH front door weather strips then the LH and RH sun visors with clips and concluding with the cowl panel grille. Completely clean the glass surface of the windshield from outside and inside with glass cleaner.
    Posted by FordPartsDeal Specialist
    Q:
    How to service and repair a windshield on Mercury Grand Marquis? Posted by Customer
    A:
    The shielding procedure for windshield repair starts with removing the cowl panel grille, sun visors and clips, RH and LH A-pillar trim panels and instrument panel defroster opening grille. The service and repair require users to disconnect electrical cables whenever possible then seal defroster ventilation points with tape for protection against outside contaminants. First remove the interior rear view mirror together with the overhead console if it exists before lowering the front section of the headliner. Caring measures must be taken to protect the seats along with instrument panel and hood from damage. First clear away all foreign material from the windshield pinch weld area until it becomes dust-free before undertaking urethane adhesive cutting tasks. Cut the urethane adhesive using the Deluxe Windshield Removal Tool with water lubrication and maintain the flat blade surface on glass to preserve adhesive on the pinch weld. Maintain constant support for the glass throughout this operation beginning in the upper central part and gradually working towards the two bottom corners. Distance the windshield glass from the body with The Pumper before cutting remaining urethane adhesive and removing the glass properly to place it on an unmovable work surface. Place the new windshield glass onto the already present urethane adhesive bead while you position it at the center of the opening by adjusting stop blocks when necessary. Apply alignment marks between glass and body before you perform thorough cleaning on the pinch weld area. Every area of corrosion on the pinch weld needs repair because it plays a structural role in the vehicle. After repairing the pinch weld, trim the urethane adhesive to reveal a 1-2 mm area of base. Dispose of existing urethane adhesive before reusing the same glass by leaving back a minimal adhesive layer to function as a bond. The new windshield glass must receive glass cleaner treatment on its interior before the application of glass primer as per manufacturer guidelines with six minutes of drying time required. Cut the urethane adhesive applicator tip according to specifications before you apply a straight urethane adhesive line along the pinch weld adhesive trim without any spaces. It is necessary to avoid operating the automobile until the urethane adhesive reaches full cure point according to manufacturer guidelines. Window openings must be available before setting the windshield glass into position at the desired alignment marks. The urethane adhesive requires at least one hour of curing time to verify air and water leaks then requires possible adhesive refills before the process continues. Finish the process by reinserting the front headliner section then putting back the rear view mirror and overhead console (when present) before removing tape from the defroster housing. After that, add the defroster grille onto the instrument panel and restore the A-pillar trims along with the sun visors with their retaining clips and cowl panel grille too.
    Posted by FordPartsDeal Specialist
    Q:
    How to reseal a windshield on Mercury Grand Marquis? Posted by Customer
    A:
    Windshield resealing requires the first step to be cowl panel grille removal and subsequent removal of screws along with left-hand (LH) and right-hand (RH) sun visor clips and screws. First place the LH and RH front door weather strips to the side while removing both the LH and RH windshield side garnish mouldings. You should remove the overhead console when it exists together with the roof opening panel headliner retainer. Support the leading segment of the headliner with appropriate material while you lower it partially. The cleaning process includes application of non-alcohol glass cleaner for performing exterior and interior windshield glass surface cleaning. Cut the urethane adhesive applicator tip to specification and operate a high ratio, electric or battery-operated caulk gun to apply urethane adhesive until the gaps become a continuous bead. The urethane adhesive should be spread on top and sides of the windshield through the vehicle's interior before dabbing it on the bottom portion of the windshield from outside. The urethane adhesive needs a minimum cure time of one hour before inspecting for leaks but further adhesive application might be required. Install first the front section of the headliner then put on the roof opening panel headliner retainer and overhead console if it comes with this equipment. Following this the installation process includes the cowl panel grille and the LH and RH windshield side garnish mouldings and finally the LH and RH front door weather strips followed by installing and screwing in the LH and RH sun visors with their clips.
    Posted by FordPartsDeal Specialist
    If you have any questions about this product, please don't hesitate to ask us. We will be happy to help you!

OEM Ford 3W7Z-5403100-AB, Excellent Performance and Perfect Fitment

To ensure reliability, purchase Ford part # 3W7Z-5403100-AB Windshield, Front. It is sometimes referred to as Ford Windshield. For those Ford owners who aspire to maintain their vehicles in optimal shape, opting for OEM parts is a wise choice. Precisely engineered, these components adhere to stringent factory guidelines and are produced in state-of-the-art facilities using cutting-edge technologies. Moreover, they are subjected to thorough testing to certify their resilience and safety, thereby making them a dependable option for Ford owners.

FordPartsDeal.com is a leading supplier of genuine Ford parts such as Ford 3W7Z5403100AB Windshield, Front. A vast selection of genuine Ford parts is available on our website, all offered at discounted prices. Every OEM Ford part is covered by the manufacturer's warranty, which also applies to our hassle-free return policy. Enjoy fast delivery service, ensuring you get your parts when you need them. Your shopping experience here is guaranteed to be pleasurable. For detailed Ford parts information, click here.
Choose FordPartsDeal for discounted prices, exceptional service and fast delivery