My Garage
Cart

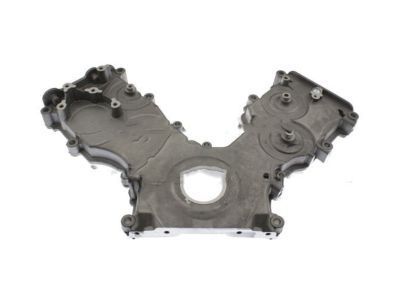
OEM 2009 Ford E-150 Timing Cover

Engine Timing Cover
  • Select Vehicle by Model
  • Select Vehicle by VIN
Select Vehicle by Model
Make
Model
Year
or
Select Vehicle by VIN
For the most accurate results, select vehicle by your VIN (Vehicle Identification Number).

2 Timing Covers found

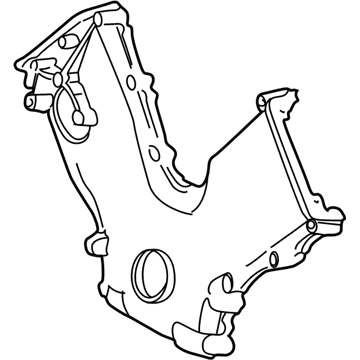
  • 2009 Ford E-150 Timing Cover Diagram - 4C2Z-6019-CA
    View related parts

    2009 Ford E-150 Timing Cover, Front Part Number: 4C2Z-6019-CA

    $128.47 MSRP: $187.00
    You Save: $58.53 (32%)
    Ships in 1-3 Business Days
    ADD TO CART
    Product Specifications
    • Other Name: Cover - Cylinder Front; Engine Timing Cover; Front Cover
    • Position: Front
    • Replaces: 4C2Z-6019-BA
    • Base No.: 6019
    • Item Weight: 9.10 Pounds
    • Item Dimensions: 4.1 x 24.2 x 21.6 inches
    • Condition: New
    • Fitment Type: Direct Replacement
    • SKU: 4C2Z-6019-CA
    • Warranty: This genuine part is guaranteed by Ford's factory warranty.
    More Info
    Fits the following 2009 Ford E-150 Submodels:
    • Base, Chateau, XL, XLT | 8 Cyl 4.6 L FLEX, 8 Cyl 4.6 L GAS
  • 2009 Ford E-150 Timing Cover - 2L3Z-6019-BA
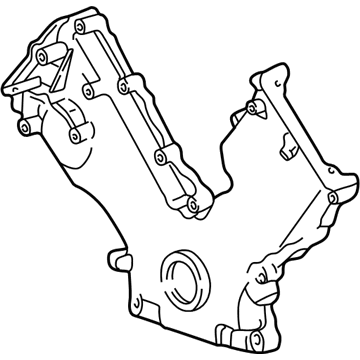
    2009 Ford E-150 Timing Cover Diagram - 2L3Z-6019-BA
    View related parts

    2009 Ford E-150 Timing Cover, Front Part Number: 2L3Z-6019-BA

    $113.41 MSRP: $174.53
    You Save: $61.12 (36%)
    Ships in 1-2 Business Days
    ADD TO CART
    Product Specifications
    • Other Name: Cover - Cylinder Front; Engine Timing Cover; Front Cover
    • Position: Front
    • Base No.: 6019
    • Item Weight: 9.90 Pounds
    • Item Dimensions: 24.4 x 23.6 x 3.6 inches
    • Condition: New
    • Fitment Type: Direct Replacement
    • SKU: 2L3Z-6019-BA
    • Warranty: This genuine part is guaranteed by Ford's factory warranty.
    More Info
    Fits the following 2009 Ford E-150 Submodels:
    • Base, Chateau, XL, XLT | 8 Cyl 5.4 L CNG, 8 Cyl 5.4 L FLEX, 8 Cyl 5.4 L GAS, 8 Cyl 5.4 L LPG

2009 Ford E-150 Timing Cover

If you're seeking quality and affordability, look no further than our extensive inventory of genuine 2009 Ford E-150 Timing Cover available at FordPartsDeal.com. You can confidently purchase our OEM 2009 Ford E-150 Timing Cover as they are supported by the manufacturer's warranty and our hassle-free return policy, alongside the benefit of our fast delivery service.

2009 Ford E-150 Timing Cover Parts Q&A

  • Q: How to Service and Repair the Engine Front Timing Cover on 2009 Ford E-150?
    A: Start with putting the vehicle on a hoist with neutral engagement and removing the radiator and proceed to work on the engine front cover service and repair. Lightly tighten the engine oil drain plug to 23 Nm (17 lb-ft). After draining the oil you should replace all covers along with their nuts. The service process starts with removing nuts and positioning LH and RH radio interference capacitors to the side. The operator should then loosen 4 coolant pump pulley bolts and rotate the tensioner while spinning the accessory drive belt in the clockwise direction. The next step requires removing the 4 coolant pump pulley bolts and pulley components before removing the bolt and the accessory drive belt idler pulley. After removing 3 power steering pump bolts, users should disconnect A/C compressor and crankshaft position (CKP) sensor electrical connectors and remove a single nut which enables positioning of the transmission cooler tube support bracket and starter wiring harness support bracket to one side. The CMP sensor electrical connector should be disconnected and the CMP sensor bolt and sensor need to be removed. A strap wrench should be used to uninstall the torque-to-yield bolt and washer but conserve the bolt for disposal. Use the crankshaft vibration damper remover to detach the crankshaft pulley following its application with the crankshaft front oil seal remover while discarding the crankshaft seal. You should detach the engine front cover by removing its 4 bolts from the oil pan and all 15 fasteners from the dowels while discarding the gaskets. Apply sufficient silicone gasket remover along with a plastic scraping tool to smoothen both sealing areas before installing. Before attaching the CKP sensor you need to apply clean engine oil to the O-ring seal and secure the bolt with 10 Nm (89 lb-in) torque. Install the engine front cover gasket before sealing its surfaces with silicone gasket and sealant while loosely mounting the bolts. To install the crankshaft pulley you should first tighten the 15 fasteners to 25 Nm (18 lb-ft) for the 4.6L (2V) engine and then proceed to the 5.4L (2V) engine with three stage tightening beginning at 25 Nm (18 lb-ft) followed by 48 Nm (35 lb-ft) for fasteners 6 and 7 before finishing with 48 Nm (35 lb-ft) for fasteners 8 through 15. Tighten the 4 oil pan bolts at first to 20 Nm (177 lb-in) before final torque to 60 degrees. The new crankshaft front seal installation requires clean engine oil lubrication of both the engine front cover and crankshaft front seal inner lip before using appropriate installers to install the seal. Seal the Woodruff key area of the crankshaft pulley with silicone gasket and sealant following a clean engine oil application on the seal area before installation. The crankshaft pulley bolt replacement requires four-stage tightening process for 4.6L (2V), which matches the procedure for 5.4L (2V). Tighten the CMP sensor to a torque of 10 Nm (89 lb-in) along with its bolt then connect the CMP sensor electrical connector. The installer must position and install the transmission cooler tube support bracket along with the starter wiring harness support bracket using 10 Nm (89 lb-in) for 4.6L engines but 28 Nm (21 lb-ft) for 5.4L engines. Reinstall the power steering pump while securing its bolts to 25 Nm (18 lb-ft) torque followed by connecting the A/C compressor and CKP sensor electrical connectors. The engineer installs both accessory drive belt idler pulley and coolant pump pulley and tightens their bolts to 25 Nm (18 lb-ft). Synchronize the tensioner movement in a clockwise direction to position the accessory drive belt before placing back the RH and LH radio interference capacitors and torquing their nuts to 25 Nm (18 lb-ft). Before completion you should replace the RH and LH valve covers then add new engine oil before reinstalling the radiator. Follow instructions from a scan tool to execute the neutral profile correction under the misfire monitor procedure.