Popular OEM Ford E-150 Parts
- Body & Hardware Parts View More >
- Electrical Parts View More >
- Air & Fuel Delivery Parts View More >
- Steering Parts View More >
- Emission Control & Exhaust Parts View More >
- Charging & Starting Parts View More >
- Engine Parts View More >
- Belts & Cooling Parts View More >
- Suspension Parts View More >
- Brakes Parts View More >
- A/C & Heating Parts View More >
- Headlights & Lighting Parts View More >
Why Buy Genuine Ford E-150 Parts From FordPartsDeal.com
FordPartsDeal.com offers a smart and convenient way to buy genuine parts online. We sell new OEM Ford E-150 parts. Authorized dealers directly provide all the Ford E-150 parts and assemblies to ensure the optimal quality and fit. We also provide all properly fitting Ford E-150 parts specific to your model. When you shop here, you get real Ford value at highly competitive prices. All our products come with the same Ford warranty available at other dealerships. Our easy-to-use catalog helps you quickly identify the right part for your car. You'll receive fast shipping from our warehouse network, keeping your Ford E-150 running smoothly. Our staff consists of Ford professionals who are ready to assist you. We aim to treat each customer as if they were stepping out of a Ford showroom. VIN verification and our live support ensure that the part you order is the right Ford E-150 part for your vehicle.
Since its 1961 launch as Ford F-Series replacement the E-150 has modified throughout five design iterations to become an important full-size van for the U.S. market. During its generations the Ford E-150 came standard with a 170 cubic inch engine with a 240 cubic inch optional variant which has always focused on delivering reliable performance. Initially the early versions provided a three-speed manual gearbox that briefly included a four-speed Dagenham transmission which came in 1963. The E-150 evolved into a heavier model using F-Series pickup components, while retaining its rear-wheel drive configuration with a single rear axle. A twin I-beam suspension transition brought better driving dynamics along with more stable and responsive handling to the vehicle. The Ford E-150 received a new chassis body-on-frame structure in 1975 so it transitioned into both becoming a popular passenger vehicle along with becoming a multi-purpose platform for ambulance and bus conversions. The mid-engine configuration in the first-generation E-150 provided improved storage space and easier access to the engine by positioning it between the driver and passenger seats. Over its production the Ford E-150 successfully dominated its segment by obtaining a large share from competitors. The performance and durability of a Ford E-150 depends on using genuine Ford parts that match original standards for reliable satisfaction of vehicle owners.
The sets of problems of the Ford E-150 are related to ignition, caulking, and rivet. Check Engine Lights and rough running are common causes of E-150 vans with faulty ignition coil boots. Split boots make it possible to get an arc on the head, resulting in firing misses and abrupt acceleration. Check coils and plugs, and replace damaged and check good grounds and proper gap. Ejection of the spark plugs in some E-150 models damages the threads of the cylinder head. There is a followed loud pop, sudden misfire, and poor power. Threaded-insert repairing as appropriate, or cylinder head renewal as necessary. External oil leaks on the head gasket occur on other vans of the E-150. During assembly, contamination entraps debris and destroys the sealing surfaces. Position to find dripping, low coolant and idle/traffic overheat. Change the head gasket, examine both sides and check flatness. Reset adaptations: road test the E-150 under a wide range of loads after inner repair. Use Ford steps on torque values, fluids and cooling bleed steps. Check that there are no outstanding faults and stable fuel trims by referring to the Ford scan data. Regular inspections based on a Ford factory are maintained to ensure that the E-150 is uniform and reliable with quality components.
Ford E-150 Parts and Q&A
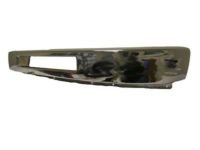
- Q: How to service and repair the front bumper on Ford E-150?A:The front bumper has to be serviced and repaired, and to do this, one has to remove the valence panel through unscrewing screws, pushing pin retainers, and wiring harness retainer. One will need an assistant to assist in the removal of the bumper. During reinstallation, make sure to screw the fasteners and invert the process of undoing.
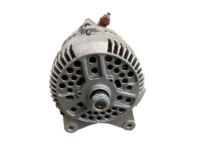
- Q: How to service and repair the alternator on Ford E-150?A:In order to maintain the alternator, undo the battery. Take off the drive belt and bolts that hold the upper intake plenum up. Assemble the rear connections: unscrew the B+ nut and lead, de-plug S and ASI connectors. Take out the bolts that are left behind and pull out the generator. Reverse steps to reinstall.
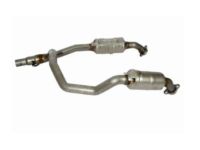
- Q: How to service and repair the catalytic converter on a stripped chassis on Ford E-150?A:In order to fix the catalytic converter, put the car in neutral on a hoist. Prop the muffler, unscrew the assembly and ease the clamp. Take the muffler off and take the CMS off. Take off the Y-pipe nuts and support bracket, then take out the converter and reverse the process of installation.


