FordParts
My Garage
My Account
Cart
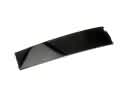
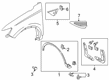
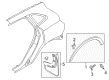
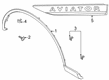
OEM Lincoln Mud Flaps
Mud Flap Splash Guards- Select Vehicle by Model
- Select Vehicle by VIN
Select Vehicle by Model
orMake
Model
Year
Select Vehicle by VIN
For the most accurate results, select vehicle by your VIN (Vehicle Identification Number).
15 Mud Flaps found


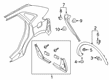
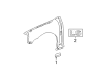
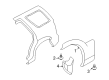
Lincoln Mud Guard, Front Part Number: GA1Z-16A550-AA
$65.10 MSRP: $80.00You Save: $14.90 (19%)Product Specifications- Other Name: Kit - Mudflap
- Position: Front


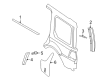
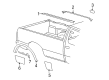
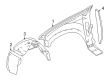
Lincoln Mud Guard, Front Part Number: FJ7Z-16A550-AB
$68.70 MSRP: $80.00You Save: $11.30 (15%)Ships in 1-2 Business DaysProduct Specifications- Other Name: Kit - Mudflap
- Position: Front

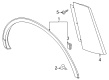
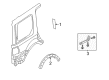
Lincoln Mud Guard Part Number: FJ7Z-16A550-BB
$65.10 MSRP: $80.00You Save: $14.90 (19%)Product Specifications- Other Name: Kit - Mudflap

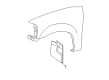
Lincoln Mud Guard Part Number: VLC5Z-16A550-A
$213.83 MSRP: $249.00You Save: $35.17 (15%)Product Specifications- Other Name: Kit - Mudflap


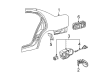
Lincoln Mud Guard, Black Part Number: F6VZ-16A550-AA
$30.84 MSRP: $35.00You Save: $4.16 (12%)Product Specifications- Other Name: Kit - Mudflap; Mud Flap Kit, Front
- Replaces: F8VZ-16A550-AA


Lincoln Mud Guard Part Number: GA1Z-16A550-BA
$68.70 MSRP: $80.00You Save: $11.30 (15%)Product Specifications- Other Name: Kit - Mudflap


Lincoln Mud Guard Part Number: 7L7Z-16A550-A
Product Specifications- Other Name: Kit - Mudflap
Lincoln Mud Guard Part Number: VLC5Z-16A550-B
$213.83 MSRP: $249.00You Save: $35.17 (15%)Product Specifications- Other Name: Kit - Mudflap

Lincoln Mud Guard Part Number: XW4Z-16A550-BA
Product Specifications- Other Name: Kit - Mudflap

Lincoln Mud Guard, Front Part Number: XW4Z-16A550-AA
Product Specifications- Other Name: Kit - Mudflap
- Position: Front

Lincoln Mud Guard Part Number: 6L3Z-16A550-AA
Product Specifications- Other Name: Kit - Mudflap

Lincoln Mud Guard Part Number: 3L7Z-16A550-BA
Product Specifications- Other Name: Kit - Mudflap

Lincoln Mud Guard, Front Part Number: 3L7Z-16A550-AA
Product Specifications- Other Name: Kit - Mudflap
- Position: Front

Lincoln Mud Guard Part Number: 3C5Z-16A550-BAA
Product Specifications- Other Name: Kit - Mudflap

Lincoln Mud Guard, Front Part Number: 3C5Z-16A550-AAA
Product Specifications- Other Name: Kit - Mudflap
- Position: Front
Lincoln Mud Flaps
If you own Lincoln and want to keep it in top shape, choosing OEM Mud Flaps is a smart move. They are precisely engineered and follow strict factory standards. They are made in advanced facilities that use cutting edge technology. Each part goes through thorough testing to confirm strength and safety, so you can trust it. FordPartsDeal.com gives you genuine Lincoln Mud Flaps at some of the affordable online prices without cutting quality. Every OEM Lincoln part includes the manufacturer's warranty, easy returns, and super-fast delivery. So why wait? Shop now and get your vehicle back to peak condition.
Lincoln Mud Flaps minimize the chips on the paint and spray on the road and also match the prestigious appearance of your sedan or SUV. Lincoln owners have quiet cabins, soft leather, and Co-Pilot360 tools which make the trips soothing; consequently, the inclusion of these molded guards adds to the Quiet Flight objective of the brand by reducing the noise caused by pebbles hitting the fenders. In 1917, Lincoln initiated the design of sophisticated vehicles and on joining Ford, it continued to press comfort with clear displays, hands-free ActiveGlide cruising, and annual technological advances that were developed on the basis of feedbacks to drivers. Due to the importance of the appearance that Lincoln attaches to silence the tailored shape of the Mud Flaps is blended with a lasting material that folds without breaking. All Lincoln driving individuals who install these Mud Flaps will have cleaner doors when taking wet rides. The Mud Flaps can be installed at home. Find a flat place to park, roll the front wheel outward, and place each of the panels against the fender to ensure the shape. You can use the holes applied in the factory liner or the dimples on the marks as a guide and only drill a small pilot hole where indicated in the kit, and then use the clips or screws provided to hold the flap together. Ensure that the tire turns lock to lock without rubbing, that each fastener is tightened and repeat in each corner. Once the last flap is secured in place, remove all the dust, go on a short test run and re-inspect the hardware to complete the work.