FordParts
My Garage
My Account
Cart
OEM Lincoln Navigator Windshield
Glass Windshield- Select Vehicle by Model
- Select Vehicle by VIN
Select Vehicle by Model
orMake
Model
Year
Select Vehicle by VIN
For the most accurate results, select vehicle by your VIN (Vehicle Identification Number).
13 Windshields found

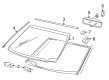
Lincoln Navigator Windshield, Front Part Number: AL1Z-7803100-B
$225.26 MSRP: $350.87You Save: $125.61 (36%)Ships in 1-3 Business Days
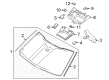
Lincoln Navigator Windshield Part Number: NL7Z-7803100-B
$807.99 MSRP: $1197.02You Save: $389.03 (33%)Ships in 1-2 Business Days

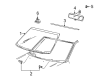
Lincoln Navigator GLASS - WINDSCREEN Part Number: SL7Z-7803100-D
$1010.85 MSRP: $1497.55You Save: $486.70 (33%)Ships in 1-2 Business Days
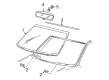
Lincoln Navigator Windshield, Front Part Number: DL1Z-7803100-A
$233.55 MSRP: $342.95You Save: $109.40 (32%)Ships in 1-3 Business DaysLincoln Navigator Windshield Part Number: JL7Z-7803100-M
$382.54 MSRP: $561.73You Save: $179.19 (32%)Ships in 1-3 Business Days
Lincoln Navigator Glass, Front Part Number: F65Z-1503100-AA
$196.34 MSRP: $285.80You Save: $89.46 (32%)Lincoln Navigator Windshield, Front Part Number: FL1Z-7803100-C
$262.30 MSRP: $385.17You Save: $122.87 (32%)Lincoln Navigator Windshield Part Number: JL7Z-7803100-L
$292.92 MSRP: $430.13You Save: $137.21 (32%)Lincoln Navigator Windshield Part Number: NL7Z-7803100-C
$472.35 MSRP: $693.62You Save: $221.27 (32%)Lincoln Navigator Windshield Part Number: JL7Z-7803100-J
$731.59 MSRP: $1083.83You Save: $352.24 (33%)Lincoln Navigator Windshield Part Number: JL7Z-7803100-N
$786.06 MSRP: $1164.53You Save: $378.47 (33%)Lincoln Navigator Windshield Part Number: JL7Z-7803100-K
$833.59 MSRP: $1234.95You Save: $401.36 (33%)
Lincoln Navigator Windshield, Front Part Number: 2L1Z-7803100-AB
Lincoln Navigator Windshield
OEM Windshield boasts unmatched quality. Each part goes through full quality checks. They adhere to Lincoln's official factory standards. These steps remove flaws and inconsistencies. So you can get Windshield with long life and a perfect fit. Come to our website and find genuine Lincoln Navigator parts. We keep a wide inventory of OEM Navigator parts at the highly affordable prices. It's easy to search, compare, and pick what you need. You'll love the clear info and simple checkout. We offer top-rated customer service, and we reply fast. We also ship promptly to ensure your order arrives on time.
Lincoln Navigator Windshield Parts and Q&A
- Q: How to remove and install windshield glass on Lincoln Navigator?A:Start windshield glass replacement by removing the cowl panel grille followed by A-pillar trim panels while overhead console and rain sensor must be detached if they exist. You need to disconnect the interior rear view mirror together with sun visors before you lower the front area of the headliner. Pull away the windshield side mouldings beginning at the upper corner while after that remove the upper windshield weather strip. Before cutting the urethane adhesive mark the outside of windshield glass with wax pencil where the stops are located then clean the pinch weld area with oil-free compressed air or a clean shop towel. The Deluxe Windshield Removal Tool should only be used once you lubricate the urethane adhesive with water and put on protective gloves along with eye protection. After placing the ribbon of the Deluxe Windshield Removal Tool blade with its flat edge on the windshield glass' pinch weld area you must support the windshield while keeping the urethane adhesive bead toward the pinch weld. Begin your urethane adhesive cuts from the upper center section while using The Pumper to elevate the windshield from the body frame and make cuts from the corners to the opposite corners. rocessing the windshield glass demands two technicians to handle it properly when placing it on a firm support surface. Check the windshield glass fit against the existing urethane adhesive bead by placing it in the opening while making adjustments to the stop blocks until installation is centered correctly. Mark the necessary alignment points with tape and non-staining grease pencil. Lay the windshield glass with its interior facing upwards on a solid work surface following dry-fitting completion. The pinch weld area should receive repairs to remove any corrosion while keeping scratch-free and then the urethane adhesive base must be trued up to 1-2 millimeters. Several steps should follow the thorough cleaning of the pinch weld area including removing residual urethane adhesive only when using the same glass. Use glass cleaner to clean both the inside of the new windshield glass while giving special attention to removing all traces from the blackened border. Glass primer must be applied as per manufacturer specifications during new windshield installation with a minimum drying time of 6 minutes. Use the upper windshield weather strip while cutting the urethane adhesive applicator tip to spec and applying a smooth urethane adhesive bead along the trimmed urethane adhesive bead on the pinch weld with no spacing allowed. Drive the vehicle only after completing the urethane adhesive curing process as indicated by the manufacturer. After making alignment marks for the windshield glass position the vehicle should have windows open. Testing air and water leaks during urethane adhesive cure demands at least one hour waiting time. Also verify all components achieve proper seating before installing windshield side mouldings, headliner, interior rear view mirror, rain sensor, overhead console, A-pillar trim panels, sun visors and cowl panel grille. To test for falling objects in the defroster vents the technician should operate the defroster blower at high speed.
- Q: How to reseal a windshield on Lincoln Navigator?A:The first step to reseal a windshield requires removal of the cowl grille and A-pillar trim panels together with bolt covers and bolt retention. Remove the panel trim from the roof opening and overhead console whenever feasible. To start the windshield resealing process remove the interior rear view mirror along with sun visors by removing their four screws and two sun visor and visor arm clips and disconnecting any present electrical connectors. Weaken the front section of the headliner by the windshield and fix it with proper support. Apply an alcohol-free cleaner to clean the urethane-glass interface on the inside windshield upper part including sides and on the outside at the bottom edge. The headliner requires Urethane Adhesive to be applied using a high-ratio electric or battery-operated caulk gun that produces a single unbroken bead while the applicator tip should be cut to meet specifications for covering all cleaned areas. The urethane application needs appropriate backfilling along with elimination of all surplus materials. Waiting for an hour serves as the minimum duration to check for air or water leakage but additional urethane adhesive can be used if needed. Installation follows the curing process where you must reinstall the headliner alongside sun visors as well as interior rear view mirror and roof opening panel trim and overhead console and finally A-pillar trim panels with bolts and covers and cowl grille. Persons should clean all glass areas of the windshield with a remedy free of alcohol.


Related Lincoln Navigator Parts
 Lincoln Navigator Bumper
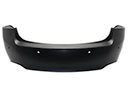 Lincoln Navigator Bumper Cover
 Lincoln Navigator Car Mirror
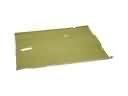 Lincoln Navigator Floor Pan
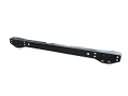 Lincoln Navigator Rear Crossmember
 Lincoln Navigator Weather Strip
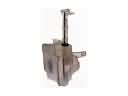 Lincoln Navigator Windshield Washer Fluid Reservoir
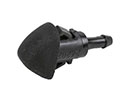 Lincoln Navigator Windshield Washer Nozzle
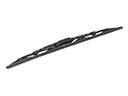 Lincoln Navigator Windshield Wiper
 Lincoln Navigator Wiper Arm
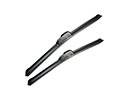 Lincoln Navigator Wiper Blade
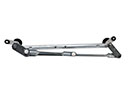 Lincoln Navigator Wiper Pivot