FordParts
My Garage
My Account
Cart
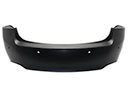
OEM Mercury Capri Bumper
Bumper Fascia- Select Vehicle by Model
- Select Vehicle by VIN
Select Vehicle by Model
orMake
Model
Year
Select Vehicle by VIN
For the most accurate results, select vehicle by your VIN (Vehicle Identification Number).
Part Type

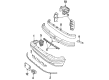
Mercury Capri Bumper
OEM Bumper boasts unmatched quality. Each part goes through full quality checks. They adhere to Mercury's official factory standards. These steps remove flaws and inconsistencies. So you can get Bumper with long life and a perfect fit. Come to our website and find genuine Mercury Capri parts. We keep a wide inventory of OEM Capri parts at the highly affordable prices. It's easy to search, compare, and pick what you need. You'll love the clear info and simple checkout. We offer top-rated customer service, and we reply fast. We also ship promptly to ensure your order arrives on time.
The Mercury Capri Bumper protects the sporty coupe from parking scrapes and low-speed knocks and gives it a sharp visual edge by combining tough impact absorbers with molded plastic covers. From its debut in 1970, the Capri made Mercury an accessible sports car, with lively four-cylinder power and optional Cologne V6 muscle with slick-shifting manual or relaxed automatic transmissions to let young drivers enjoy responsive handling without breaking the bank. Throughout its three generations, Mercury designers added structure to meet ever-increasing safety rules, which gave it increased crash protection and an improved look. Continuous updates kept the ride modern, with generation changes freshening up styling, improving safety, and adding such innovations as driver airbags, but the engineers always kept the lightweight body that helped the car dart through traffic and hug corners. Rigorous factory testing meant every part left the line built to last, and factory-backed warranties are still making sourcing genuine parts affordable for restorers today. The Capri Bumper itself is a sacrificial guard, taking five-mile-per-hour hits, protecting body panels and providing mounting points for lights and trim that complete the nose and tail with factory fit precision. Owners that require originality rely on Mercury service manuals when selecting a replacement Capri Bumper. Installing a new Bumper is as easy as prepare tools, disconnect battery, unclip and unbolt damaged unit, transfer brackets and sensors, align replacement, hand start bolts, snap clips, fasten tighteners, reconnect wiring, check gaps, test lights and sensors.
Related Mercury Capri Parts
 Mercury Capri Bumper Cover
 Mercury Capri Car Mirror
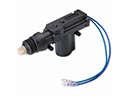 Mercury Capri Door Lock Actuator
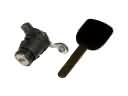 Mercury Capri Door Lock Cylinder
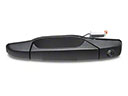 Mercury Capri Exterior Door Handle
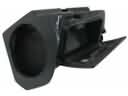 Mercury Capri Glove Box
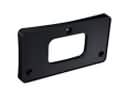 Mercury Capri License Plate
 Mercury Capri Rear Door Striker
 Mercury Capri Weather Strip
 Mercury Capri Wiper Motor
Browse Mercury Capri Bumper by Years
1993
1992
1991