FordParts
My Garage
My Account
Cart
OEM Mercury Headlight Connector
Headlight Pigtail- Select Vehicle by Model
- Select Vehicle by VIN
Select Vehicle by Model
orMake
Model
Year
Select Vehicle by VIN
For the most accurate results, select vehicle by your VIN (Vehicle Identification Number).
5 Headlight Connectors found


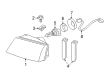
Mercury Socket & Wire Part Number: 3W3Z-13076-AA
Product Specifications- Other Name: Wiring Assembly; Headlight Wiring Harness; Headlight Socket
- Manufacturer Note: Jumper from 14290 to headlamp, also included with headlamp assembly

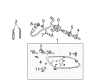
Mercury Wire, Front Part Number: YF1Z-13076-AA
Product Specifications- Other Name: Wire Assembly; Headlight Wiring Harness, Front; Headlight Wiring Harness
- Manufacturer Note: Headlamp jumper
- Position: Front
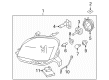
Mercury Socket & Wire Part Number: 5W3Z-13076-AA
Product Specifications- Other Name: Wiring Assembly; Headlight Wiring Harness; Headlight Socket
- Manufacturer Note: RH & LH, Headlamp Jumper

Mercury Wire Part Number: 5T5Z-13A006-AA
Product Specifications- Other Name: Wire Assembly; Headlight Wiring Harness

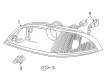
Mercury Socket, Front Part Number: 3F2Z-13076-AA
Product Specifications- Other Name: Wiring Assembly; Headlight Wiring Harness, Front; Headlight Socket; Bulb Socket
- Position: Front
Mercury Headlight Connector
If you own Mercury and want to keep it in top shape, choosing OEM Headlight Connector is a smart move. They are precisely engineered and follow strict factory standards. They are made in advanced facilities that use cutting edge technology. Each part goes through thorough testing to confirm strength and safety, so you can trust it. FordPartsDeal.com gives you genuine Mercury Headlight Connector at some of the affordable online prices without cutting quality. Every OEM Mercury part includes the manufacturer's warranty, easy returns, and super-fast delivery. So why wait? Shop now and get your vehicle back to peak condition.
The Mercury Headlight Connector is a compact plug that connects the car's wiring harness to the lamp and provides a constant power and ground for reliable beams. For decades, Mercury found a sweet spot between comfort and cost, giving drivers soft seats, generous legroom and suspensions that soaked up bumps without the boat-like sway. According to Mercury, thicker insulation keeps tire noise at a muted roar. The steering and brakes are direct and responsive, allowing one to cruise the highway relaxed and confident. The clean grille lines of the first models and the poised stance of the Grand Marquis let you know a Mercury is present without making a big fuss. Owners of the brand loved it as the feel of the switches, gauges and HVAC knobs felt intuitive, thus allowing them to focus on the road instead of rendering an opinion on some gimmicky screen. Despite technology advances over time, Mercury has kept the formula balanced with solid build quality and features that enhance daily living, not those that helped in mere brochure protection. When it's time to replace the Headlight Connector, disconnect the negative battery cable as it protects the electrical system from nasty sparks. Open up the hood, then pull the lamp housing towards you. Pinch the connector and slide it out. Check each wire for burns or corrosion. Cut back to clean copper. Attach the new Headlight Connector to the bright wire ends using crimping or soldering. Apply dielectric grease and add heat shrink to every joint to seal water out. Insert the connector into the lamp, put the housing back in place, reconnect the battery, flip the switch and the light confirms that the Headlight Connector is locked in.
Related Mercury Parts
 Mercury Relay
 Mercury Daytime Running Light Relay
 Mercury Door Jamb Switch
 Mercury Headlight Relay
 Mercury Headlight Switch
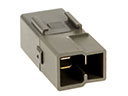 Mercury Horn Relay
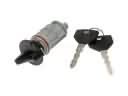 Mercury Ignition Lock Assembly
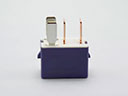 Mercury Ignition Relay
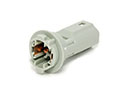 Mercury Light Socket
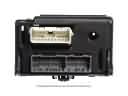 Mercury Lighting Control Module
 Mercury Mirror Switch
 Mercury Power Window Switch