My Garage
Cart
Make sure this part fits

Ford AU2Z-10V346-AXRM
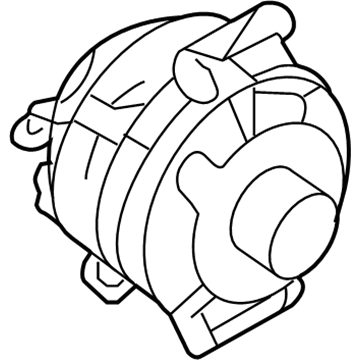
Alternator

2006-2009 Ford AU2Z10V346AXRM

Customer Questions & Expert Answers (5)
Ford AU2Z-10V346-AXRM Alternator
  • Part Description
    Re-Manufactured Alternator Assembly
  • Replaces
    6E5Z-10V346-AARM, 6E5Z-10346-AA, GL-668, GLV-8987-RM, 6E5Z-10V346-ABRM, GLV-8649-RM
  • Manufacturer
    Ford
Make sure this part fits
$181.34 MSRP: $285.45
You Save: $104.11 (37%)
Core Charge: $75.00
Ships in 1-2 Business Days
1
ADD TO CART
  • Related Parts
  • Product Specifications
  • Vehicle Fitment
  • Customer Questions & Expert Answers
  • Product Specifications

    BrandGenuine Ford
    Manufacturer Part NumberAU2Z-10V346-AXRM
    Part DescriptionRe-Manufactured Alternator Assembly
    ConditionNew
    Fitment TypeDirect Replacement
    Replaces6E5Z-10V346-AARM, 6E5Z-10346-AA, GL-668, GLV-8987-RM, 6E5Z-10V346-ABRM, GLV-8649-RM
    ManufacturerFord
    SKUAU2Z-10V346-AXRM
    WarrantyThis genuine Ford part is guaranteed by Ford's factory warranty.
    Shipping & ReturnShipping Policy Return Policy
    Warning: California's Proposition 65
  • Vehicle Fitment

    Year Make Model Trim Engine
    2006-2009 Ford FusionS, SE, SEL4 Cyl 2.3 L GAS
    2006-2009 Mercury MilanBase, Premier4 Cyl 2.3 L GAS
  • Customer Questions & Expert Answers

    Q:
    Can you verify if AU2Z-10V346-AXRM is the right one for my car? Posted by FordPartsDeal Specialist
    A:
    Select Your Vehicle model to verify if part number AU2Z-10V346-AXRM fits your car.
    Posted by FordPartsDeal Specialist
    Q:
    How to service and repair the alternator on Ford Fusion? Posted by Customer
    A:
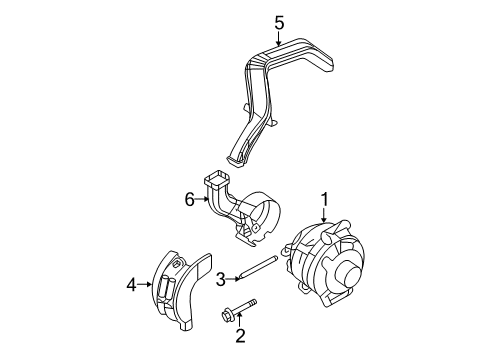
    Service and repair of the alternators begins with disconnecting the battery from the vehicle. First detach the bolt and two nuts which maintain the generator upper air duct and when reinstalling secure the bolt to 8 Nm (71 lb-in) torque. A clockwise rotation of the FEAD tensioner will create space for moving the accessory drive belt off to the side. Disassemble the generator shield by first removing its two nuts and then install it securely at 25 Nm (18 lb-ft). After releasing the locking tabs the generator intermediate air duct will detach from the system so users can set the generator protective cover aside. Start by detaching the nut from the generator and position its B+ terminal aside and tighten it to 12 Nm (9 lb-ft) at installation. Lift the generator harness locator from the generator then break the connection between the generator electrical connector. The crankshaft position (CKP) sensor connector along with the engine block generator harness locator need release to disconnect both components from each other for proper positioning of the generator harness. The generator can be detached by removing a bolt and two nuts while the installation requires tightening them to 47 Nm (35 lb-ft). The generator lower air duct must be detached from its mounting bolts which need to be tightened to 4 Nm (35 lb-in) after reinstalling. During installation ensure to fasten the two generator stud bolts to a torque of 24 Nm (18 lb-ft). Complete the installation by performing the reverse steps of the removal process.
    Posted by FordPartsDeal Specialist
    Q:
    How to service the alternator on Ford Fusion? Posted by Customer
    A:
    Service of the alternator begins by taking the A/C compressor off along with disconnecting the battery. First put aside the generator protective cover and then extract the nut before placing the generator B+ terminal to the side. Tighten the B+ terminal with a torque of 12 Nm when performing reinstallation. First remove the generator electrical connector while you detach the three bolts which secure the generator. The installation procedure ends after applying 47 Nm (35 lb-ft) torque to generator bolts while following the reverse order of removal steps.
    Posted by FordPartsDeal Specialist
    Q:
    How to service and repair the alternator on Mercury Milan? Posted by Customer
    A:
    The first task for servicing or repairing an alternator requires battery disconnection. The generator upper air duct should be detached from its securing bolt and two nuts before proper handling for a second installation which requires a torque of 8 Nm (71 lb-in). The front end accessory drive belt tensioner should be turned clockwise to shift the accessory drive belt into position. You should remove the two nuts while taking out the generator shield before installing it with 25 Nm (18 lb-ft) torque. Use the locking tabs to dismiss the generator intermediate air duct from its position before placing the generator protective cover to the side. Fasten the generator B+ terminal at 12 Nm torque (9 lb-ft) after placing it aside during replacement. Separate the generator harness locator from the generator while additionally unconnecting the electrical generator connector. After breaking the generator harness locator loose from both the engine block and separating the CKP sensor connector from the harness you should position the generator harness aside. Disengage the generator while removing its bolt and two nuts but reinstall it at 47 Nm (35 lb-ft). Release and detach the generator lower air duct by removing its three bolts but reapply 4 Nm (35 lb-in) torque before reinstalling. During reinstallation tighten the two generator stud bolts to 24 Nm (18 lb-ft). The process ends when you perform the reverse instructions of removal.
    Posted by FordPartsDeal Specialist
    Q:
    How to service and repair the alternator on a 2.3L generator on Mercury Milan? Posted by Customer
    A:
    Service and repair operations for the alternator require starting with the removal of the battery from the system. When reinstalling the generator upper air duct you should tighten the bolt and two nuts to 8 Nm (71 lb-in). The Front End Accessory Drive (FEAD) belt tensioner requires clockwise rotation as the operator positions the accessory drive belt out of the way. The two nuts and generator shield must be removed while you must tighten them to 25 Nm (18 lb-ft) when installing them. Start by unwinding the locking tabs for removing the generator intermediate air duct before placing the generator protective cover to one side along with the unwiring of the B+ terminal nut from the generator. Reinstall all components by tightening the B+ terminal nut to 12 Nm (106 lb-in). The generator electrical connector along with the generator harness locator from the generator and engine block must be separately disconnected. The technician disconnects the Crankshaft Position (CKP) sensor connector before placing generator harness to the side. The generator separation requires removing its bolt and two nuts and requires the generator bolt torque to be set at 47 Nm (35 lb-ft) during installation. Reinstallation of the generator requires tightening the three bolts and the generator lower air duct to a torque of 4 Nm (35 lb-in). Reattach the generator stud bolts after removal while torquing them to 24 Nm (18 lb-ft). A thorough and reverse reinstall procedure will mark the end of the installation process.
    Posted by FordPartsDeal Specialist
    If you have any questions about this product, please don't hesitate to ask us. We will be happy to help you!

OEM Ford AU2Z-10V346-AXRM, Excellent Performance and Perfect Fitment

To ensure reliability, purchase Ford part # AU2Z-10V346-AXRM Alternator. It is sometimes referred to as Ford Alternator. For those Ford owners who aspire to maintain their vehicles in optimal shape, opting for OEM parts is a wise choice. Precisely engineered, these components adhere to stringent factory guidelines and are produced in state-of-the-art facilities using cutting-edge technologies. Moreover, they are subjected to thorough testing to certify their resilience and safety, thereby making them a dependable option for Ford owners.

FordPartsDeal.com is a leading supplier of genuine Ford parts such as Ford AU2Z10V346AXRM Alternator. A vast selection of genuine Ford parts is available on our website, all offered at discounted prices. Every OEM Ford part is covered by the manufacturer's warranty, which also applies to our hassle-free return policy. Enjoy fast delivery service, ensuring you get your parts when you need them. Your shopping experience here is guaranteed to be pleasurable. For detailed Ford parts information, click here.
Choose FordPartsDeal for discounted prices, exceptional service and fast delivery