
Popular OEM Ford Fusion Parts
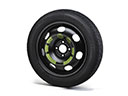
- Body & Hardware Parts View More >
- Electrical Parts View More >
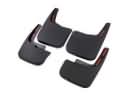
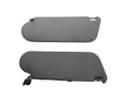
- Interior & Exterior Trim Parts View More >
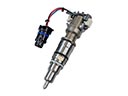
- Air & Fuel Delivery Parts View More >
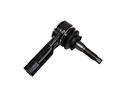
- Steering Parts View More >
- Emission Control & Exhaust Parts View More >
- Charging & Starting Parts View More >
- Engine Parts View More >
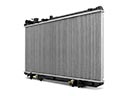
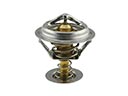
- Belts & Cooling Parts View More >
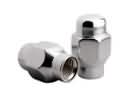
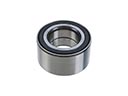
- Suspension Parts View More >
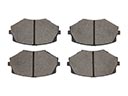
- Brakes Parts View More >
- A/C & Heating Parts View More >


Why Buy Genuine Ford Fusion Parts From FordPartsDeal.com
FordPartsDeal.com offers a smart and convenient way to buy genuine parts online. We sell new OEM Ford Fusion parts, including Headlights & Lighting. Authorized dealers directly provide all the Ford Fusion parts and assemblies to ensure the optimal quality and fit. We also provide all properly fitting Ford Fusion parts, such as Transmission, Driveline & Axles specific to your model. When you shop here, you get real Ford value at highly competitive prices. All our products come with the same Ford warranty available at other dealerships. Our easy-to-use catalog helps you quickly identify the right part for your car. You'll receive fast shipping from our warehouse network, keeping your Ford Fusion running smoothly. Our staff consists of Ford professionals who are ready to assist you. We aim to treat each customer as if they were stepping out of a Ford showroom. VIN verification and our live support ensure that the part you order is the right Ford Fusion part for your vehicle.
Launched between 2006 and 2020, the Ford Fusion went through a continuous development throughout two generations, with the first hybrid version introduced in 2010, while a plug-in variant, Fusion Energi entered production in 2013. First Ford Fusion was assembled on the CD3 platform, used by the Lincoln MKZ and Mercury Milan, whereas the second generation Ford Fusion switched to the global CD4 platform in line with the European Mondeo for better handling and rigidity. The standard powertrains comprised of the Duratec 2.3L and 2.5L I4, while enthusiasts got the Ford Fusion Sport (2017–2019), with a 2.7L EcoBoost V6 that churned 325 horsepowers. The transmission offered included 5-speed manuals and 6-speed automatics, in addition to hybrid models' eCVTs, catering for both economy and performance. New safety features introduced during it's lifetime included, Ford's SYNC multimedia system, rear parking assist and also available advanced features such as, lane-keeping assist and adaptive cruise control in models later in its life. Earlier versions had ABS and side airbags as optional while they became standard in the later production years. To maintain Ford Fusion's performance and safety, an owner should first prefer using authentic OEM Ford parts specifically engineered for perfect fitment and long-term reliability throughout all powertrain and safety systems to ensure that the vehicle maintains the exacting Ford quality standards.
Ford Fusion falls into the cluster of the engine timing controls, exhaust gas metering, and interior electronics. In timing control, low quality oil or dirt may clog the VCT solenoid. The Fusion can light warning, and save cam timing codes. Replace the VCT solenoid and check the oil pressure on the Fusion. Check oil control passages with regard to sludge and check the cam phaser operation. Do Ford diagnostics, read the codes, and perform idle relearn if needed. In terms of dragginess, a faulty DPFE sensor causes inaccurate reading of flow and pressure on the EGR valve. The Fusion stalls, stammers and may lose power during light acceleration. Examine vacuum lines, measure reference voltage, and perform a check of fuel trims on the Fusion. Make a replacement or repair of a damaged EGR valve, and update programming where necessary. Check vacuum leaks in keeping with the manifold gaskets and PCV connections. In interior electronics, the instrument cluster can revert to the default state once the car is key off. It is possible that the Fusion loses clock settings or trip data between drives. Ford updated the software, check charging voltage, resea connectors to work steady. Cap it off with a road test in which jerkiness and response should be restored. To keep the Fusion reliable, have your document serviced by following the Ford maintenance schedules.
Ford Fusion Parts and Q&A
- Q: How to service the radiator grille on Ford Fusion?A:When it comes to service of the radiator grille, the first step would be to remove the front bumper cover. Next, remove the radiator grille in the bumper cover by unscrewing. Disconnect the grille to the clips and remove it. Installation of the new grille is easy; one needs to reverse the process to remove it.
- Q: How to service and repair the oil filter on Ford Fusion?A:In order to service the oil filter, place the vehicle on a hoist in neutral. Take off oil filter access cover screws, loosen oil filter cover and drain the engine oil. Change the oil filter and seals, wipe the surfaces and install parts correctly with the correct torque to avoid leakages.
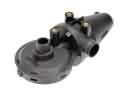
- Q: How to service the water pump on a 2.3L engine on Ford Fusion?A:In order to service a coolant pump in a 2.3L engine, lift up the vehicle, empty the cooling system and unscrew the pulley bolts. Take out the pump and O-ring seal followed by installation of the new pump with lubricated O-ring with tightening bolts of 10 Nm. Lastly: fill and bleed the cooling system.


