My Garage
Cart
Make sure this part fits

Ford 8A5Z-5403100-A
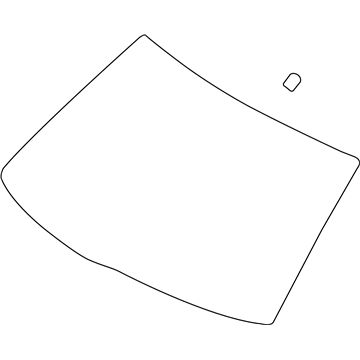
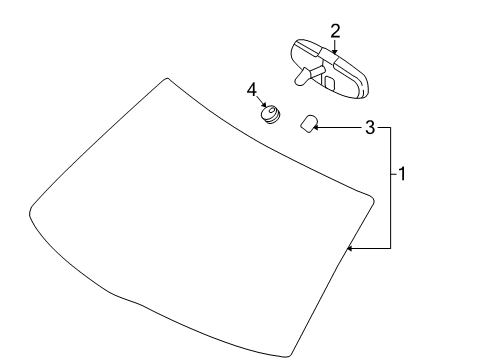
Windshield

2009-2012 Lincoln MKS 8A5Z5403100A

Customer Questions & Expert Answers (3)
Ford 8A5Z-5403100-A Windshield
  • Part Description
    Glass - Windscreen
  • Base No.
    <03100
  • Manufacturer
    Ford
Make sure this part fits
$229.89 MSRP: $337.58
You Save: $107.69 (32%)
Ships in 1-3 Business Days
1
ADD TO CART
  • Related Parts
  • Product Specifications
  • Vehicle Fitment
  • Customer Questions & Expert Answers
  • Product Specifications

    BrandGenuine Ford
    Base No.<03100
    Manufacturer Part Number8A5Z-5403100-A
    Part DescriptionGlass - Windscreen
    Item Weight37.40 Pounds
    ConditionNew
    Fitment TypeDirect Replacement
    ManufacturerFord
    SKU8A5Z-5403100-A
    WarrantyThis genuine Ford part is guaranteed by Ford's factory warranty.
    Shipping & ReturnShipping Policy Return Policy
    Warning: California's Proposition 65
  • Vehicle Fitment

    Year Make Model Trim Engine
    2009-2012 Lincoln MKSBase, EcoBoost6 Cyl 3.5 L GAS, 6 Cyl 3.7 L GAS
  • Customer Questions & Expert Answers

    Q:
    Will this 8A5Z-5403100-A work in my car? Posted by FordPartsDeal Specialist
    A:
    Select Your Vehicle model to verify if part number 8A5Z-5403100-A fits your car.
    Posted by FordPartsDeal Specialist
    Q:
    How to reseal the windshield on Lincoln MKS? Posted by Customer
    A:
    Start the windshield resealing process by displacing the front parts of both left-hand (LH) and right-hand (RH) roof ditch mouldings while removing front scrivets to release their mount clips. The windshield resealing procedure begins by taking out the upper cowl panel grille then continuing with the LH and RH A-pillar trim panels and overhead console and additional rain sensor if present. Start by taking out the passenger front assist handle together with the LH and RH sun visors before lowering the front section of headliner coverage with suitable blocking materials. Glass cleaner should be used to clean all interior and exterior windshield glass surfaces. The urethane adhesive applicator tip should be trimmed down to 6 mm (0.24 in) specifically to be used with a high-ratio electric or battery-operated caulk gun that can distribute the adhesive smoothly to existing adhesive areas. All spaces should blend seamlessly into single continuous beads. The technician should apply adhesive to the windshield top and sides through the interior vehicle access while applying adhesive to the windshield bottom outside of the vehicle. Transport to a testing station after one hour urethane adhesive curing period for air and water leak inspections with possible additional adhesive application. When the urethane adhesive cures completely reinstall the front portion of the headliner followed by sun visors on both sides together with the passenger front assist handle and any rain sensor equipped with overhead console and A-pillar panels and upper cowl panel grille. Install the scrivet after repositioning LH and RH roof ditch mouldings then conduct a last cleansing process of interior and exterior windshield glass with glass cleaner.
    Posted by FordPartsDeal Specialist
    Q:
    How to remove and install windshield glass on Lincoln MKS? Posted by Customer
    A:
    The windshield glass removal process starts with displacing the left-hand (LH) and right-hand (RH) roof ditch mouldings' front sections by removing their front scrivets and pulling upward to detach the front clips. You must begin the windshield removal process by taking off the upper cowl panel grille and both LH and RH A-pillar trim panels and the overhead console along with the rain sensor (if wipers are rain-sensitive) and passenger front assist handle and LH and RH sun visors. The front segment of the headliner should be lowered before blocking it with proper materials. You must use eye protection together with protective gloves while performing this operation. Apply water to the present urethane adhesive so the Deluxe Windshield Removal Tool can cut the adhesive by beginning at the top center and proceeding toward the bottom corners. Complete the windshield glass removal through the following steps: use The Pumper and increase the windshield glass distance from the vehicle body and then cut away the remaining urethane adhesive before extracting the glass. The windshield glass should be fitted dry to the existing urethane adhesive bead found on the body pinch weld while maintaining uniform positioning. Apply non-permanent pencil marks on glass and body to verify their alignment. Set the windshield glass on an unmovable surface. Any corrosion on the pinch weld requires repair and the weld must be kept free from all scratches. Cut away 1 mm to 2 mm of urethane adhesive from the edges before vacuum cleaning and brushing the surface of the pinch weld. The process of reusing original glass requires removal of surplus urethane adhesive followed by application of glass cleaner to the inside surface. Follow manufacturer directions regarding glass primer application then let the primer sit for a duration of 6 minutes before proceeding. A high-ratio electric or battery-operated caulk gun should be used to apply urethane adhesive after trimming the bead while avoiding gaps in the application. It is essential to open all vehicle windows before moving the windshield glass into position because atmospheric pressure could influence the adhesive bond. Work with the marks to position the windshield glass before starting vehicle operation until the urethane adhesive reaches full cure as stated by the manufacturer. Cured windshield seals must be examined for leaks before adding more adhesive if needed. To finish the process install the headliner then position the sun visors and passenger front assist handle followed by the rain sensor when equipped before connecting electrical connectors while installing overhead console and adding A-pillar trim panels upper cowl panel grille along with roof ditch mouldings that you would secure with the scrivet. Use glass cleaner to clean the interior and exterior parts of the windshield glass thoroughly.
    Posted by FordPartsDeal Specialist
    If you have any questions about this product, please don't hesitate to ask us. We will be happy to help you!

OEM Ford 8A5Z-5403100-A, Excellent Performance and Perfect Fitment

To ensure reliability, purchase Ford part # 8A5Z-5403100-A Windshield. It is sometimes referred to as Ford Windshield. For those Ford owners who aspire to maintain their vehicles in optimal shape, opting for OEM parts is a wise choice. Precisely engineered, these components adhere to stringent factory guidelines and are produced in state-of-the-art facilities using cutting-edge technologies. Moreover, they are subjected to thorough testing to certify their resilience and safety, thereby making them a dependable option for Ford owners.

FordPartsDeal.com is a leading supplier of genuine Ford parts such as Ford 8A5Z5403100A Windshield. A vast selection of genuine Ford parts is available on our website, all offered at discounted prices. Every OEM Ford part is covered by the manufacturer's warranty, which also applies to our hassle-free return policy. Enjoy fast delivery service, ensuring you get your parts when you need them. Your shopping experience here is guaranteed to be pleasurable. For detailed Lincoln parts information, click here.
Choose FordPartsDeal for discounted prices, exceptional service and fast delivery