
Popular OEM Lincoln MKS Parts
- Body & Hardware Parts View More >
- Electrical Parts View More >
- Air & Fuel Delivery Parts View More >
- Steering Parts View More >
- Emission Control & Exhaust Parts View More >
- Charging & Starting Parts View More >
- Engine Parts View More >
- Belts & Cooling Parts View More >
- Suspension Parts View More >
- Brakes Parts View More >
- A/C & Heating Parts View More >
- Headlights & Lighting Parts View More >


Why Buy Genuine Lincoln MKS Parts From FordPartsDeal.com
FordPartsDeal.com offers a smart and convenient way to buy genuine parts online. We sell new OEM Lincoln MKS parts, including Transmission. Authorized dealers directly provide all the Lincoln MKS parts and assemblies to ensure the optimal quality and fit. We also provide all properly fitting Lincoln MKS parts, such as Driveline & Axles specific to your model. When you shop here, you get real Lincoln value at highly competitive prices. All our products come with the same Lincoln warranty available at other dealerships. Our easy-to-use catalog helps you quickly identify the right part for your car. You'll receive fast shipping from our warehouse network, keeping your Lincoln MKS running smoothly. Our staff consists of Lincoln professionals who are ready to assist you. We aim to treat each customer as if they were stepping out of a Lincoln showroom. VIN verification and our live support ensure that the part you order is the right Lincoln MKS part for your vehicle.
At the LA Auto Show in late 2007 the Lincoln MKS debuted as a 2009 model while introducing its brand nameplate to the market and succeeding the Lincoln Town Car. MKS came standard with front-wheel drive (FWD), with all-wheel drive (AWD) available as an option. The EcoBoost variant came only with AWD. The vehicle measures 112.9 inches for wheelbase while its dimensions extend to 204.2 inches lengthwise and 75.9 inches widthwise at 61.6 inches in height with curb weights between 4,127 and 4,276 pounds. A standard powertrain for the Lincoln MKS includes a 3.7L V6 engine that delivers 273 horsepower with 270 pounds-per-foot of torque while being matched with a six-speed automatic transmission. With its available turbocharged 3.5L V6 engine there is a possible rating of 365 horsepower and 350 pounds-per-foot of torque that becomes more powerful specifically when equipped with all-wheel drive. Traction control and stability control join multiple airbags as advanced safety features that the Lincoln MKS includes in its design. Several modifications occurred from the time Lincoln MKS began production in 2013 until its conclusion in 2016 to keep both the engine and transmission systems reliable and efficient. To keep their Lincoln MKS vehicle performing at its peak owners should choose original Lincoln parts because these components fulfill Lincoln's exacting product standards which provide long-lasting operational reliability.
Lincoln MKS concerns group into infotainment electronics, brake hardware, and drivetrain sealing and lubrication. In the electrical system, the MKS may show radio noise, no audio, or SYNC faults. Root causes often involve corrupted software in the audio control module or network mismatches. Perform module scan, install updates, then reinitialize the radio and confirm stable operation. For braking, some MKS vehicles produce grunting under light stops and display uneven rotor wear. Anchor bracket geometry increases pad edge loading, which accelerates rotor and brake pads wear. For fixing, replace new pads and rotors, clean bracket slides, and install the revised bracket. MKS models can leak red or brown fluid around the axle area due to the drivetrain issue. Red fluid indicates transmission seals, brown indicates power transfer unit leakage. Inspect axle seals and PTU cover sealing, then replace damaged seals and verify fluid level. Clean all residual oil, road test the MKS, and check for renewed weeping. Across systems, Lincoln diagnosis should verify codes, wiring integrity, and software currency before mechanical repairs. Confirm Lincoln bulletins for bracket updates and pad compound selection. Follow Lincoln guidance for torque values and fluid specifications. A final validation drive ensures the MKS returns to normal performance.
Lincoln MKS Parts and Q&A
- Q: How to service the radiator on Lincoln MKS?A:Service the radiator, drain the cooling system, disassemble the fan motor, shroud and the bumper cover. Unplug the upper and lower radiator hose, unscrew the support brackets and strip off the A/C condenser bolts. To install the radiator again, follow the reversed steps of installing the radiator, tightening the bolts to 6 Nm and refill the cooling system.
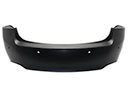
- Q: How to remove and replace the front bumper cover on Lincoln MKS?A:In order to change the front bumper cover, make sure the vehicle is on neutral in a hoist. Take out the bumper cover scrivets and bolts, wheel house screws and loosen the electrical connectors. Take off the lower air deflector scrivets, draw out the bumper cover, look at the reinforcements, and invert the process to put in place.
- Q: How to service and repair the alternator on Lincoln MKS?A:In order to fix the alternator, the battery should be disconnected, engine cover taken off and the radiator hose support removed. Lift the cover of the generator, remove electrical connector and generator. Install the generator once again, and connect bolts, electrical connector, and other parts, then after that, you can reconnect the battery.


