FordParts
My Garage
My Account
Cart
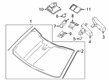
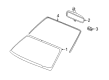
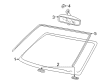
OEM Ford Windshield
Glass Windshield- Select Vehicle by Model
- Select Vehicle by VIN
Select Vehicle by Model
orMake
Model
Year
Select Vehicle by VIN
For the most accurate results, select vehicle by your VIN (Vehicle Identification Number).
243 Windshields found


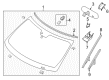
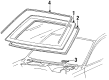
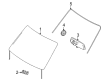
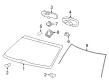
Ford Windshield, Front Part Number: YL8Z-7803100-AA
$218.83 MSRP: $321.33You Save: $102.50 (32%)Ships in 1-2 Business DaysProduct Specifications- Other Name: Glass - Windscreen; Windshield, Front
- Position: Front


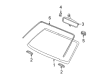
Ford Windshield, Front Part Number: FB5Z-7803100-E
$389.48 MSRP: $571.92You Save: $182.44 (32%)Product Specifications- Other Name: Glass - Windscreen; Windshield Glass, Front
- Position: Front


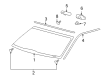
Ford Windshield, Front Part Number: 3L3Z-1503100-AA
$209.04 MSRP: $306.97You Save: $97.93 (32%)Product Specifications- Other Name: Glass - Windscreen; Windshield, Front
- Position: Front


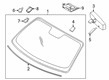
Ford Windshield, Front Part Number: 3C2Z-1503100-AA
$213.86 MSRP: $314.03You Save: $100.17 (32%)Product Specifications- Other Name: Glass - Windscreen; Windshield, Front
- Manufacturer Note: Green tint - includes mirror bracket
- Position: Front


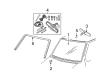
Ford Windshield Part Number: F5ZZ-6303100-AA
$218.57 MSRP: $320.95You Save: $102.38 (32%)Product Specifications- Other Name: Glass - Windscreen
- Manufacturer Note: Green tint - includes glass,rear view mirror bracket and windshield moulding, Coupe, BEFORE 02/22/99


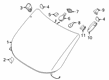
Ford Windshield, Front Part Number: 9T1Z-5803100-D
$219.74 MSRP: $322.67You Save: $102.93 (32%)Product Specifications- Other Name: Glass - Windscreen; Windshield, Front
- Position: Front
- Replaces: 9T1Z-5803100-C


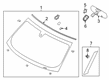
Ford Windshield, Front Part Number: 9C2Z-1503100-A
$227.07 MSRP: $333.43You Save: $106.36 (32%)Product Specifications- Other Name: Glass - Windscreen; Windshield Glass, Front; Windshield, Front
- Position: Front
- Replaces: 6C2Z-1503100-AA, 7C2Z-1503100-B


Ford Windshield, Front Part Number: DT1Z-5403100-Y
$245.82 MSRP: $360.97You Save: $115.15 (32%)Product Specifications- Other Name: Glass - Windscreen; Windshield Glass, Front; Windshield, Front
- Position: Front


Ford Windshield, Front Part Number: YR3Z-6303100-AA
$248.02 MSRP: $364.20You Save: $116.18 (32%)Product Specifications- Other Name: Glass - Windscreen; Windshield, Front
- Position: Front


Ford Windshield, Front Part Number: DA8Z-7403100-A
$254.75 MSRP: $374.08You Save: $119.33 (32%)Product Specifications- Other Name: Glass - Windscreen; Windshield Glass, Front; Windshield, Front
- Position: Front


Ford Windshield, Front Part Number: DL3Z-1503100-A
$272.26 MSRP: $399.80You Save: $127.54 (32%)Product Specifications- Other Name: Glass - Windscreen; Windshield, Front
- Manufacturer Note: Top Molding Removed From Service Part, No Longer Required
- Position: Front


Ford Windshield, Front Part Number: 7C3Z-2503100-A
$279.70 MSRP: $410.72You Save: $131.02 (32%)Product Specifications- Other Name: Glass - Windscreen; Windshield, Front
- Position: Front


Ford Windshield, Front Part Number: 4L3Z-1503100-AA
$319.99 MSRP: $469.88You Save: $149.89 (32%)Product Specifications- Other Name: Glass - Windscreen; Windshield, Front
- Manufacturer Note: With "F150" Logo
- Position: Front


Ford Windshield, Front Part Number: FR3Z-6303100-E
$341.90 MSRP: $502.05You Save: $160.15 (32%)Product Specifications- Other Name: Glass - Windscreen; Windshield Glass, Front; Windshield, Front
- Position: Front
- Replaces: FR3Z-6303100-A

Ford Windshield, Front Part Number: DL3Z-1503100-B
$342.38 MSRP: $502.77You Save: $160.39 (32%)Product Specifications- Other Name: Glass - Windscreen; Windshield, Front
- Position: Front

Ford Windshield, Front Part Number: FR3Z-6303100-H
$353.34 MSRP: $518.85You Save: $165.51 (32%)Product Specifications- Other Name: Glass - Windscreen; Windshield Glass, Front; Windshield, Front
- Position: Front
- Replaces: FR3Z-6303100-F, FR3Z-6303100-D


Ford Windshield, Front Part Number: JL3Z-1503100-B
$374.15 MSRP: $549.42You Save: $175.27 (32%)Product Specifications- Other Name: Glass - Windscreen; Windshield Glass, Front
- Position: Front
- Replaces: FL3Z-1503100-A, GL3Z-1503100-A


Ford Windshield, Front Part Number: EC3Z-2503100-A
$391.81 MSRP: $575.35You Save: $183.54 (32%)Product Specifications- Other Name: Glass - Windscreen; Windshield Glass, Front; Windshield, Front
- Position: Front

Ford Windshield, Front Part Number: 8C3Z-2803100-A
$507.48 MSRP: $745.20You Save: $237.72 (32%)Product Specifications- Other Name: Glass - Windscreen; Windshield, Front
- Manufacturer Note: With Logo
- Position: Front


Ford Windshield, Front Part Number: 4C3Z-2803100-AA
$579.07 MSRP: $857.88You Save: $278.81 (33%)Product Specifications- Other Name: Glass - Windscreen; Windshield, Front
- Manufacturer Note: Production only - Green tint, w/o shade band, w/Harley Davidson logo
- Position: Front
| Page 1 of 13 |Next >
1-20 of 243 Results
Ford Windshield
If you own Ford and want to keep it in top shape, choosing OEM Windshield is a smart move. They are precisely engineered and follow strict factory standards. They are made in advanced facilities that use cutting edge technology. Each part goes through thorough testing to confirm strength and safety, so you can trust it. FordPartsDeal.com gives you genuine Ford Windshield at some of the affordable online prices without cutting quality. Every OEM Ford part includes the manufacturer's warranty, easy returns, and super-fast delivery. So why wait? Shop now and get your vehicle back to peak condition.
Ford Windshield maintains the view and shields the occupants during highway revenge with trash. In 1903, Ford drove out its first vehicle, and over the next ten years, has demonstrated that mass mobility can progress without emptying wallets or even smogging urban areas. Starting with the moving assembly line in 1913, which reduced the time and costs of building, continuing with strident EcoBoost engines that squeeze turbo muscle out of tiny fuel sips, and then adding SYNC voice control that calls on routes and lanes without raising fingertips, and now introducing Co-Pilot360 aids that spot a lane and squeeze. The Ford puts tempered-laminate Windshield glass in its interior that has a clear vinyl layer sandwiched between two layers and therefore rock hits are known to spider and stick instead of bursting inward and its slight curvature cuts air to take off drag and cabin roar. When the sun turns into sleet, Ford then applies UV blockers and acoustic films to each Windshield, making cabins colder, conversations more understandable and wiper sweeps devoid of noises at highway speeds. Drivers love the way Ford adheres the Windshield to the frame, which makes the roof stronger and does not affect the sightlines despite years of vibration and unforeseen pothole bangs.
Ford Windshield Parts and Q&A
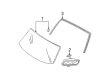
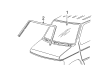
- Q: How to reseal a windshield on Ford Focus?A:A windshield reseal process starts with cowl panel grille removal after which technicians should proceed to remove the left-hand (LH) and right-hand (RH) A-pillar trim panels and the LH and RH sun visors with their retaining clips. Remove the trim ring from around the opening panel then lower the front part of the headliner by securing it properly. Apply glass cleaner to clean all surfaces of the windshield glass both inside and outside. Proceed to cut the urethane adhesive tip according to specifications before applying adhesive with a high-ratio electric or battery-powered caulk gun to create consistent beads while avoiding gaps in the adhesive line. The work starts by placing urethane adhesive on the existing urethane covering both the top and sides of the windshield seen from within the cabin and afterward it continues on the windshield bottom from the exterior. The urethane adhesive needs at least one hour to cure before performing a test for air and water leaks in the adhesive bead while adding additional adhesive when required. After the curing process ends move the front part of the headliner into position while reinstalling the sun visor retaining clips and components at the left and right sides followed by the replacement of left and right A-pillar trim pieces then mounting the cowl panel grille.
- Q: How to remove and install a windshield glass on Ford Mustang?A:The first step for windshield glass removal requires cowl vent screen removal and interior rear view mirror removal. Coupes need the removal of A-pillar trim panels and overhead console together with sun visor on the left and right sides followed by lowering the front headliner with necessary support. Convertibles require uninstallation of the header trim panel together with both left-hand and right-hand A-pillar trim panels. Before cutting the urethane adhesive clean the pinch weld area on the windshield with a shop towel combined with compressed air which should be free of oil. Water lubrication applied to the adhesive will help operate the Deluxe Windshield Removal Tool although protective eye gear and gloves should be worn at all times during this process. Use the tool by inserting it into the upper windshield middle section and perform a corner-to-corner cut while using The Pumper to maintain separation between windshield and body. Secure the windshield onto a flat and secure location. The new windshield should be placed on to the existing urethane bead while maintaining center alignment before marking the installation points. Treat damaged areas of the pinch weld by eliminating rust while avoiding surface scratches and conduct complete area cleanup. To utilize an existing windshield it is necessary to remove the old adhesive until only a thin layer remains to bond the window. Before applying a new windshield clean its interior surface then add glass primer which needs to dry for at least 6 minutes. The urethane adhesive applicator should undergo dimensional trimming before being used to make an uninterrupted bead that covers the complete area. The windshield installation should begin within 10 minutes from application and vehicle windows should be opened for air pressure control. Check for leaks after the minimum curing time of one hour and only then use additional adhesive if needed. Proceed with the reinstallation of the interior rear view mirror and cowl vent screen while adjusting wiper blade and pivot arms according to necessary specifications.


Related Ford Parts
 Ford Grille
 Ford Air Deflector
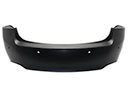 Ford Bumper Cover
 Ford Car Mirror
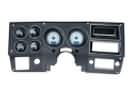 Ford Dash Panel
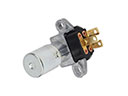 Ford Dimmer Switch
 Ford Seat Switch
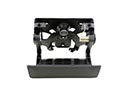 Ford Tailgate Handle
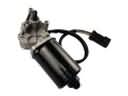 Ford Wiper Motor
 Ford Seat Heater
 Ford Weather Strip
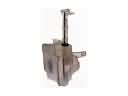 Ford Windshield Washer Fluid Reservoir
Browse Ford Windshield by Models
Ranger Bronco Mustang Explorer Focus Fusion F-150 Maverick Escape Edge Excursion Expedition Fiesta Taurus Thunderbird Flex Transit Connect Bronco Sport Explorer Sport Trac Crown Victoria Probe Bronco II EcoSport Escort F-250 Aerostar Aspire C-Max Contour E-150 Econoline Explorer Sport F-350 Five Hundred Freestar Freestyle Mustang Mach-E Police Interceptor Utility Taurus X Windstar F-350 Super Duty Police Interceptor Sedan E-150 E-150 Club Wagon E-150 Econoline Club Wagon E-250 E-250 Econoline E-350 Club Wagon E-350 Econoline E-350 Econoline Club Wagon E-350 Super Duty E-Transit F-150 Heritage F-150 Lightning F-250 HD F-250 Super Duty Police Responder Hybrid Special Service Police Sedan SSV Plug-In Hybrid Transit-150 Transit-250 Transit-350 Transit-350 HD