My Garage
Cart

OEM 2000 Ford Crown Victoria Axle Shaft

Car Axle Shaft
  • Select Vehicle by Model
  • Select Vehicle by VIN
Select Vehicle by Model
Make
Model
Year
or
Select Vehicle by VIN
For the most accurate results, select vehicle by your VIN (Vehicle Identification Number).

2 Axle Shafts found

  • 2000 Ford Crown Victoria Axle Shaft - F8AZ-4234-DA
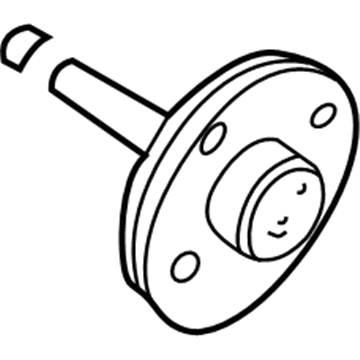
    2000 Ford Crown Victoria Axle Shaft Diagram - F8AZ-4234-DA
    View related parts
    Product Specifications
    • Other Name: Shaft; Axle Shafts; Axle Assembly
    • Base No.: 4234
    • Item Weight: 27.60 Pounds
    • Item Dimensions: 41.2 x 8.3 x 8.6 inches
    • Condition: New
    • Fitment Type: Direct Replacement
    • Require Quantity: 2
    • SKU: F8AZ-4234-DA
    • Warranty: This genuine part is guaranteed by Ford's factory warranty.
    More Info
    Fits the following 2000 Ford Crown Victoria Submodels:
    • Base, LWB, LX, Police Interceptor, S | 8 Cyl 4.6 L CNG, 8 Cyl 4.6 L GAS
  • 2000 Ford Crown Victoria Axle Shaft - F8AZ-4234-CA
    2000 Ford Crown Victoria Axle Shaft Diagram - F8AZ-4234-CA
    View related parts
    Product Specifications
    • Other Name: Shaft; Axle Shafts
    • Manufacturer Note: RH & LH, Non-ABS
    • Base No.: 4234
    • Item Weight: 19.80 Pounds
    • Item Dimensions: 40.5 x 8.4 x 8.4 inches
    • Condition: New
    • Fitment Type: Direct Replacement
    • Require Quantity: 2
    • SKU: F8AZ-4234-CA
    • Warranty: This genuine part is guaranteed by Ford's factory warranty.
    More Info
    Fits the following 2000 Ford Crown Victoria Submodels:
    • Base, LWB, LX, Police Interceptor, S | 8 Cyl 4.6 L CNG, 8 Cyl 4.6 L GAS

2000 Ford Crown Victoria Axle Shaft

If you're seeking quality and affordability, look no further than our extensive inventory of genuine 2000 Ford Crown Victoria Axle Shaft available at FordPartsDeal.com. You can confidently purchase our OEM 2000 Ford Crown Victoria Axle Shaft as they are supported by the manufacturer's warranty and our hassle-free return policy, alongside the benefit of our fast delivery service.

2000 Ford Crown Victoria Axle Shaft Parts Q&A

  • Q: How to service and repair the axle shaft on 2000 Ford Crown Victoria?
    A: The first step for servicing an axle shaft involves unthreading the lug nuts while avoiding heat application because it leads to wheel damage and affects rear wheel bearings. Using the vehicle weight on the wheels, proceed to loosen the lug nuts further after removing the center cap. The right-hand kick panel contains the air suspension switch which needs to be switched off to disable the air suspension system in vehicles that have rear air springs before raising the vehicle for service. Disassemble the rear wheel and tire assembly beginning with removing lug nuts and proceeding to pull out the assembly itself. Begin by untightening the 10 bolts from the differential housing cover while draining all lubricant from the rear axle housing. Clamp off the rear brake anti-lock sensor and move on to detach the rear brake caliper and brake disc. Differential pinion shaft removal demands careful handling since differential case or axle shaft rotation could trigger pinion gears to escape and generate harm. Erase the differential pinion shaft lock bolt before proceeding to unfasten the shaft. The U-washer needs removal only after pushing the axle shaft inboard until it clears the rubber O-ring groove. Secure the pinion shaft lock bolt by first tightening it with fingers only after repositioning the differential pinion shaft by moving outboard with the axle shaft. When taking out the axle shaft prevent any damage to the wheel bearing oil seal. The first step of installation requires Premium Long-Life Grease XG-1-C or an equivalent that meets Ford specification ESA-M1C75-B for lubrication on the wheel bearing oil seal lip. After repeating the differential pinion shaft removal process, avoid damaging the oil seal during axle shaft replacement. Position the U-washer onto the button end of the axle shaft and after pulling the shaft outward the U-washer will automatically fit into the side gear. Position the differential pinion shaft before aligning its lock bolt hole orientation and tighten it with the lock bolt. The procedure continues by putting back the brake disc and caliper followed by the rear brake anti-lock sensor. The motorist must place the differential housing cover in position and add the recommended liquid lubricant to it. The wheel mounting surfaces must be completely cleaned to remove corrosion and dirt which will ensure proper metal contact between surfaces in order to prevent wheel nut loosening. Conclude the repair process by adding the wheel and tire elements together with the center cap followed by activated air suspension systems through the air suspension switch starting the lowering process of the vehicle.