FordParts
My Garage
My Account
Cart
OEM 2000 Lincoln Continental EGR Valve
Emissions EGR Valve- Select Vehicle by Model
- Select Vehicle by VIN
Select Vehicle by Model
orMake
Model
Year
Select Vehicle by VIN
For the most accurate results, select vehicle by your VIN (Vehicle Identification Number).
1 EGR Valve found

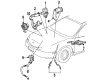
2000 Lincoln Continental EGR Valve Part Number: XF3Z-9D475-AB
Product Specifications- Other Name: Valve - Exhaust Gas; Exhaust Gas Recirculation (EGR) Valve; EGR Vacuum Solenoid; EGR; Valve - Exhaust Gas Recirculation
- Replaces: E9SZ-9D475-B, F7OZ-9D475-AA, F6DZ-9D475-B, XF3Z-9D475-AA, F55Y-9D475-A
- Base No.: 9D475
- Item Weight: 1.30 Pounds
- Item Dimensions: 5.9 x 3.2 x 4.6 inches
- Condition: New
- Fitment Type: Direct Replacement
- SKU: XF3Z-9D475-AB
- Warranty: This genuine part is guaranteed by Ford's factory warranty.
2000 Lincoln Continental EGR Valve
If you're seeking quality and affordability, look no further than our extensive inventory of genuine 2000 Lincoln Continental EGR Valve available at FordPartsDeal.com. You can confidently purchase our OEM 2000 Lincoln Continental EGR Valve as they are supported by the manufacturer's warranty and our hassle-free return policy, alongside the benefit of our fast delivery service.
2000 Lincoln Continental EGR Valve Parts Q&A
- Q: How to Properly Maintain and Troubleshoot the EGR Valve on 2000 Lincoln Continental?A: The first step of EGR valve maintenance requires removal of an air cleaner outlet tube along with a throttle linkage cover through screw and push pin detachment. Disconnection of the EGR tube from both the EGR valve and vacuum hose must be performed before the EGR valve securing bolts are removed. The EGR valve service starts with detachment from the vehicle and simultaneous removal of the EGR valve gasket. Check the EGR valve for blocked passages as well as infected materials and vacuum leaks while performing cleaning operations when needed. The installation requires a backward order of steps which includes fitting the gasket and EGR valve followed by locking them into place with bolts. The bolt tightening must be performed through two separate stages where you start by applying 20 Nm force (14 lb/ft) then turning the bolts another 90 degrees. The installation process ends with tube and hose connection to the EGR valve and proper tightening of the EGR valve tube nut followed by vacuum leak inspection for necessary repair work.
Related 2000 Lincoln Continental Parts
 2000 Lincoln Continental Catalytic Converter
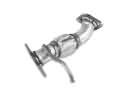 2000 Lincoln Continental Exhaust Pipe
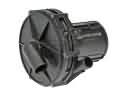 2000 Lincoln Continental Air Injection Pump
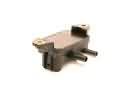 2000 Lincoln Continental EGR Valve Position Sensor
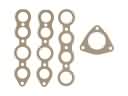 2000 Lincoln Continental Exhaust Manifold
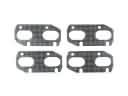 2000 Lincoln Continental Exhaust Manifold Gasket
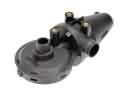 2000 Lincoln Continental PCV Valve
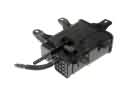 2000 Lincoln Continental Vapor Canister