FordParts
My Garage
My Account
Cart
OEM 2001 Mercury Villager Oil Pan
Oil Drain Pan- Select Vehicle by Model
- Select Vehicle by VIN
Select Vehicle by Model
orMake
Model
Year
Select Vehicle by VIN
For the most accurate results, select vehicle by your VIN (Vehicle Identification Number).
1 Oil Pan found

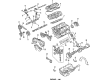
2001 Mercury Villager Oil Pan Part Number: F6XZ-6675-AA
Product Specifications- Other Name: Pan Assembly - Engine Oil; Engine Oil Pan
- Item Weight: 7.10 Pounds
- Item Dimensions: 24.9 x 11.6 x 10.7 inches
- Condition: New
- Fitment Type: Direct Replacement
- SKU: F6XZ-6675-AA
- Warranty: This genuine part is guaranteed by Ford's factory warranty.
2001 Mercury Villager Oil Pan
If you're seeking quality and affordability, look no further than our extensive inventory of genuine 2001 Mercury Villager Oil Pan available at FordPartsDeal.com. You can confidently purchase our OEM 2001 Mercury Villager Oil Pan as they are supported by the manufacturer's warranty and our hassle-free return policy, alongside the benefit of our fast delivery service.
2001 Mercury Villager Oil Pan Parts Q&A
- Q: How to service and repair the oil pan on 2001 Mercury Villager?A: The oil pan repair service requires disconnecting the battery ground cable followed by removing the oil dipstick. Drain fluid from the engine requires first raising the vehicle and taking off the splash shield and then pulling out the draining plug from the oil pan while cleaning it thoroughly to add fresh washer before reinstalling. The Heated Oxygen Sensor (H02S) wire harness should be unclipped first while positioning a screw-type jack under the crankshaft pulley where a shop rag will defend against damage. First remove the through bolts from the LH and RH engine support insulators before moving on to detach the transverse member by removing its bolts. Detach the H02S electrical connector before moving the exhaust outlet pipe toward the side by unfastening its nuts and bolt. Move forward by disconnecting the bolts and nut of the LH transaxle-to-engine brace then finish by taking away the exhaust outlet pipe bracket and transaxle to engine separator plate through their individual bolts. When you remove the oil pan bolts according to the specified sequence you should discard the oil pan seals because you already removed the oil pan. The installation process requires well-cleaned oil pan and mating areas followed by new oil pan seals application with Silicone Gasket and Sealant F7AZ-19554-EA or equivalent material that matches Ford specification WSE-M4G323-A4 for oil pan seals and oil pan application surfaces. First place the oil pan into position before installing its bolts according to the specified tightening sequence. Reinstallation of transaxle-to-engine separator plate must be followed by both RH transaxle-to-engine brace and exhaust outlet pipe bracket preceding LH transaxle-to-engine brace installation. Before the reinstallation you need to connect the H02S electrical connector to the exhaust outlet pipe. Begin by installing the transverse member along with its bolts followed by installing both the LH and RH engine support insulators using through bolts. First detach the screw-type jack along with installing the H02S wire harness before placing the engine splash shield back into position. Users must reinstall the oil level dipstick then forward Super Premium SAE 5W-30 Motor Oil XO-5W30-QSP or its equivalent which satisfies Ford WSS-M2C153-G to the proper mark level while finishing with battery ground cable installation.
Related 2001 Mercury Villager Parts
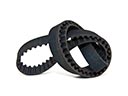 2001 Mercury Villager Timing Belt
 2001 Mercury Villager Camshaft
 2001 Mercury Villager Cylinder Head
 2001 Mercury Villager Cylinder Head Gasket
 2001 Mercury Villager Dipstick
 2001 Mercury Villager Dipstick Tube
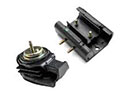 2001 Mercury Villager Motor And Transmission Mount
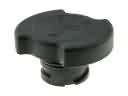 2001 Mercury Villager Oil Filler Cap
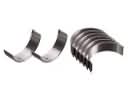 2001 Mercury Villager Rod Bearing
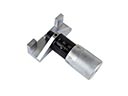 2001 Mercury Villager Timing Belt Tensioner
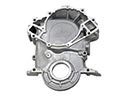 2001 Mercury Villager Timing Cover
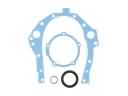 2001 Mercury Villager Timing Cover Gasket