FordParts
My Garage
My Account
Cart
OEM 2002 Lincoln Town Car Blower Control Switches
HVAC Control Switch- Select Vehicle by Model
- Select Vehicle by VIN
Select Vehicle by Model
orMake
Model
Year
Select Vehicle by VIN
For the most accurate results, select vehicle by your VIN (Vehicle Identification Number).
1 Blower Control Switches found

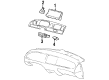
2002 Lincoln Town Car Temperature Control Part Number: 1W1Z-19980-AA
Product Specifications- Other Name: Control; Climate Control Module; Blower Control Switch; Dash Control Unit
- Replaces: YW1Z-19980-AA
- Base No.: 19980
- Item Weight: 2.00 Pounds
- Condition: New
- Fitment Type: Direct Replacement
- SKU: 1W1Z-19980-AA
- Warranty: This genuine part is guaranteed by Ford's factory warranty.
2002 Lincoln Town Car Blower Control Switches
If you're seeking quality and affordability, look no further than our extensive inventory of genuine 2002 Lincoln Town Car Blower Control Switches available at FordPartsDeal.com. You can confidently purchase our OEM 2002 Lincoln Town Car Blower Control Switches as they are supported by the manufacturer's warranty and our hassle-free return policy, alongside the benefit of our fast delivery service.
2002 Lincoln Town Car Blower Control Switches Parts Q&A
- Q: How to Service and Repair Blower Control Switches for Motor Speed on 2002 Lincoln Town Car?A: Draining the engine cooling system is the first step when servicing both the blower motor switch and speed control. The blower motor service begins by disconnecting two components from the evaporative emission canister purge valve which has EVAP canister purge valve as its part number. The service begins by taking away the nut which is attached to the nuts holding the evaporative emission canister purge valve before removing the valve itself. The heater core requires releasing its clamps to detach heater hoses from the heater core followed by removing the hose after releasing its clamp. First disconnect the wire harness connector and remove the nut followed by the stud before moving onto the harness connector disconnect. The blower motor speed control becomes removable with the necessary screw removal steps. The reverse order of removal steps should be used during installation while also performing hose cleaning with hose lubricant or plain water when needed. After completion fill the engine coolant at the proper mark.
Related 2002 Lincoln Town Car Parts
 2002 Lincoln Town Car Blend Door Actuator
 2002 Lincoln Town Car Blower Motor
 2002 Lincoln Town Car Blower Motor Resistor
 2002 Lincoln Town Car Heater Core
 2002 Lincoln Town Car A/C Accumulator
 2002 Lincoln Town Car A/C Compressor
 2002 Lincoln Town Car A/C Hose
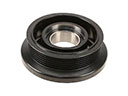 2002 Lincoln Town Car A/C Idler Pulley
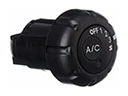 2002 Lincoln Town Car A/C Switch
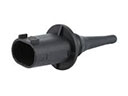 2002 Lincoln Town Car Ambient Temperature Sensor
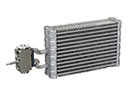 2002 Lincoln Town Car Evaporator
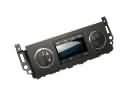 2002 Lincoln Town Car HVAC Control Module