FordParts
My Garage
My Account
Cart
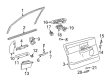
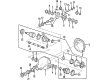
OEM 2002 Mercury Villager Headlight Bulb
Headlamp Bulb- Select Vehicle by Model
- Select Vehicle by VIN
Select Vehicle by Model
orMake
Model
Year
Select Vehicle by VIN
For the most accurate results, select vehicle by your VIN (Vehicle Identification Number).
6 Headlight Bulbs found


2002 Mercury Villager Dome Lamp, Front Part Number: F58Z-13466-A
$5.05 MSRP: $7.17You Save: $2.12 (30%)Ships in 1 Business DayProduct Specifications- Other Name: Bulb; Dome Light, Front; Map Light, Front; Courtesy Light; Trunk Light; Interior Car Bulbs.; Dome Lamp Bulb; Cargo Lamp Bulb; Map Lamp Bulb
- Position: Front
- Replaces: F4DZ-13466-A
- Base No.: 13466
- Item Weight: 0.30 Pounds
- Item Dimensions: 0.4 x 0.4 x 1.0 inches
- Condition: New
- Fitment Type: Direct Replacement
- SKU: F58Z-13466-A
- Warranty: This genuine part is guaranteed by Ford's factory warranty.


2002 Mercury Villager Tail Lamp Bulb, Rear Part Number: F4CZ-13466-A
$2.82 MSRP: $4.00You Save: $1.18 (30%)Ships in 1 Business DayProduct Specifications- Other Name: Bulb; Turn Signal Light Bulb, Front; Rear; Brake; Tail; Back Up; Parking; Headlight; Car Bulbs; Backup Lamp Bulb; Signal, Parking, Marker, Stop Lamp Bulbs; Exterior Bulbs.
- Position: Rear
- Replaces: E5MY-13466-A
- Base No.: 13466
- Item Weight: 1.20 Pounds
- Item Dimensions: 0.4 x 0.4 x 1.0 inches
- Condition: New
- Fitment Type: Direct Replacement
- SKU: F4CZ-13466-A
- Warranty: This genuine part is guaranteed by Ford's factory warranty.


2002 Mercury Villager Bulb & Socket, Rear Part Number: D7TZ-13466-A
$4.41 MSRP: $6.25You Save: $1.84 (30%)Ships in 1 Business DayProduct Specifications- Other Name: Bulb; Center High Mount Stop Light, Rear; Engine Compartment, Back Up, Turn Signal; Parking, Dome, Interior, Tail, Car; Backup Lamp Bulb; Dome Lamp Bulb; Parking Lamp Bulb; High Mount Bulb; Exterior Bulbs.
- Position: Rear
- Base No.: 13466
- Item Weight: 0.30 Pounds
- Item Dimensions: 0.4 x 0.4 x 1.1 inches
- Condition: New
- Fitment Type: Direct Replacement
- SKU: D7TZ-13466-A
- Warranty: This genuine part is guaranteed by Ford's factory warranty.


2002 Mercury Villager Tail Lamp Bulb, Front Part Number: C2AZ-13466-C
$1.26 MSRP: $1.78You Save: $0.52 (30%)Ships in 1-3 Business DaysProduct Specifications- Other Name: Bulb; Turn Signal & Parking Light Bulb; License Plate Light Bulb; Side Marker Light Bulb; Tail Light Bulb; Side Marker Bulb; Signal Lamp Bulb; Dome Lamp Bulb; Parking Lamp Bulb; Exterior Bulbs.
- Position: Front
- Replaces: F4BZ-13466-J, E8GY-13466-C
- Base No.: 13466
- Item Weight: 0.30 Pounds
- Item Dimensions: 0.4 x 0.4 x 1.1 inches
- Condition: New
- Fitment Type: Direct Replacement
- SKU: C2AZ-13466-C
- Warranty: This genuine part is guaranteed by Ford's factory warranty.


2002 Mercury Villager Bulb & Socket, Front Part Number: F4TZ-13N021-B
$13.85 MSRP: $20.17You Save: $6.32 (32%)Ships in 1 Business DayProduct Specifications- Other Name: Bulb; Headlight Bulb, Front; Headlight Bulbs; Car Bulbs; Headlamp Bulb; Composite Headlamp; Bulb & Retainer; Exterior Bulbs
- Position: Front
- Replaces: 6E7Z-13N021-AB
- Base No.: 13N021
- Item Weight: 0.30 Pounds
- Item Dimensions: 0.4 x 0.4 x 1.1 inches
- Condition: New
- Fitment Type: Direct Replacement
- SKU: F4TZ-13N021-B
- Warranty: This genuine part is guaranteed by Ford's factory warranty.

2002 Mercury Villager Tail Lamp Bulb, Lower Outer Part Number: F5DZ-13466-B
$2.03 MSRP: $2.88You Save: $0.85 (30%)Ships in 1-3 Business DaysProduct Specifications- Other Name: Bulb, Turn Signal & Parking, Tail, Backup, License Plate, Side Marker, Headlight; Backup Lamp Bulb; Signal, Parking, Stop, High Mount, Cornering, License, and Parking Light Bulbs.
- Position: Lower Outer
- Replaces: F8DZ-13466-AB, E8AZ-13466-A
- Base No.: 13466
- Item Weight: 0.40 Pounds
- Item Dimensions: 0.4 x 0.4 x 1.0 inches
- Condition: New
- Fitment Type: Direct Replacement
- SKU: F5DZ-13466-B
- Warranty: This genuine part is guaranteed by Ford's factory warranty.
2002 Mercury Villager Headlight Bulb
If you're seeking quality and affordability, look no further than our extensive inventory of genuine 2002 Mercury Villager Headlight Bulb available at FordPartsDeal.com. You can confidently purchase our OEM 2002 Mercury Villager Headlight Bulb as they are supported by the manufacturer's warranty and our hassle-free return policy, alongside the benefit of our fast delivery service.
2002 Mercury Villager Headlight Bulb Parts Q&A
- Q: How to service the front headlight bulb on 2002 Mercury Villager?A: Service of the headlamp bulb begins by disconnecting its electrical connector at first. Begin by turning the headlamp bulb retainer counterclockwise one-eighth of a turn to remove it followed by taking out the bulb from its position. The halogen bulb releases pressurized gas so handle the bulb by its base while avoiding contact with the glass surface. Proper timing is essential to remove the headlamp bulb from point of replacement since delayed handling both reduces performance quality and lets contaminants accumulate on the lens and reflector surface. Start the installation process only when both the headlamp switch and ignition switch show an OFF position. You must install the new headlamp bulb inside the headlamp assembly by tightening the bulb retainer with clockwise rotation for one-eighth turn until it is secure followed by reattaching the electrical connector.
Related 2002 Mercury Villager Parts
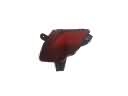 2002 Mercury Villager Bumper Reflector
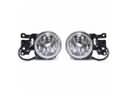 2002 Mercury Villager Fog Light
 2002 Mercury Villager Fog Light Bulb
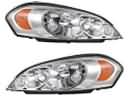 2002 Mercury Villager Headlight
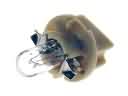 2002 Mercury Villager Instrument Panel Light Bulb
 2002 Mercury Villager Interior Light Bulb
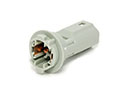 2002 Mercury Villager Light Socket