My Garage
Cart

OEM 2003 Ford Expedition Rack And Pinion

Steering Rack And Pinion
  • Select Vehicle by Model
  • Select Vehicle by VIN
Select Vehicle by Model
Make
Model
Year
or
Select Vehicle by VIN
For the most accurate results, select vehicle by your VIN (Vehicle Identification Number).

1 Rack And Pinion found

  • 2003 Ford Expedition Rack And Pinion - 2L1Z-3504-KERM
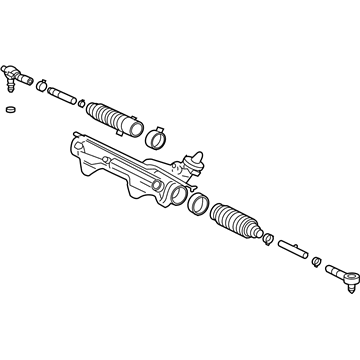
    2003 Ford Expedition Rack And Pinion Diagram - 2L1Z-3504-KERM
    View related parts

    2003 Ford Expedition Steering Gear Part Number: 2L1Z-3504-KERM

    $456.96 MSRP: $750.91
    You Save: $293.95 (40%)
    Ships in 1-2 Business Days
    ADD TO CART
    Product Specifications
    • Other Name: Remanufactured Gear Assembly - Steering; Rack and Pinion Assembly; Steering Gearbox; Gear Assembly
    • Replaces: 2L1Z-3504-KB
    • Base No.: 3504
    • Item Weight: 24.20 Pounds
    • Item Dimensions: 6.0 x 11.1 x 51.5 inches
    • Condition: New
    • Fitment Type: Direct Replacement
    • SKU: 2L1Z-3504-KERM
    • Warranty: This genuine part is guaranteed by Ford's factory warranty.
    More Info
    Fits the following 2003 Ford Expedition Submodels:
    • Eddie Bauer, XLT | 8 Cyl 4.6 L GAS, 8 Cyl 5.4 L GAS

2003 Ford Expedition Rack And Pinion

If you're seeking quality and affordability, look no further than our extensive inventory of genuine 2003 Ford Expedition Rack And Pinion available at FordPartsDeal.com. You can confidently purchase our OEM 2003 Ford Expedition Rack And Pinion as they are supported by the manufacturer's warranty and our hassle-free return policy, alongside the benefit of our fast delivery service.

2003 Ford Expedition Rack And Pinion Parts Q&A

  • Q: How to Service and Repair the Front Rack and Pinion Steering Gear on 2003 Ford Expedition?
    A: Service and repair operations for the rack and pinion require positioning front wheels directly ahead followed by turning off the ignition. Scrutinize the air suspension switch near the rear passenger compartment jack storage as failure to do so will cause the air springs to experience accidental inflation or deflation when carrying out hoisting or jacking or towing. Position the vehicle on a hoist while placing it in the neutral gear. The hex holding feature should stop the stud from rotating when removing nuts to detach tie-rods from wheel knuckles. The second step requires the removal of bolts and oil drip shield before removing lines from the clip. When the intermediate shaft remains disconnected from the rack and pinion it should not rotate because this can harm the clock spring. In this case, the technician will need to remove the clock spring to recenter it. First, detach the intermediate shaft from the rack and pinion using the gear bolt removal and second disconnect the power steering lines with the bolts before setting them away. The electrical connector on Navigator vehicles needs disconnection by turning the actuator to expose the connector housing toward the rack and pinion input shaft. Detach the power steering lines from the rack and pinion while disposing of the nuts and verify that the removal path of the rack and pinion possesses clear access to the lines to prevent any damage. Remove the nuts, bolts, brackets along with the rack and pinion without keeping the nuts. Before tightening bolts on 4x4 vehicles ensure that all wheel end vacuum lines are positioned away from the rack and pinion mounting fasteners to avoid damage. The M14 bracket-to-rack and pinion bolts must be tightened first to prevent damage to the rack and pinion yet M12 bracket-to-crossmember bolts need to be applied second. The completion of the process involves following the removal steps in reverse order while performing system filling and purging with leak testing.