
Popular OEM Ford Expedition Parts
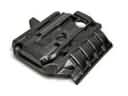
- Body & Hardware Parts View More >
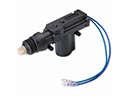
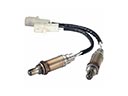
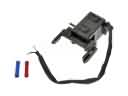
- Electrical Parts View More >
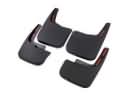
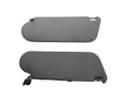
- Interior & Exterior Trim Parts View More >
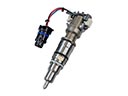
- Air & Fuel Delivery Parts View More >
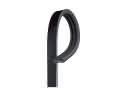
- Steering Parts View More >
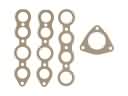
- Emission Control & Exhaust Parts View More >
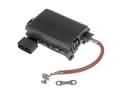
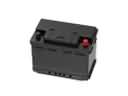
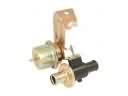
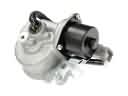
- Charging & Starting Parts View More >
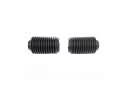
- Engine Parts View More >
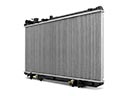
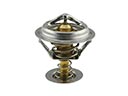
- Belts & Cooling Parts View More >
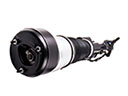
- Suspension Parts View More >
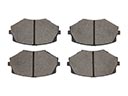
- Brakes Parts View More >
- A/C & Heating Parts View More >


Why Buy Genuine Ford Expedition Parts From FordPartsDeal.com
FordPartsDeal.com offers a smart and convenient way to buy genuine parts online. We sell new OEM Ford Expedition parts, including Headlights & Lighting. Authorized dealers directly provide all the Ford Expedition parts and assemblies to ensure the optimal quality and fit. We also provide all properly fitting Ford Expedition parts, such as Transmission, Driveline & Axles specific to your model. When you shop here, you get real Ford value at highly competitive prices. All our products come with the same Ford warranty available at other dealerships. Our easy-to-use catalog helps you quickly identify the right part for your car. You'll receive fast shipping from our warehouse network, keeping your Ford Expedition running smoothly. Our staff consists of Ford professionals who are ready to assist you. We aim to treat each customer as if they were stepping out of a Ford showroom. VIN verification and our live support ensure that the part you order is the right Ford Expedition part for your vehicle.
The Ford Expedition is a full-size SUV introduced in 1996 and which has been continuously developed, with Ford's new T3 construction featuring wide-scale use of aluminum body introduced on the model year of 2018 onwards as part of the weight-saving and efficiency-evolving solution. Bearing a standard 3.5-liter EcoBoost V 6 engine with both standard and high output models of 375 horse power and 400 horse power respectively, the Ford Expedition combines the powerplant with a 10 speed automatic transmission to deliver impressive performance and increased fuel efficiency. With the Heavy-Duty Trailer Tow Package, the Expedition can with a maximum towing capacity of 9,300 pounds that makes it very capable for both family and utility use. The installation of independent rear suspension first seen from the third generation Ford Expedition and further developed on later models that works in conjunction with optional adaptive steering technology to improve both ride comfort and handling accuracy. Customers of the Ford Expedition have variety to select from either standard or extended-length (MAX) variants depending on space and cargo requirements. Interior amenities like dual-zone automatic climate control and high-end sound systems are standard at Ford Expedition higher trims, which makes the rides more comfortable and enhance the driving pleasure. In order to keep the Ford Expedition's performance and structural integrity, it is crucial to use genuine OEM Ford and Motorcraft parts, particularly for parts of the aluminum body and the specialized drivetrains which are concerned, to continue proper fit, safety and longevity.
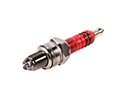
Ford Expedition concerns cluster into ignition and combustion, engine airflow sensing, and engine hardware durability. In the ignition system, Expedition models can eject spark plugs from the cylinder head under load. Short, soft threads let combustion pressure push the plug out, damaging aluminum threads. Install approved thread inserts or replace the cylinder head, then fit updated spark plugs and torque carefully. Expedition engines may also show ignition coil failure caused by excessive spark plug gap. Expect rough idle, flashing lights, and stored misfire codes at higher load. Replace the failed ignition coil, new spark plugs, and all coil boots, then clear codes. For engine airflow control, an aging mass air flow sensor can cause hesitation or stalling on Expedition. Look for unstable trims, low power, and a check engine light. Inspect the air filter seal, check wiring, and replace the mass air flow sensor if values drift. Consistent maintenance keeps the Expedition running smoothly and protects Ford reliability on every trip. After repairs, road test the Expedition, confirm no leaks, and verify steady idle. Follow Ford service procedures for plug torque, coil testing, and airflow diagnostics. Use Ford specifications for gaps and torque values.
Ford Expedition Parts and Q&A
- Q: How to service and repair the power steering pump on Ford Expedition?A:To maintain the power steering pump, the pulley is to be removed and the fluid in the reservoir emptied. Loosen hoses and lines and make sure to screw the connections to the required torque when re-attaching them. Unscrew the pump bolts, install back and use a Teflon pressure line seal installer. Lastly, fill up power steering system.
- Q: How to service and repair the alternator on Ford Expedition?A:To service the alternator, remove the battery, and engine cover and place the air cleaner intake pipe aside. Loose accessory drive belt and take out the generator cables and generator bracket bolts and disconnect electrical connections. Lastly, adjust the lower bolts so as to be able to remove the generator and then reverse the procedure to install it.
- Q: How to remove and replace the rear bumper cover on Ford Expedition?A:In order to replace the rear bumper cover, one must remove the screws of the rear fender splash shield and the inner bumper cover nuts in the first place. Unplug the reverse parking aid connector, should it be available. Then take out the lower pin-type retainers and also the bumper cover. In order to install the new cover, undo the steps of removal.


