FordParts
My Garage
My Account
Cart
OEM 2003 Ford Windstar Bumper
Bumper Fascia- Select Vehicle by Model
- Select Vehicle by VIN
Select Vehicle by Model
orMake
Model
Year
Select Vehicle by VIN
For the most accurate results, select vehicle by your VIN (Vehicle Identification Number).
10 Bumpers found
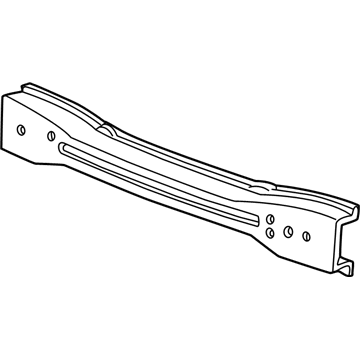
2003 Ford Windstar Impact Bar, Front Part Number: 3F2Z-17757-AA
$104.39 MSRP: $142.06You Save: $37.67 (27%)Product Specifications- Other Name: Bumper Assembly - Front; Bumper Impact Bar, Front
- Position: Front
- Replaces: XF2Z-17757-AA
- Base No.: 17757
- Item Weight: 15.40 Pounds
- Item Dimensions: 8.2 x 6.1 x 54.6 inches
- Condition: New
- Fitment Type: Direct Replacement
- SKU: 3F2Z-17757-AA
- Warranty: This genuine part is guaranteed by Ford's factory warranty.
2003 Ford Windstar Bumper Cover Part Number: YF2Z-17K835-AA
$185.99 MSRP: $253.10You Save: $67.11 (27%)Ships in 1-2 Business DaysProduct Specifications- Other Name: Cover
- Manufacturer Note: Primed, smooth - includes integral step pad, must drill holes for w/park aid. completely interchangeable with YF2Z 17K835-BA, SE, SEL, Limited - w/ or w/o reverse park aid
- Replaces: YF2Z-17B807-EA, YF2Z-17K835-BA
- Base No.: 17K835
- Item Weight: 8.50 Pounds
- Condition: New
- Fitment Type: Direct Replacement
- SKU: YF2Z-17K835-AA
- Warranty: This genuine part is guaranteed by Ford's factory warranty.
2003 Ford Windstar Bumper Cover Part Number: 2F2Z-17K835-JAA
$306.87 MSRP: $421.03You Save: $114.16 (28%)Product Specifications- Other Name: Cover
- Base No.: 17K835
- Item Weight: 9.00 Pounds
- Condition: New
- Fitment Type: Direct Replacement
- SKU: 2F2Z-17K835-JAA
- Warranty: This genuine part is guaranteed by Ford's factory warranty.
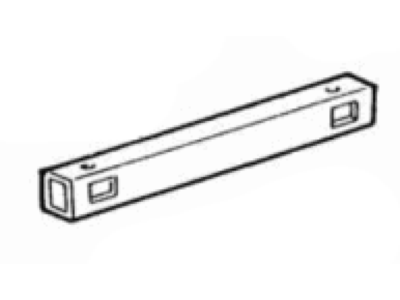
2003 Ford Windstar Impact Bar Part Number: XF2Z-17906-AA
$79.02 MSRP: $109.32You Save: $30.30 (28%)Ships in 1-2 Business DaysProduct Specifications- Other Name: Bumper
- Manufacturer Note: Bar only , order 17K835 cover separately
- Replaces: F68Z-17906-AA
- Base No.: 17906
- Item Weight: 13.40 Pounds
- Item Dimensions: 68.0 x 9.3 x 7.8 inches
- Condition: New
- Fitment Type: Direct Replacement
- SKU: XF2Z-17906-AA
- Warranty: This genuine part is guaranteed by Ford's factory warranty.
2003 Ford Windstar Bumper Cover Part Number: 2F2Z-17D957-NAA
$218.82 MSRP: $300.23You Save: $81.41 (28%)Product Specifications- Other Name: Cover
- Base No.: 17D957
- Item Weight: 22.40 Pounds
- Condition: New
- Fitment Type: Direct Replacement
- SKU: 2F2Z-17D957-NAA
- Warranty: This genuine part is guaranteed by Ford's factory warranty.
2003 Ford Windstar Bumper Cover, Green Part Number: XF2Z-17K835-AAC
Product Specifications- Other Name: Cover
- Base No.: 17K835
- Item Weight: 8.10 Pounds
- Condition: New
- Fitment Type: Direct Replacement
- SKU: XF2Z-17K835-AAC
- Warranty: This genuine part is guaranteed by Ford's factory warranty.
2003 Ford Windstar Bumper Cover, Green Part Number: 1F2Z-17D957-HAB
Product Specifications- Other Name: Cover
- Base No.: 17D957
- Condition: New
- Fitment Type: Direct Replacement
- SKU: 1F2Z-17D957-HAB
- Warranty: This genuine part is guaranteed by Ford's factory warranty.
2003 Ford Windstar Bumper Cover, Gold Part Number: 1F2Z-17D957-HAA
Product Specifications- Other Name: Cover
- Manufacturer Note: Harvest Gold (lower cover) use with (B2) paint code for upper half of cover: paint to match, Base, LX, GL
- Base No.: 17D957
- Item Weight: 12.30 Pounds
- Condition: New
- Fitment Type: Direct Replacement
- SKU: 1F2Z-17D957-HAA
- Warranty: This genuine part is guaranteed by Ford's factory warranty.
2003 Ford Windstar Bumper Cover Part Number: 1F2Z-17D957-KAA
Product Specifications- Other Name: Cover
- Replaces: YF2Z-17D957-KB
- Base No.: 17D957
- Item Weight: 25.00 Pounds
- Condition: New
- Fitment Type: Direct Replacement
- SKU: 1F2Z-17D957-KAA
- Warranty: This genuine part is guaranteed by Ford's factory warranty.
2003 Ford Windstar Bumper Cover, Gray Part Number: 1F2Z-17D957-HAC
Product Specifications- Other Name: Cover
- Base No.: 17D957
- Condition: New
- Fitment Type: Direct Replacement
- SKU: 1F2Z-17D957-HAC
- Warranty: This genuine part is guaranteed by Ford's factory warranty.
2003 Ford Windstar Bumper
If you're seeking quality and affordability, look no further than our extensive inventory of genuine 2003 Ford Windstar Bumper available at FordPartsDeal.com. You can confidently purchase our OEM 2003 Ford Windstar Bumper as they are supported by the manufacturer's warranty and our hassle-free return policy, alongside the benefit of our fast delivery service.
2003 Ford Windstar Bumper Parts Q&A
- Q: How to service and repair the rear bumper cover with parking aid on 2003 Ford Windstar?A: The first step to work on the rear bumper cover with parking aid is removing the entire bumper cover. When replacing a bumper cover the parking aid wiring harness needs to be detached by pressing the tab locks that exist on both connectors. First remove the tabs to take out the four parking aid sensors and next trim the four inner retainers and outer brackets that should be discarded. The location of the new bumper cover should be on a damage-free work surface that is also free of scratches during installation. Insert a 3.18 mm (1/8 in) drill piece inside the bumper cover from its interior side before cutting any holes because excessive trimming may affect the parking aid sensor fit. The correct placement of the sensor depends on its operational needs therefore drill a 1-1/8 inch hole saw perpendicular to the bumper cover surface from its exterior side. The procedure consists of both inboard and outboard holes for Sport vehicles but focuses on outerboard holes for the other vehicles when scribe lines are reached. Start notching the keyways from inside and perform additional oval-shaping on inboard holes for all vehicles except Sport models by using the scribe lines as guide. Use a file on the bottom part of the hole until it achieves the outer bracket and bumper cover match for smooth installation. The outer bracket should be installed only after ensuring that locating ribs on the brackets interact with the locating keyways of the bumper cover. The mounting success depends on correctly placing the foam compression ring to fit between retention and the rear face of the bumper surface. The foam compression rings and inner retainers will be installed but the parking aid sensors or brackets must be kept stationary and the locating lug on the sensor should be aligned to the bracket notch prior to placing the rear parking aid sensors. Secure the parking aid wiring harness through an electric connector attachment process. The process ends with installing the rear bumper cover after screwing it down followed by attaching the parking aid wiring harness electrical connector followed by screwing down six fixtures (three on each side). Finish by attaching pin-type retainers.


