
Popular OEM Ford Windstar Parts
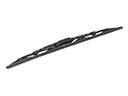
- Body & Hardware Parts View More >
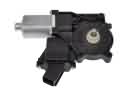
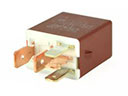
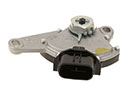
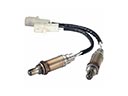
- Electrical Parts View More >
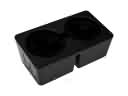
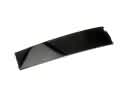
- Interior & Exterior Trim Parts View More >
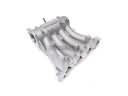
- Air & Fuel Delivery Parts View More >
- Steering Parts View More >
- Emission Control & Exhaust Parts View More >
- Charging & Starting Parts View More >
- Engine Parts View More >
- Belts & Cooling Parts View More >
- Suspension Parts View More >
- Brakes Parts View More >
- A/C & Heating Parts View More >


Why Buy Genuine Ford Windstar Parts From FordPartsDeal.com
FordPartsDeal.com offers a smart and convenient way to buy genuine parts online. We sell new OEM Ford Windstar parts, including Headlights & Lighting. Authorized dealers directly provide all the Ford Windstar parts and assemblies to ensure the optimal quality and fit. We also provide all properly fitting Ford Windstar parts, such as Transmission specific to your model. When you shop here, you get real Ford value at highly competitive prices. All our products come with the same Ford warranty available at other dealerships. Our easy-to-use catalog helps you quickly identify the right part for your car. You'll receive fast shipping from our warehouse network, keeping your Ford Windstar running smoothly. Our staff consists of Ford professionals who are ready to assist you. We aim to treat each customer as if they were stepping out of a Ford showroom. VIN verification and our live support ensure that the part you order is the right Ford Windstar part for your vehicle.
The Ford Windstar existed from 1995 through 2003 offering characteristics for families and combining practical aspects with modern comfort features. Ford Windstar models used to come standard with a 3.0L Vulcan V6 engine but customers could opt for the 4.2L Essex V6 engine in their final models from 2001 to 2003. The Windstar engine design became famous for its dependable driving characteristics because of its combined reliability and efficiency features. The automatic 4-speed transmission of the vehicle maintains quick gear shifts and delivers quick rapid acceleration. The Ford Windstar combines stability features with comfort because its 120.7-inch wheelbase sustains drivers and vehicle occupants who weigh up to 3,800 pounds. Large families benefit from theViewById minivan due to its measurements which extend to 201.2 inches length and 75.4 inches width and 68.0 inches height. The Ford Windstar has maintained continuous recognition of its original equipment manufacturer parts because its components complete extensive safety checks and performance tests. Alternative owners can access certified replacement parts for Ford Windstar vehicles because manufacturers ensure their components stand both high quality and reliable standards for maintenance and repair operations. History honors the Ford Windstar minivan because it holds an enduring place in the minivan industry thanks to its focus on creating products for family-centric requirements.
Ford Windstar issues center on engine air metering, intake hardware durability, and lubrication sealing. For the intake system, a Windstar can set P0171 or P0174 with lean codes. Vacuum leaks often originate at the upper intake manifold gasket or aged hoses. Expect rough idle, surge, and high fuel trims. Perform a smoke test, then replace the upper intake manifold gasket and reseal affected joints. Top end knocking on a Windstar usually points to a broken intake runner within the clamshell. Noise increases with load, and power may dip during acceleration. Replace the intake runner assembly on the Windstar to restore airflow control. Oil odors on a Windstar often trace to a leaking oil pan gasket. Look for drips near the exhaust crossover and oily subframe. Clean the area, then install a new oil pan gasket with correct torque. Verify oil level and recheck for leaks after a road test. Follow Ford diagnostic routines for vacuum testing, intake inspection, and gasket replacement. Use Ford service specifications for clamp torque, idle relearn, and sealing compounds. Check your Windstar after fixing, and confirm fuel trims return normal. Check Ford communications for relevant updates before ordering components.
Ford Windstar Parts and Q&A
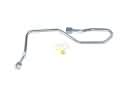
- Q: How to service and repair the power steering pump on Ford Windstar?A:To service the power steering pump, unhook the fuel pump relay, remove the return hose and plug the reservoir. Connect an extension hose to a vacuum container, lift the front wheels and examine the level of fluid. Do not over crank and turn against the stops. cleanse the system when noisy and aerated.
- Q: How to service the cabin air filter on Ford Windstar?A:In order to service the cabin air filter, begin by accessing it in the event that it is provided. It is then followed by placing the filter to remove it. Installation To install, just undo the steps of removal.
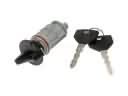
- Q: How to service and repair the ignition coil on Ford Windstar?A:Service To service the ignition coil, remove the cowl, disconnect the electrical connector, and twist and pull the spark plug wires. Next, unscrew the bolts holding the coil and unscrew it. To install, follow the steps of removal in the reverse order to install.


