FordParts
My Garage
My Account
Cart
OEM 2003 Mercury Marauder Front Cross-Member
Front Engine Cross Member- Select Vehicle by Model
- Select Vehicle by VIN
Select Vehicle by Model
orMake
Model
Year
Select Vehicle by VIN
For the most accurate results, select vehicle by your VIN (Vehicle Identification Number).
3 Front Cross-Members found


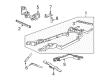
2003 Mercury Marauder Front Crossmember Part Number: 3W1Z-5019-AA
$22.91 MSRP: $32.50You Save: $9.59 (30%)Product Specifications- Other Name: Cross Member Assembly; Frame Crossmember, Front
- Position: Front
- Base No.: 5019
- Item Weight: 9.10 Pounds
- Item Dimensions: 23.2 x 11.6 x 8.4 inches
- Condition: New
- Fitment Type: Direct Replacement
- SKU: 3W1Z-5019-AA
- Warranty: This genuine part is guaranteed by Ford's factory warranty.


2003 Mercury Marauder Transmission Support Part Number: 3W1Z-5027-AA
Product Specifications- Other Name: Crossmember; Transmission Crossmember; Transfer Case Mount; Transmission Mount; Trans Crossmember
- Base No.: 5025
- Item Weight: 33.20 Pounds
- Item Dimensions: 6.4 x 55.6 x 10.5 inches
- Condition: New
- Fitment Type: Direct Replacement
- SKU: 3W1Z-5027-AA
- Warranty: This genuine part is guaranteed by Ford's factory warranty.
 Product Specifications
- Other Name: Cross Member Assembly; Suspension Subframe Crossmember
- Manufacturer Note: Cross member #2, FROM 01-17-06
- Replaces: 4W1Z-5C145-AA, 6W1Z-5C145-A
- Base No.: 5C145
- Item Weight: 62.40 Pounds
- Condition: New
- Fitment Type: Direct Replacement
- SKU: 6W1Z-5C145-BD
- Warranty: This genuine part is guaranteed by Ford's factory warranty.
2003 Mercury Marauder Front Cross-Member
If you're seeking quality and affordability, look no further than our extensive inventory of genuine 2003 Mercury Marauder Front Cross-Member available at FordPartsDeal.com. You can confidently purchase our OEM 2003 Mercury Marauder Front Cross-Member as they are supported by the manufacturer's warranty and our hassle-free return policy, alongside the benefit of our fast delivery service.
2003 Mercury Marauder Front Cross-Member Parts Q&A
- Q: How to service and repair the front cross-member on 2003 Mercury Marauder?A: Hoist vehicle in Neutral. De-energize HO2S, as well as catalyst monitor connections. Take exhaust flange fasteners out, loosen clamps and take pipes out. Take out rear insulator nuts; hold transmission. Take off crossmember bolts and parking brake bracket; pry crossmember. Install reverse: crossmember, bracket, lower transmission, insulator nuts. Install catalytic assemblies, clamps, connectors; install lower vehicle.
Related 2003 Mercury Marauder Parts
 2003 Mercury Marauder Axle Beam
 2003 Mercury Marauder Car Mirror
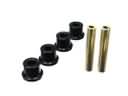 2003 Mercury Marauder Crossmember Bushing
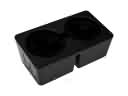 2003 Mercury Marauder Cup Holder
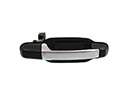 2003 Mercury Marauder Door Handle
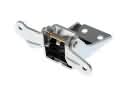 2003 Mercury Marauder Door Hinge
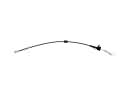 2003 Mercury Marauder Door Latch Cable
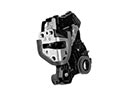 2003 Mercury Marauder Door Lock
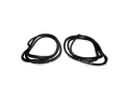 2003 Mercury Marauder Door Seal
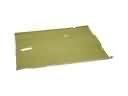 2003 Mercury Marauder Floor Pan
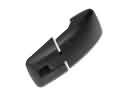 2003 Mercury Marauder Liftgate Hinge
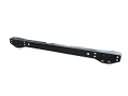 2003 Mercury Marauder Rear Crossmember