FordParts
My Garage
My Account
Cart
OEM 2004 Ford Explorer Sport Trac Timing Cover
Engine Timing Cover- Select Vehicle by Model
- Select Vehicle by VIN
Select Vehicle by Model
orMake
Model
Year
Select Vehicle by VIN
For the most accurate results, select vehicle by your VIN (Vehicle Identification Number).
1 Timing Cover found


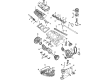
2004 Ford Explorer Sport Trac Timing Cover, Front Part Number: 5L2Z-6019-AA
$63.86 MSRP: $92.95You Save: $29.09 (32%)Product Specifications- Other Name: Cover - Cylinder Front; Engine Timing Cover; Front Cover
- Position: Front
- Replaces: 1L2Z-6019-AA, F77Z-6019-AD
- Base No.: 6019
- Item Weight: 5.60 Pounds
- Item Dimensions: 14.3 x 13.1 x 4.4 inches
- Condition: New
- Fitment Type: Direct Replacement
- SKU: 5L2Z-6019-AA
- Warranty: This genuine part is guaranteed by Ford's factory warranty.
2004 Ford Explorer Sport Trac Timing Cover
If you're seeking quality and affordability, look no further than our extensive inventory of genuine 2004 Ford Explorer Sport Trac Timing Cover available at FordPartsDeal.com. You can confidently purchase our OEM 2004 Ford Explorer Sport Trac Timing Cover as they are supported by the manufacturer's warranty and our hassle-free return policy, alongside the benefit of our fast delivery service.
2004 Ford Explorer Sport Trac Timing Cover Parts Q&A
- Q: How to service and repair the engine front timing cover on 2004 Ford Explorer Sport Trac?A: You should service and repair the engine front cover starting with the vehicle in neutral and on a hoist while disconnecting the ground cable from the battery. Remove the front oil seal of the crankshaft and drain fluid from both the cooling system. Vehicles that have A/C need the A/C line bracket bolt to be removed before setting the A/C line away. The service process begins with disconnecting the generator wiring while positioning it aside and then proceeding to remove accessory bracket bolts, drivebelt tensioner and the wiring harness routing clip and lower cylinder block cradle-to-engine front cover bolts. Remove the wiring harness retainer along with the generator mounting bracket before disconnecting the crankshaft position (CKP) sensor electrical connector and removing the wiring anchors which you should place aside. Reset the clamp on the bypass hose at its coolant pump outlet then remove the clips from both the heater water hose and radiator cooling hose at the bottom. Start by removing engine front cover bolts along with the discarding of its gasket. Before gasket installation the mating surfaces need cleaning but no abrasive equipment is permitted. A new gasket should be installed while applying silicone gasket and sealant to the oil pan and engine block connection points and also to the front cover in two spots. Reconnect the coolant bypass hose clamp prior to installing the engine front cover and complete the installation of the lower radiator and heater water hoses using their clamps. Secure the wiring harness then proceed to install the bolt afterward secure the wiring anchors before connecting the CKP sensor electrical connector and finally install the generator mounting bracket together with the wiring harness retainer. After fitting generator wires you should put on drivebelt tensioner followed by accessory bracket bolts then route the clip before applying cylinder block cradle-to-engine front cover bolts. Place the A/C line bracket then fasten it with the bolt when installing an A/C-equipped vehicle. Draining should be followed by installation of the drain plug and crankshaft front oil seal with engine oil and coolant addition and reconnection of the battery ground cable.
Related 2004 Ford Explorer Sport Trac Parts
 2004 Ford Explorer Sport Trac Oil Filter
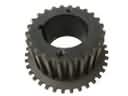 2004 Ford Explorer Sport Trac Crankshaft Gear
 2004 Ford Explorer Sport Trac Crankshaft Pulley
 2004 Ford Explorer Sport Trac Crankshaft Seal
 2004 Ford Explorer Sport Trac Cylinder Head
 2004 Ford Explorer Sport Trac Dipstick
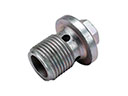 2004 Ford Explorer Sport Trac Drain Plug
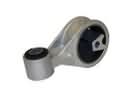 2004 Ford Explorer Sport Trac Engine Torque Strut Mount
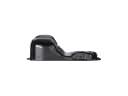 2004 Ford Explorer Sport Trac Oil Pan
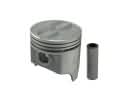 2004 Ford Explorer Sport Trac Piston
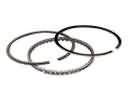 2004 Ford Explorer Sport Trac Piston Ring Set
 2004 Ford Explorer Sport Trac Valve Cover Gasket