FordParts
My Garage
My Account
Cart
OEM 2005 Ford Explorer Radiator
Cooling Radiator- Select Vehicle by Model
- Select Vehicle by VIN
Select Vehicle by Model
orMake
Model
Year
Select Vehicle by VIN
For the most accurate results, select vehicle by your VIN (Vehicle Identification Number).
1 Radiator found
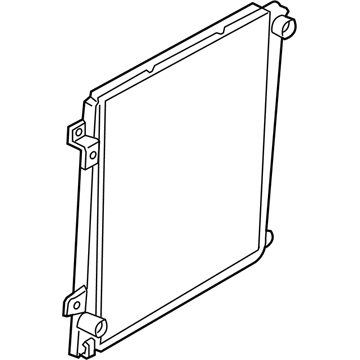
2005 Ford Explorer Radiator Assembly Part Number: H2MZ-8005-H
Product Specifications- Other Name: Radiator
- Replaces: 3L2Z-8005-AA
- Condition: New
- Fitment Type: Direct Replacement
- SKU: H2MZ-8005-H
- Warranty: This genuine part is guaranteed by Ford's factory warranty.
2005 Ford Explorer Radiator
If you're seeking quality and affordability, look no further than our extensive inventory of genuine 2005 Ford Explorer Radiator available at FordPartsDeal.com. You can confidently purchase our OEM 2005 Ford Explorer Radiator as they are supported by the manufacturer's warranty and our hassle-free return policy, alongside the benefit of our fast delivery service.
2005 Ford Explorer Radiator Parts Q&A
- Q: How to Service and Repair the Radiator on 2005 Ford Explorer?A: The first step when servicing the cooling module requires collecting the A/C refrigerant while draining the cooling system. You must begin by taking off the cooling fan and unhinging the upper degas bottle hose from the radiator by unclipping its clamp. The next step involves disconnecting the hose that runs between the radiator and the radiator. The disconnect process of the A/C manifold tube from the LH condenser requires using a 8 Nm torque wrench for tightening the nut while reinstalling this component. Unfasten the clamp and disconnect this hose while tightening both condenser sides with 8 Nm torque. Starting with the lower radiator hose you should open the clamp then disconnect the tube before opening the clamp to detach the lower degas bottle hose from the radiator. Follow the removal steps by taking out the lower fan shroud bolts then reinstall them with a torque of 7 Nm (62 inch lbs.). Remove transmission cooler hoses by releasing their clamps followed by unscrewing the cooling module retaining bolts before final tightening to 12 Nm (9 ft. lbs.) during installation. End the installation by performing the uninstallation steps in reverse order.


