FordParts
My Garage
My Account
Cart
OEM 2005 Ford Thunderbird Timing Cover
Engine Timing Cover- Select Vehicle by Model
- Select Vehicle by VIN
Select Vehicle by Model
orMake
Model
Year
Select Vehicle by VIN
For the most accurate results, select vehicle by your VIN (Vehicle Identification Number).
1 Timing Cover found

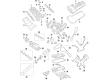
2005 Ford Thunderbird Timing Cover, Front Part Number: 2W9Z-6019-AA
Product Specifications- Other Name: Cover - Cylinder Front; Engine Timing Cover; Front Cover
- Position: Front
- Base No.: 6019
- Item Weight: 6.90 Pounds
- Item Dimensions: 9.1 x 17.0 x 3.1 inches
- Condition: New
- Fitment Type: Direct Replacement
- SKU: 2W9Z-6019-AA
- Warranty: This genuine part is guaranteed by Ford's factory warranty.
2005 Ford Thunderbird Timing Cover
If you're seeking quality and affordability, look no further than our extensive inventory of genuine 2005 Ford Thunderbird Timing Cover available at FordPartsDeal.com. You can confidently purchase our OEM 2005 Ford Thunderbird Timing Cover as they are supported by the manufacturer's warranty and our hassle-free return policy, alongside the benefit of our fast delivery service.
2005 Ford Thunderbird Timing Cover Parts Q&A
- Q: How to Service and Repair the Engine Front Timing Cover to Prevent Engine Failure on 2005 Ford Thunderbird?A: The service and repair of the engine front cover requires cleaning efforts to stop foreign material from resulting in engine failure. Mount the vehicle on a hoist and set it to neutral position before discharging the battery ground cable. The service and repair of the engine front cover requires complete drainage of engine cooling system fluids and engine oil before removing LH and RH valve covers and engine cooling fan assembly together with accessory drive belt idler pulley and crankshaft front seal and A/C compressor and lower radiator hose bracket nut. All lower radiator and upper radiator and heater hoses should get disconnected from the power steering reservoir hose and the two oil cooler hoses if present together with the power steering pressure (PSP) switch. First detach the four power steering pump bolts which include the power steering pressure hose block while setting the pump aside. You should start by taking out five bolts which secure the power steering pump bracket followed by removing the wiring harness clips. Finish by removing the bolts from the engine front cover following a specific order. Apply plastic scraping to clean the sealing surfaces followed by surface cleaning with a metal tool and new gasket installation. A reapplication of cleaning the sealing area should happen if the front cover remains unsecured beyond four minutes of using sealant. Set the engine front cover onto the cylinder block and start the bolt installation loosely before performing two-stage bolt tightening to 5 Nm (44 inch lbs.) and following with 10 Nm (89 inch lbs.). First reinstall the wiring harness clips before putting in the power steering pump bracket with five bolts at 25 Nm (18 ft. lbs.) torque and finally place the power steering pump with four bolts reaching the same torque rating of 25 Nm (18 ft. lbs.). After connecting the PSP switch and power steering reservoir hose and the two oil cooler hoses if your vehicle is equipped you should proceed to attach the lower radiator and upper radiator and heater hoses. The mechanic tightens lower radiator hose bracket nut to 10 Nm (89 inch lbs.) before installing the A/C compressor while also adding the crankshaft front seal and accessory drive belt idler pulley and engine cooling fan assembly. The service ends with installing the valve covers before filling the engine with fresh oil and reattaching the ground cable then powering up the power steering system and filling the cooling system correctly. Doing so avoids damage to the engine. The A/C system evacuation combined with recharging completes this service procedure.
Related 2005 Ford Thunderbird Parts
 2005 Ford Thunderbird Crankshaft Seal
 2005 Ford Thunderbird Dipstick Tube
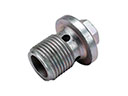 2005 Ford Thunderbird Drain Plug
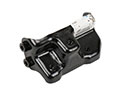 2005 Ford Thunderbird Engine Mount Bracket
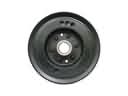 2005 Ford Thunderbird Harmonic Balancer
 2005 Ford Thunderbird Oil Pan Gasket
 2005 Ford Thunderbird Oil Pump
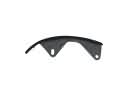 2005 Ford Thunderbird Timing Chain Guide
 2005 Ford Thunderbird Timing Chain Tensioner
 2005 Ford Thunderbird Timing Cover Gasket
 2005 Ford Thunderbird Valve Stem Seal
 2005 Ford Thunderbird Variable Timing Sprocket