
Popular OEM Ford Thunderbird Parts
- Body & Hardware Parts View More >
- Electrical Parts View More >
- Interior & Exterior Trim Parts View More >
- Air & Fuel Delivery Parts View More >
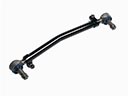
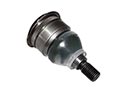
- Steering Parts View More >
- Emission Control & Exhaust Parts View More >
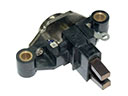
- Charging & Starting Parts View More >
- Engine Parts View More >
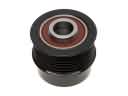
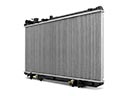
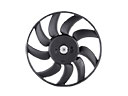
- Belts & Cooling Parts View More >
- Suspension Parts View More >
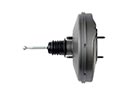
- Brakes Parts View More >
- A/C & Heating Parts View More >


Why Buy Genuine Ford Thunderbird Parts From FordPartsDeal.com
FordPartsDeal.com offers a smart and convenient way to buy genuine parts online. We sell new OEM Ford Thunderbird parts, including Headlights & Lighting. Authorized dealers directly provide all the Ford Thunderbird parts and assemblies to ensure the optimal quality and fit. We also provide all properly fitting Ford Thunderbird parts, such as Transmission, Driveline & Axles specific to your model. When you shop here, you get real Ford value at highly competitive prices. All our products come with the same Ford warranty available at other dealerships. Our easy-to-use catalog helps you quickly identify the right part for your car. You'll receive fast shipping from our warehouse network, keeping your Ford Thunderbird running smoothly. Our staff consists of Ford professionals who are ready to assist you. We aim to treat each customer as if they were stepping out of a Ford showroom. VIN verification and our live support ensure that the part you order is the right Ford Thunderbird part for your vehicle.
The Ford Thunderbird underwent eleven generations of production spanning from 1955 to 1997 and again from 2002 to 2005. The Ford Thunderbird debuted in 1955 with a sports convertible design featuring two seats and integrating sporty design with relaxed features which made it different from mainstream sports cars. From its original release in 1955 the first Ford Thunderbird model category offered a 292 CID V8 engine producing 193 horsepower along with a Ford-O-Matic three-speed automatic transmission which delivered refined gear shifting. The Ford Thunderbird underwent successive developments that included the installment of enhanced 430 CID V8 engines within different generations thus improving its velocity on diverse terrains. Introduced in 1977 as part of the sixth-generation line the Thunderbird got enlarged dimensions which raised its interior capacity and refined its position as a luxury and comfort vehicle. The 2002-2005 final Thunderbird edition brought two seats back alongside a 3.9-liter V8 engine which received the 5R55N automatic transmission addition of SelectShift manual controls for more direct driver control. The maker of Ford Thunderbirds depended on its esteemed reputation for quality standards since the car incorporated original components made for meeting strict factory requirements for extended operational reliability. Through their extensive collection of original equipment manufacturer parts the company demonstrates its quality values by providing components that meet the original specifications for the first Ford Thunderbird model.
Ford Thunderbird issues group into ignition, engine sealing, and misfire monitoring across the powertrain. The Thunderbird may misfire, idle rough, or show a warning lamp under load. Moisture or oil can reach the ignition coil and spark plug wells on the Thunderbird. A revised ignition coil improves sealing and reduces repeat faults on many Thunderbird models. Engine sealing faults arise when a leaking valve cover gasket lets oil flood plug tubes. Oil in the wells shorts ignition, triggers a Check Engine Light, and causes steady misfires. Reseal the valve cover gasket, then replace damaged plugs and coils, and verify dry wells. For system control, the Thunderbird can log misfire counts after extended heat soak or rain. Run Ford scan tests, check mode six data, and confirm coil dwell and fuel trims. Replace failed coils in matched pairs, clear codes, and perform a road test in the Thunderbird. Follow Ford procedures for torque values, connector sealing, and battery precautions during ignition service. Use parts that meet Ford specifications, then recheck the Thunderbird for smooth idle and strong acceleration. Confirm no leaks remain after an overnight soak.
Ford Thunderbird Parts and Q&A
- Q: How to service and repair the ignition coils on Ford Thunderbird?A:In order to service the ignition coils, take out the air cleaner outlet tube to the right side and the evaporation emission canister valve to the left. Unscrew the bolts of ignition coil cover, unplug the electric connectors, strip the coils. To install: Simply undo the process, apply silicone grease and dielectric compound.
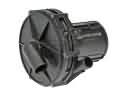
- Q: How to service and repair a water pump on Ford Thunderbird?A:To fix the water pump, empty the cooling system, disconnect the drive belt and pulley and remove the water pump. Wipe down the surface, replace O-ring and gasket where necessary and examine rotors. Install new gasket in place, lubricate O-ring, and install bolts sequentially. Refill the cooling system.
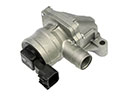
- Q: How to service the air filter element on Ford Thunderbird?A:Service the air filter, by loosening the clamp in the air cleaner outlet tube at the MAF sensor and opening the air cleaner snaps and laying the outlet aside. Hand wipe out the air cleaner element. When putting in the grommet, care should be taken that it fits in place, then do the reversal of the un installation.


