FordParts
My Garage
My Account
Cart
OEM 2005 Lincoln Aviator Crankshaft Position Sensor
Engine Crankshaft Position Sensor- Select Vehicle by Model
- Select Vehicle by VIN
Select Vehicle by Model
orMake
Model
Year
Select Vehicle by VIN
For the most accurate results, select vehicle by your VIN (Vehicle Identification Number).
1 Crankshaft Position Sensor found


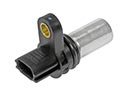
2005 Lincoln Aviator Crankshaft Position Sensor Part Number: 1W7Z-6C315-AB
$41.91 MSRP: $66.55You Save: $24.64 (38%)Ships in 1 Business DayProduct Specifications- Other Name: Sensor - Crankshaft Position; Engine Crankshaft Position Sensor; Crankshaft Sensor; Position Sensor; Sensor - Crankshaft Position - Cps
- Manufacturer Note: Sensor asy. (Crankshaft position) #1W7E 6C315-AA
- Replaces: 1W7Z-6C315-AA
- Base No.: 6C315
- Item Weight: 0.30 Pounds
- Item Dimensions: 8.1 x 6.2 x 4.2 inches
- Condition: New
- Fitment Type: Direct Replacement
- SKU: 1W7Z-6C315-AB
- Warranty: This genuine part is guaranteed by Ford's factory warranty.
2005 Lincoln Aviator Crankshaft Position Sensor
If you're seeking quality and affordability, look no further than our extensive inventory of genuine 2005 Lincoln Aviator Crankshaft Position Sensor available at FordPartsDeal.com. You can confidently purchase our OEM 2005 Lincoln Aviator Crankshaft Position Sensor as they are supported by the manufacturer's warranty and our hassle-free return policy, alongside the benefit of our fast delivery service.
2005 Lincoln Aviator Crankshaft Position Sensor Parts Q&A
- Q: How to Service the Crankshaft Position Sensor on 2005 Lincoln Aviator?A: The crankshaft position (CKP) sensor service starts with turning off the battery ground cable and removing the accessory drive belt. The service procedure begins with separator removal and moves to disconnecting both the CKP sensor electrical connector and the A/C compressor electrical connector. The correct first step involves loosening the A/C compressor bolts to allow a 1 inch movement range for the compressor. The A/C compressor bolts require tightening to 25 Nm (18 lb-ft) force before conducting reinstallation. The CKP sensor bolt should be fastened to 10 Nm (89 lb-in) torque after it is reinstalled. End by uninstalling the CKP sensor before putting on the new one according to the previous installation steps.
Related 2005 Lincoln Aviator Parts
 2005 Lincoln Aviator Camshaft Position Sensor
 2005 Lincoln Aviator Coolant Temperature Sensor
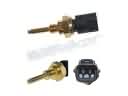 2005 Lincoln Aviator Cylinder Head Temperature Sensor
 2005 Lincoln Aviator Engine Control Module
 2005 Lincoln Aviator Ignition Coil Boot
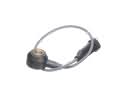 2005 Lincoln Aviator Knock Sensor
 2005 Lincoln Aviator Mass Air Flow Sensor
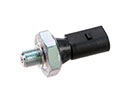 2005 Lincoln Aviator Oil Pressure Switch
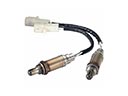 2005 Lincoln Aviator Oxygen Sensors
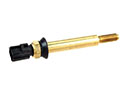 2005 Lincoln Aviator Temperature Sender
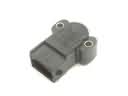 2005 Lincoln Aviator Throttle Position Sensor
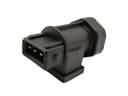 2005 Lincoln Aviator Vehicle Speed Sensor